At customer sign-up (Collect+)
Capture initial permissions & preferences

Before or After the DataGuard Record?
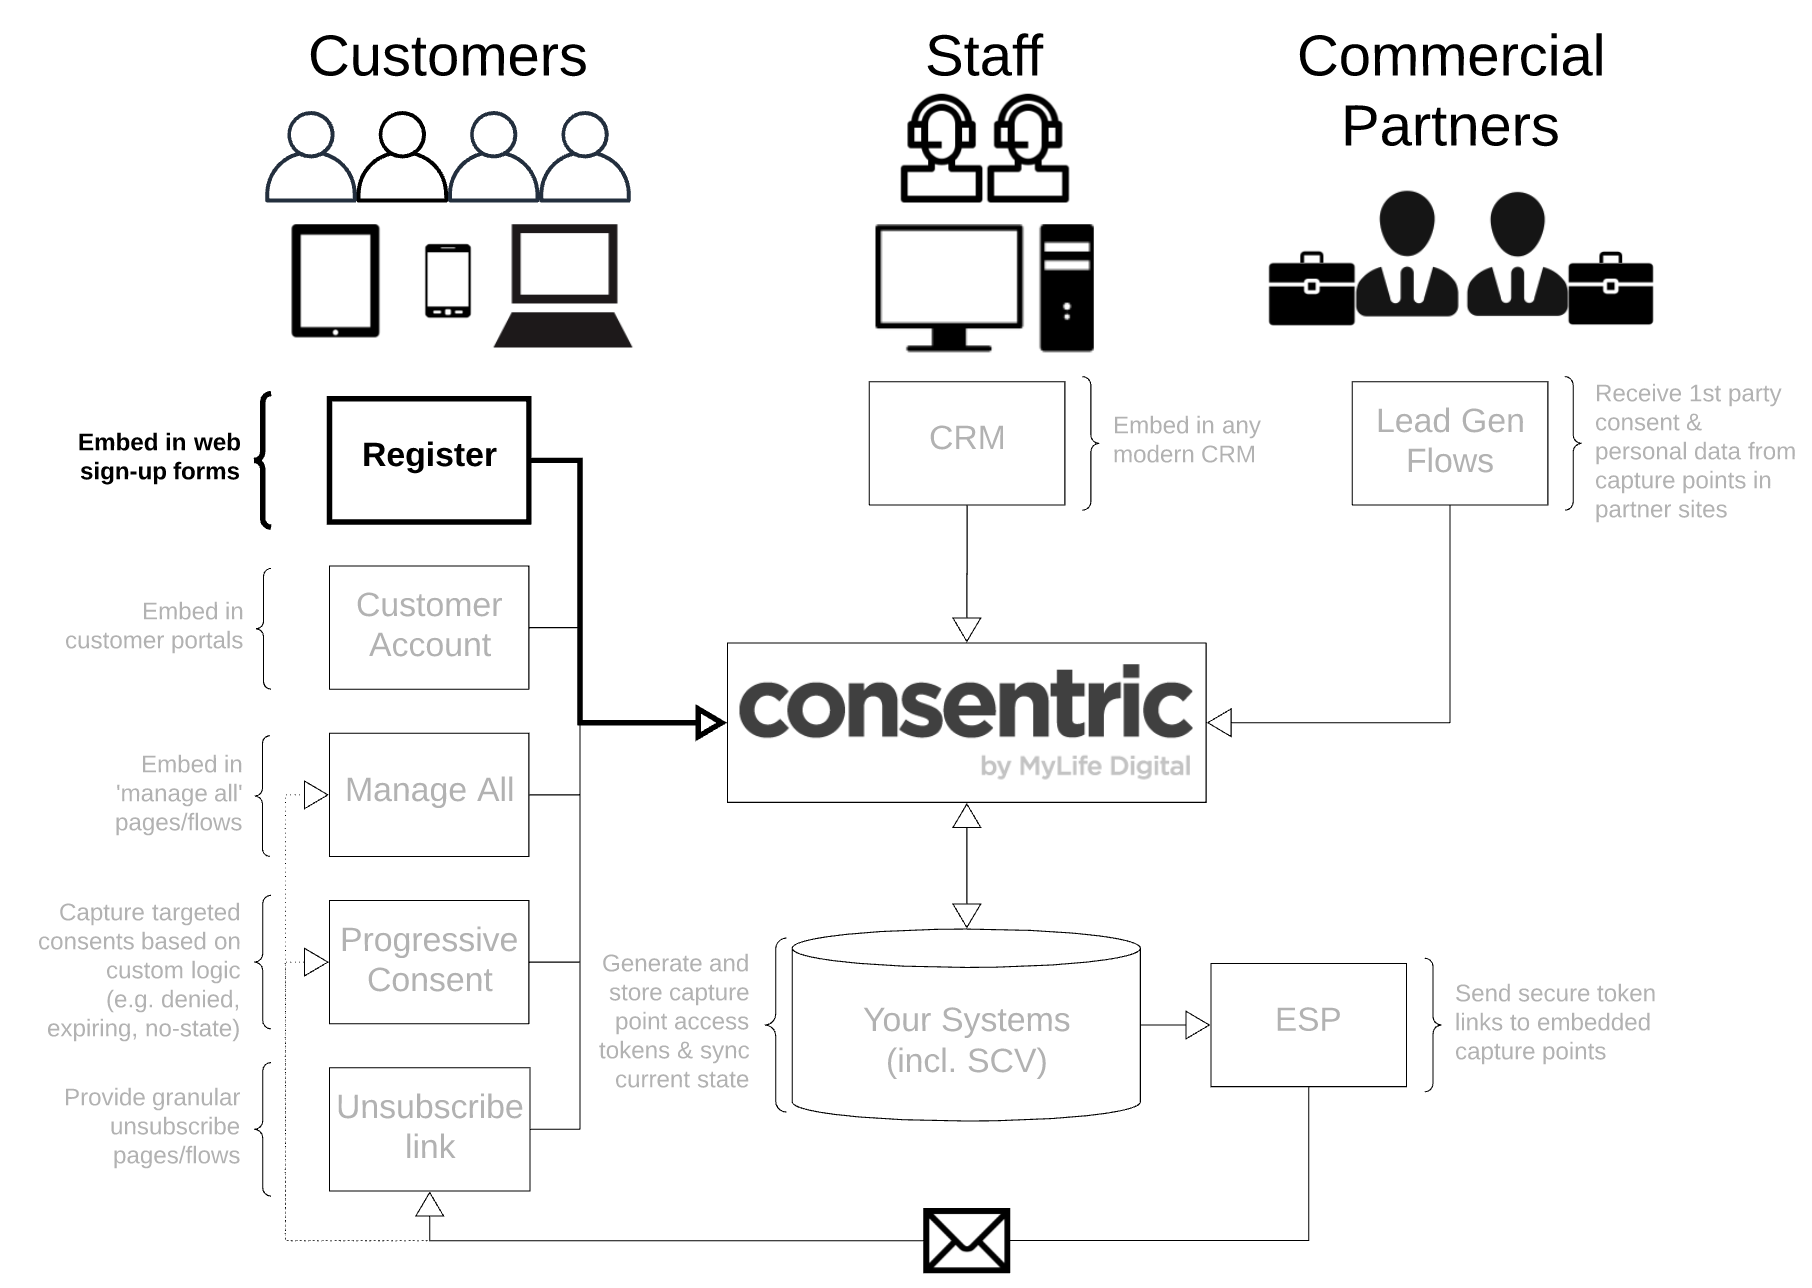
In order to capture permissions and preferences in a sign-up flow you can choose whether you wish to do this without the overhead of creating a DataGuard record up-front, or having already created it. Each has different implications and uses different capture point configuration - full details below.
Without a DataGuard record
High Level
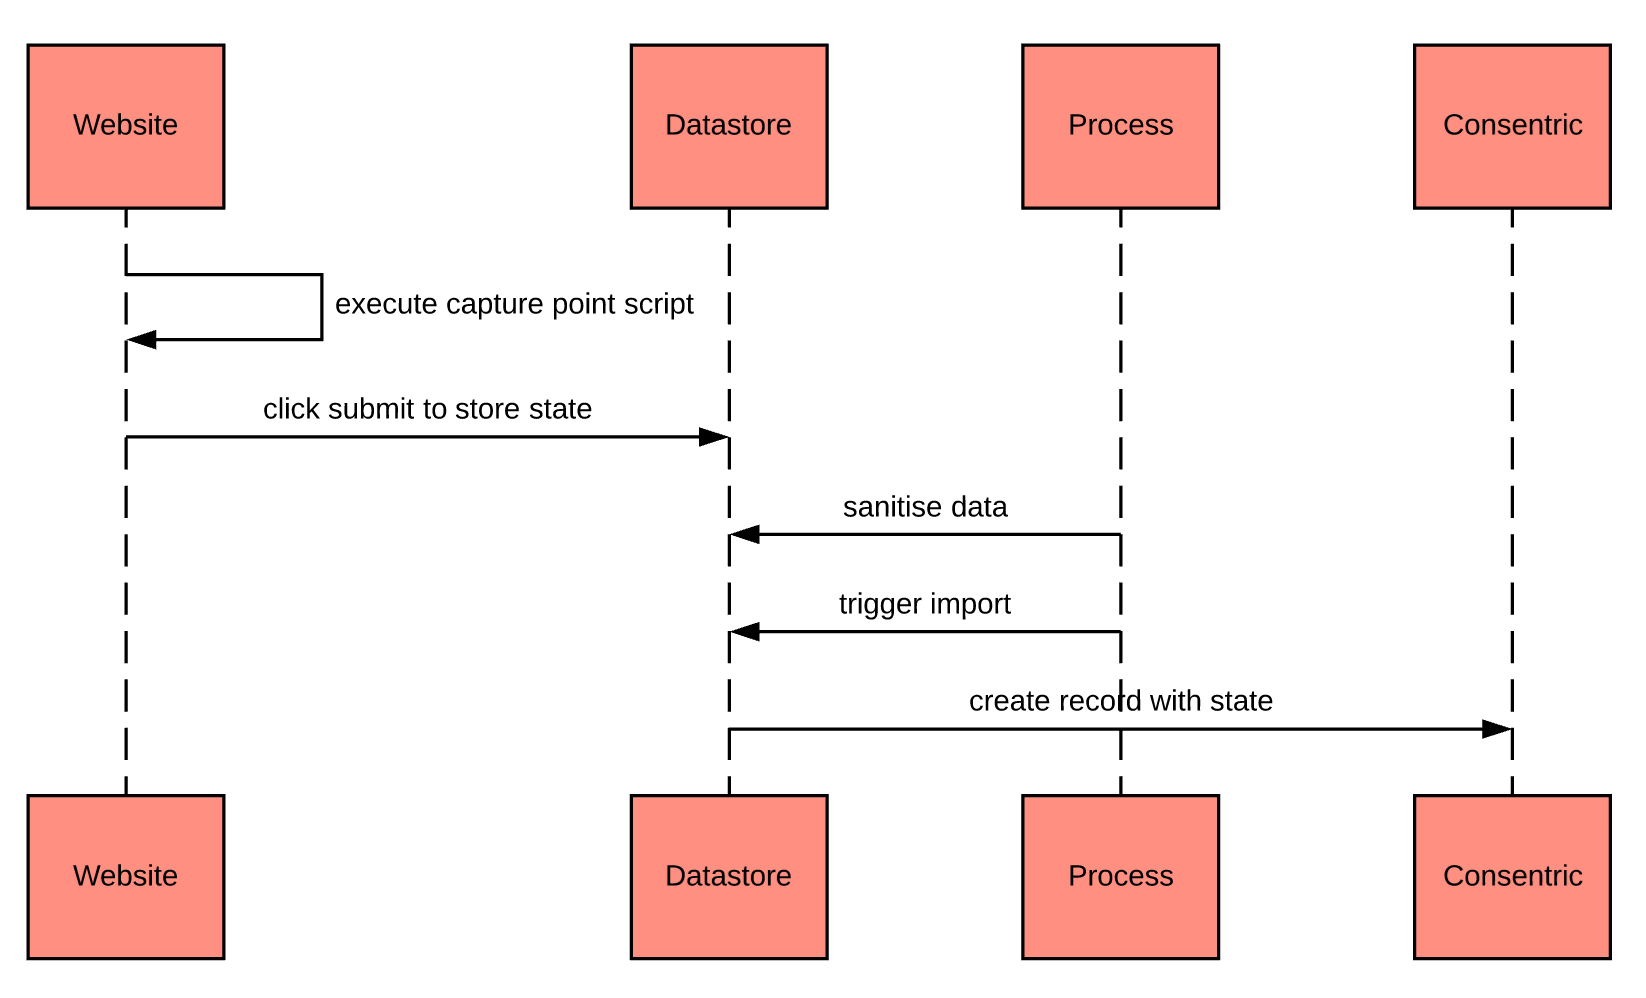
This (like all DataGuard contact points) involves some up-front config work to define the content and embed the script in your sign-up form. When your form submission is triggered the script will push the data into a store outside of the main DataGuard platform. From there the data can be sanitised then imported or pushed into DataGuard where the corresponding record will be created.
The UML sequence looks like:

After this stage is complete you will have a valid record and existing state for your customer in the platform. It is then possible to show them their current permissions in a 'My Account' page, which allows them to update for themselves using the StatefulWidget.load function.
Embed the Capture Point
In order to capture permissions and preferences at sign-up without first creating a DataGuard record, you will use the StatelessWidget.load function as described in the main Capture Points page.
Generate Unique References
The stateless contact point require a uniqueReference value to be provided in the configuration. This is used to identify the record in DataGuard that the permissions and preferences are recorded against.
Ensure reference is unique
Any frailty in reference generation can cause downstream issues. e.g. If basing references on hashed values of specific fields within sign-up forms, the form must be rejected without these fields being populated (otherwise duplicates can be leaked into DataGuard).
The uniqueReference field can take either a string or a function, if you give it a function it will be evaluated on submission.
This reference can be pulled from the value of a specified input element on your page (e.g. a form field). It is recommended that you generate the unique ID in a hidden input element when the page is rendered, and then save that ID alongside the user information when the page is submitted, using a function to retrieve its value.
i.e. uniqueReference: () => document.getElementById('< HIDDEN INPUT ID>').value
<script>
  window.addEventListener('load', function() {
    StatelessWidget.load({
      id: '< ELEMENT ID >',
      templateId: '< TEMPLATE ID >',
      uniqueReference: () => document.getElementById('< HIDDEN INPUT ID>').value
      //ruleId: '< RULE ID >',
      //channel: '< CHANNEL >',
    });
  });
</script>
<script src="https://scripts.consentric.io/capture-point.min.js"></script>
Review & Cleanse Data
You should review the data held in the store as either JSON or as export it as .csv to allow the data to be cleansed before it is imported to the DataGuard platform. The API is available here.
Important points to consider:
- Undesired data can, and should, be deleted before any import to DataGuard
- Reading the data out as CSV will set an
exportedflag for each record being exported - Previously exported data can only be returned on subsequent GETs by adding a query parameter to specifically include them
- Previously exported data will not be pushed to DataGuard if you are using an automated process to trigger imports (to avoid duplication)
- The CSV structure that is returned can be used as-is to import data to DataGuard here, but may wish to be amended prior to importing depending on your requirements
- Reading as JSON provides a paginated response, and will not change the exported flag to true (so can be used to safely review data without setting the
exportedflag)
Import Data to DataGuard
Data is auto-purged
The data that is captured within the unauthenticated data store is not automatically pushed into the DataGuard platform, but can be triggered on the API, or exported as a .csv and subsequently imported after being reviewed. The data is automatically purged 1 month after being recorded, so a timely process to sanitise the data and import / push the required records to DataGuard should be established to avoid any unintended loss of data.
All records will be generated in DataGuard by importing, and therefore become chargeable so, before importing it is important to confirm that the data has been sense-checked and cleansed as necessary.
You can export the data as .csv and import using the import UI here (max. file size of 10MB), or you can access the auto-import API here. The auto-import will only send records which have not already been exported (read as .csv) to DataGuard, and therefore may not have been reviewed and cleansed.
With a DataGuard record
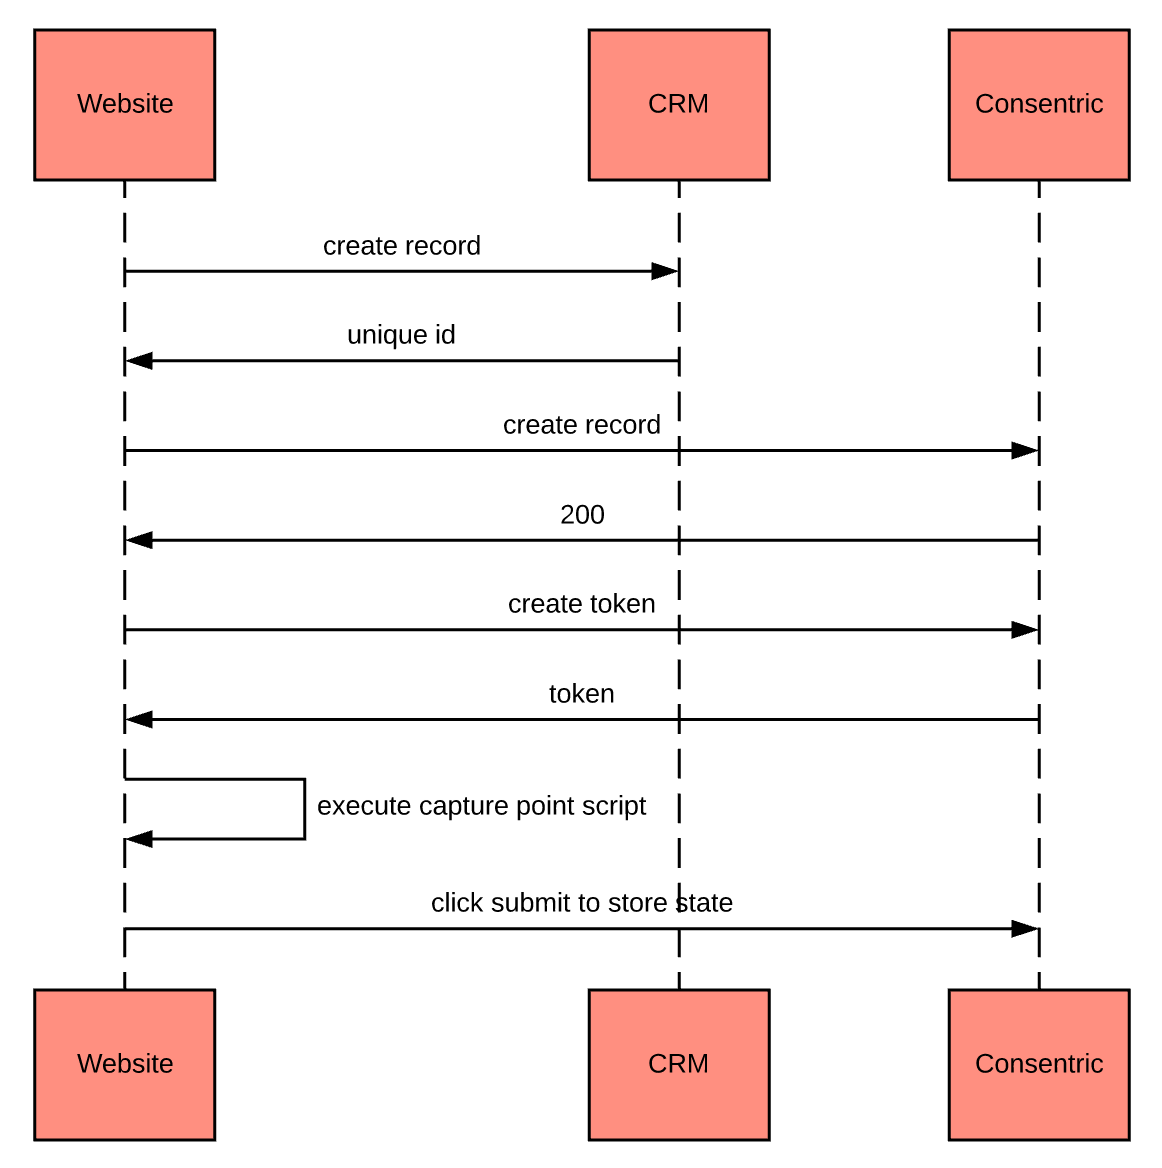
If you wish to show the customer a 'My Account' page immediately upon sign-up, then your flow needs to handle making multiple calls. These steps must happen quickly to ensure the user journey is relatively frictionless. For full details on how to implement this type of sign-up flow please refer to the Customer 'manage-all' section.
This flow uses the StatefulWidget.load function, and as with the StatelessWidget.load you must define the content and embed the script to your site. As this type of capture point displays the current state a token is also required in the config.
The UML sequence looks like:

Use the form submission event
In order to action the capture point submission when the user clicks the 'register' button on a form you can tie in an action to a DOM element and event, see the below example for details:
<!DOCTYPE html>
<html>
    <head>
        ...
    </head>
    <body>
        <h1>An Example Website..</h1>
        <main class="data-form">
            <form id="main-form">
                ...
                <div id="mld-prog-widg"></div>
                <button id="register">Register</button>
            </form>
        </main>
        <script src="https://scripts.consentric.io/capture-point.min.js"></script>
            <script>
                      StatelessWidget.load({
                                id: 'mld-prog-widg',
                                uniqueReference: 'citizen-ref-001',
                                templateId: '7KiQSkp436c',
                    display: { ... },
                    actions: {
                        submit: {
                            elem: document.getElementById('register'),
                            event: 'click',
                        },
                    },
                        });
        </script>
    </body>
</html>
Updated over 1 year ago
