Permissions Config
The permissions configuration API is available here.
Deprecating Soon
We are launching a new version of creating consent purposes (earlier: Permissions Configuration). This section / page highlights the old experience to create consent framework in DataGuard. If your application has this version, please reach out to your customer success contact at DataGuard to enable the latest version. For the latest version, please refer to Consent Purposes
Permission Options
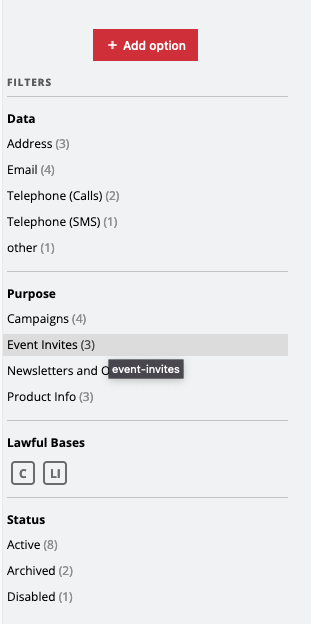
To view your Permissions Configuration, navigate to the 'Configuration' screen of the Admin UI. By default, the 'Options' tab will be selected, however, if not just click the 'Options' tab to view all of your Options.
Your Options will be split into 3 sections; 'Active', 'Archived' and 'Disabled'.

The right hand side of the screen has a button to add additional Options, as well as filters to narrow down the Options displayed. To filter the Options displayed, simply click on the required filters. To remove the filter, just click on it again.
Adding Options
To add a new Option, click on the '+ Add option' button. You will be presented with the 'Add option' menu.
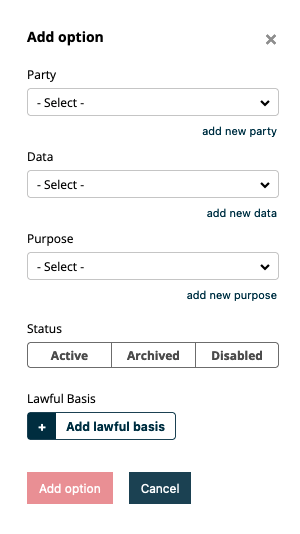
To create a new Option, you will first need to assign it a Party, Data type and Purpose. These can be selected from existing entries, or you can add a new entry by clicking on the 'Add new...' button under each. Remember to click '+ Add...' to confirm your new entry.
Note: once your new Option has been added, these fields cannot be changed. Please ensure that each field is correct before proceeding.
Next you will need to assign a Status to the Option; 'Active', 'Archived' or 'Disabled'. This can be changed later as required.
Finally, you need to assign a lawful basis or multiple lawful bases to the new Option. Click on the '+Add lawful basis' button and add which ever required. You will also need to select the default validity period for each lawful basis. Again, these can be changed at a later date, and will not impact historic transactions already captured on the platform.
Once you are happy with your new Option, click 'Add option' to store it and auto-assign it an OptionID.
Editing Options
WARNING:
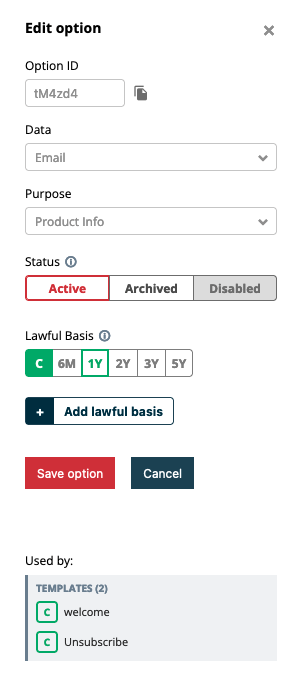
There are restrictions on particular actions relating to Permission Options that are used in Capture Templates and Capture Points (e.g. you can’t disable options until they are removed from any templates).
To see more details about a specific Option, click on it. This will bring up the 'Edit Option' menu.
From this menu, you can see all of the data attributes that create each Option. These are the same components used when creating new Options, with the addition of the 'OptionID' field.
When editing Options, you are only able to change the status and to add/remove lawful bases (all Options must have at least one).
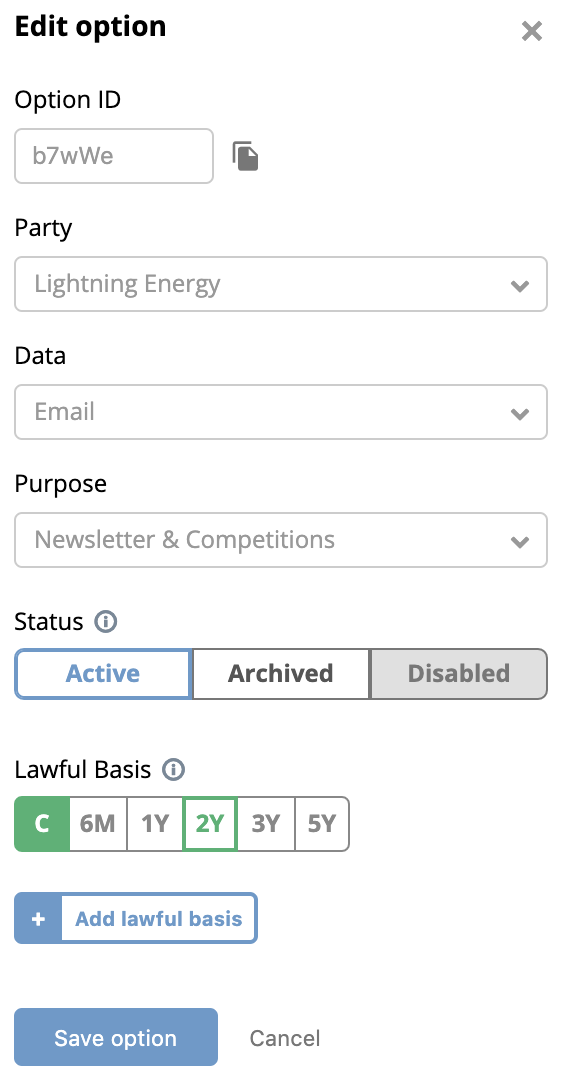
Some features may be locked if the Option is being used in a Group or Template. This will be highlighted to you with a small 'i' icon and the Groups or Templates will be listed below. You will need to remove the Option from those identified locations before you can make the intended update.
Permission Groups
Grouping options allows for transactions to be submitted which relate to multiple Options in a single interaction.
Viewing Groups
To view your existing Groups, navigate to the 'Groups' tab of your Configuration area.
This will display all Configuration Options, split into 3 sections; 'Active', 'Archived' and 'Disabled', with Groups be listed down the right hand side of the page.

Click a Group to display the Options it contains. Click it again or click on the 'X' to show all Options again.

Creating Groups
To create a new Group, click on the '+Add group' button. You will be presented with the 'Add group' menu.
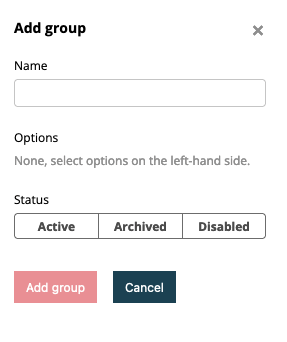
All Groups require a unique name as well as a Status.
The final step is to select the Options you wish the Group to contain. To select these Options, click on their tick boxes on the left hand side of the screen.
Note: once your new Group has been added, the name cannot be changed. Please ensure that each field is correct before proceeding.
Note: Groups can only contain the Lawful Bases that are common to all Options within the Group.
One you are happy with your group, click 'Add group' to store it.
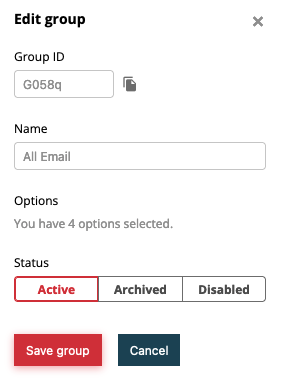
Editing Groups
To edit a Group, click on the pencil icon next to the Group you wish to edit.
From here, you can add and remove Options as well as change the Group's Status. Remember to click the 'Save group' button to save any changes.
Updated 8 months ago