CPM API Postman Collection
What is Postman?
Postman is a user-friendly, free-to-use visual editing tool designed for creating and testing API requests. Unlike other methods of interacting with APIs, such as using cURL, Postman provides an intuitive interface that simplifies the process of editing API requests, viewing header information, and much more. You can learn more about making your first Postman API request here.Postman API Request
Postman also offers the capability to save collections or libraries of sample pre-made API requests. To facilitate an easy start with our Consent State API, we've created a collection with pre-made examples. You can import our collections as outlined below or refer to the Postman documentation for more details. Postman Documents
For a quick entry into Data Guard APIs, you can find a guide here. API Quick start
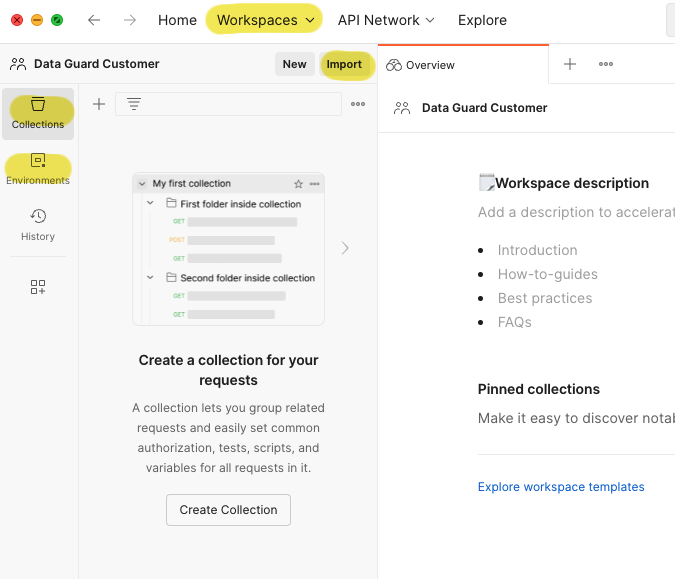
After installing Postman collections from Github repository and creating a new workspace, you'll need to import the Postman DG CPM API collection and environment variables..
Importing DG CPM Environment Variables
Consent State utilizes environment variables, allowing you to avoid manually editing all the request parameters in your API requests. You can configure these variables within your Postman environment by following these steps:
- Click the import button.
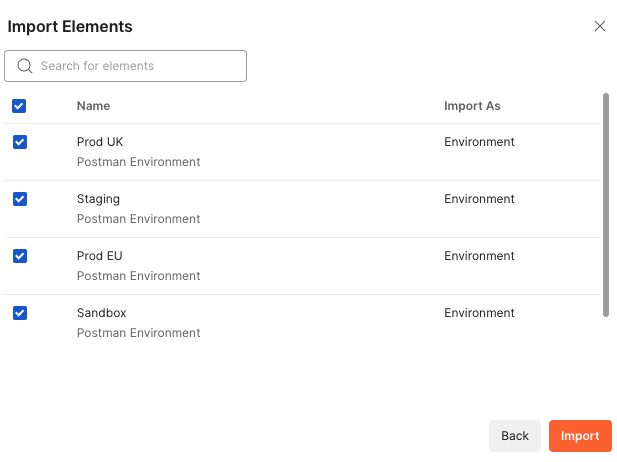
- Select all JSON files located under the environment folder to import all the environment variables associated with PROD EU, PROD UK, Sandbox, Staging, and Testing
- Click Save.
These variables differ for each environment and are provided to customers by Data Guard when their application is created.
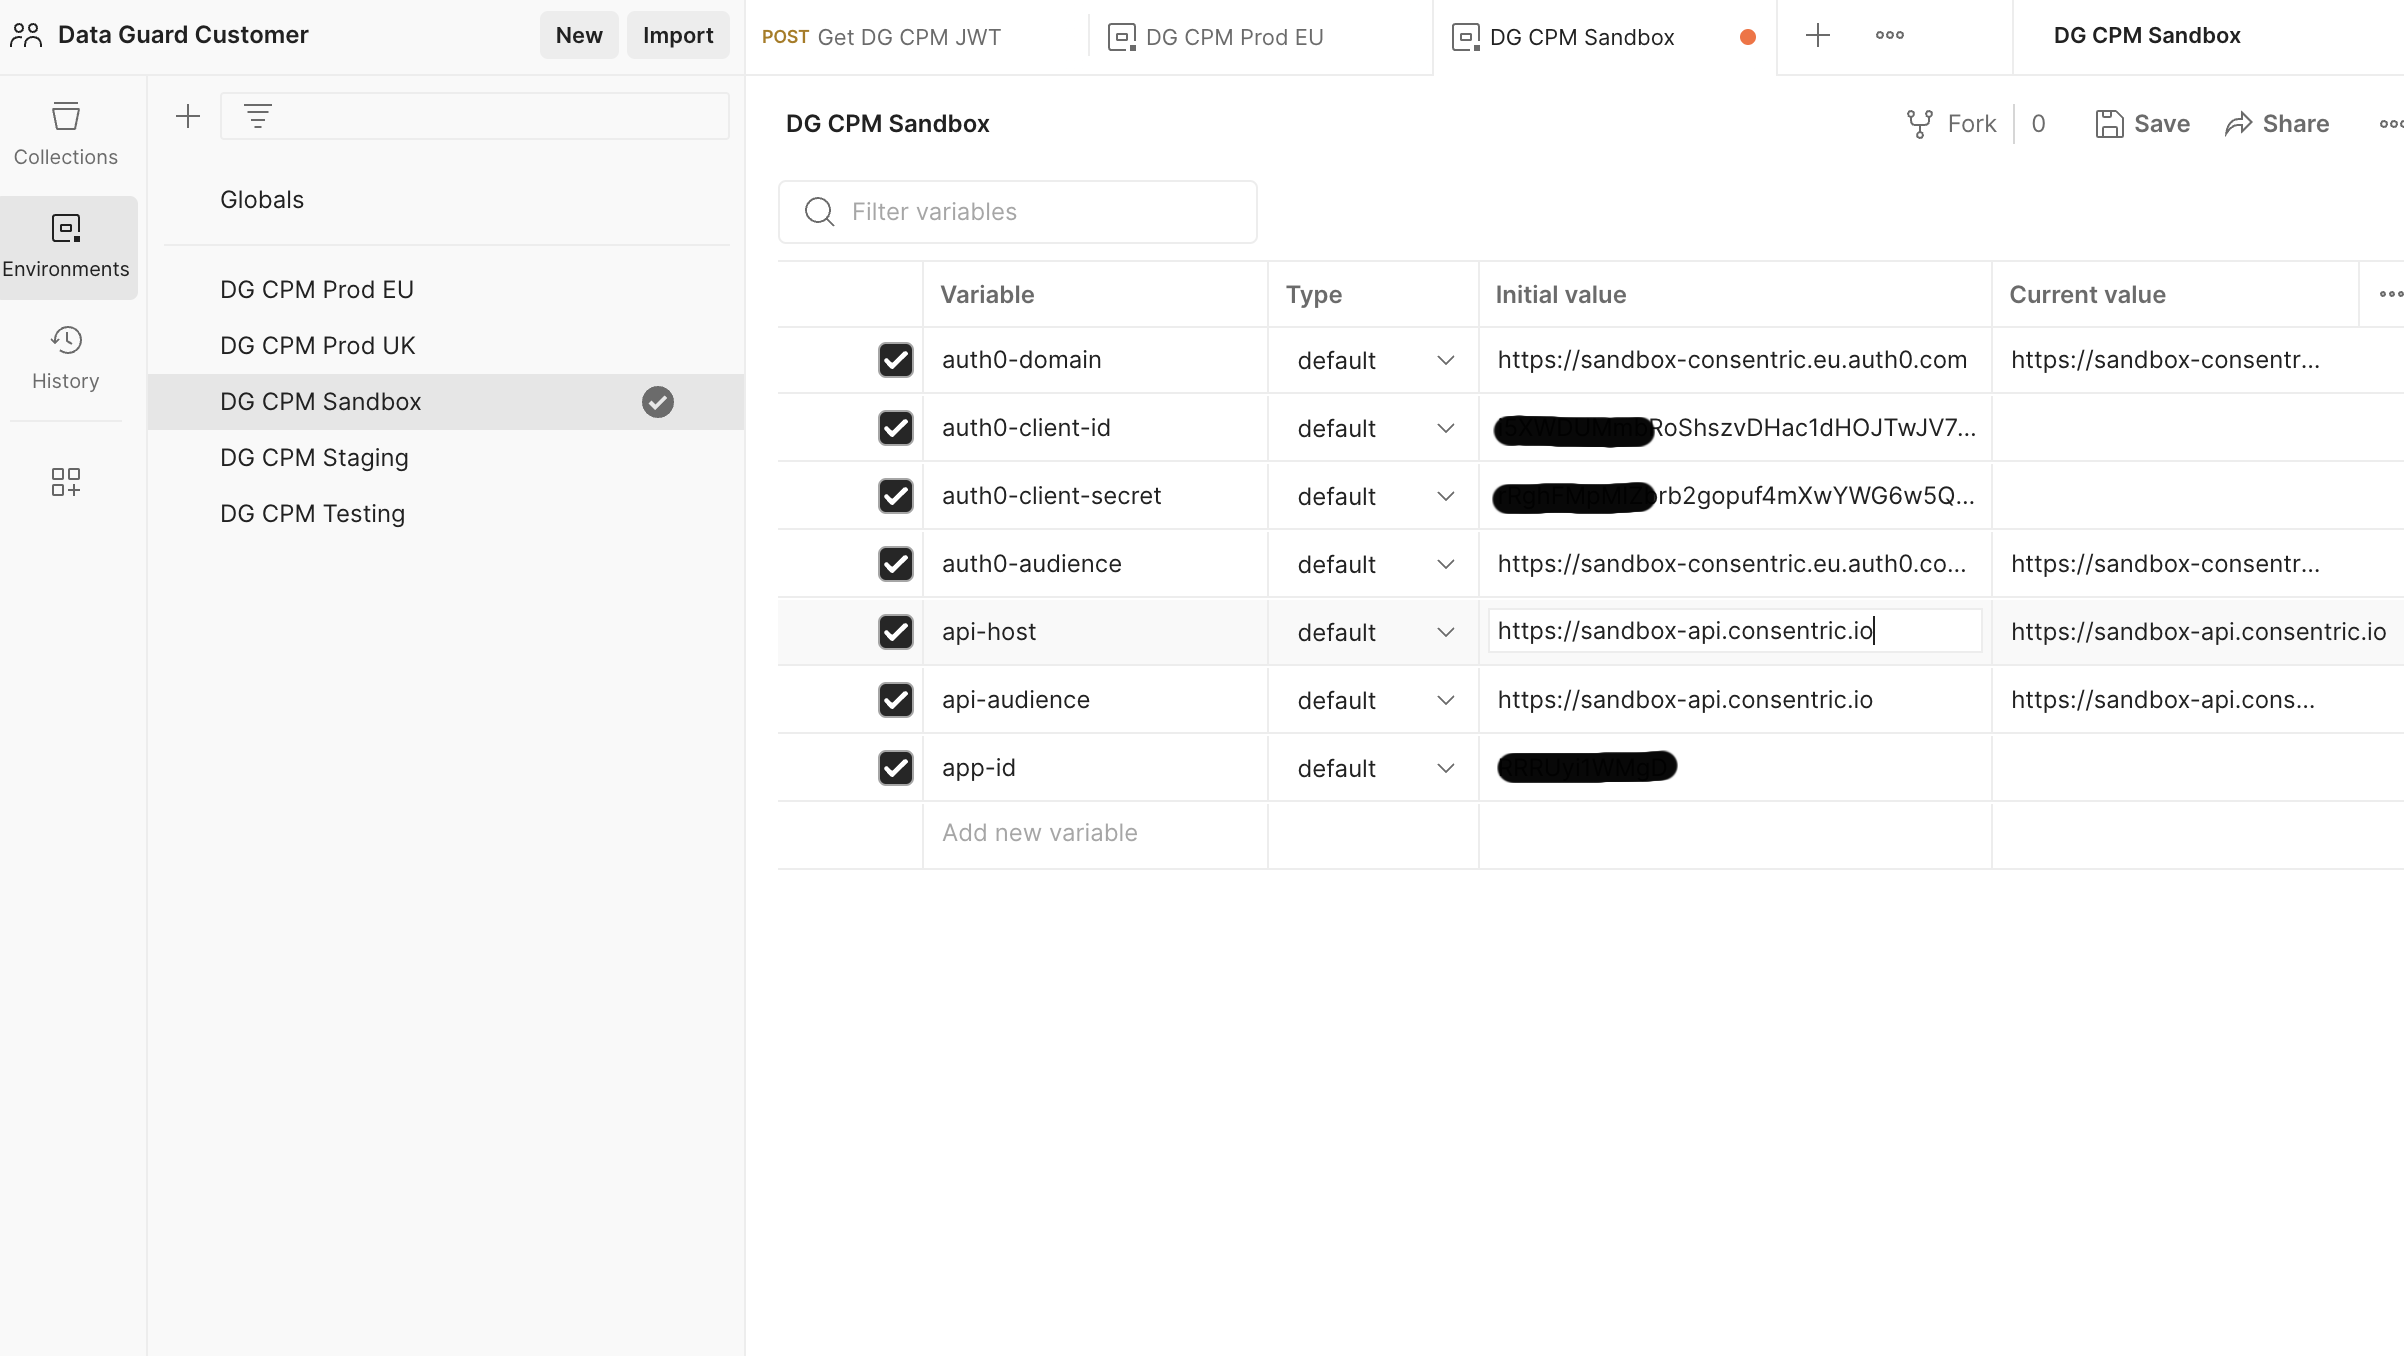
| Variable name | Values |
|---|---|
| auth0-domain | sandbox: https://sandbox-consentric.eu.auth0.com test: https://test-consentric.eu.auth0.com production (UK data center): https://consentric.eu.auth0.com production (EU data center): https://dgconsentde.eu.auth0.com |
| auth0-client-id | Sensitive data - please check your welcome email |
| auth0-client-secret | Sensitive data - please check your welcome email Note: This is secured using a One-time Secret. The secret link is only active for seven days and works only once before disappearing forever, so complete your API setup within 7 days of receiving the email. |
| auth0-audience | sandbox: https://sandbox-api.consentric.io test: https://testing-api.consentric.io production (UK data center): https://api.consentric.io production (EU data center): <https://api.dgconsent.de |
The URLs in the environment variables ( auth0-domain, auth0-audience, api-host etc. ) are preset in the environment JSON files for each specific environment.
In this variable list, The only necessary variables you need to set:
auth0-client-id
auth0-client-secret
app-id
When using an environment variable in a request, it must be enclosed in double curly brackets without doublequotes to tell postman that this variable is a dynamic environment variable: {{<variable_name>}}
DG CPM Consent State Postman Collection
After configuring your environment, you can import the DG CPM Consent State collection by following these steps in Postman
- Click import .
- Select DG CPM API collection json file.
- Click Save.
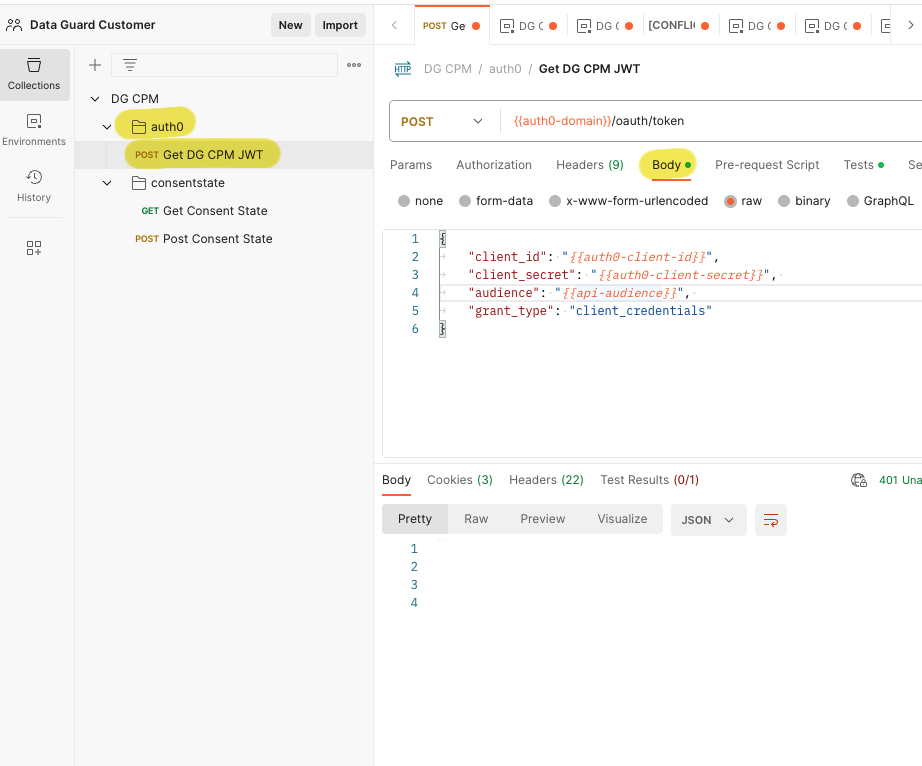
Once you installed the Collection, you will find two folders, Auth0 and consent state . Inside the Auth0 folder, there's a request named Get DG CPM JWT . In the consent state folder, you will find Get Consent State and Post Consent State.
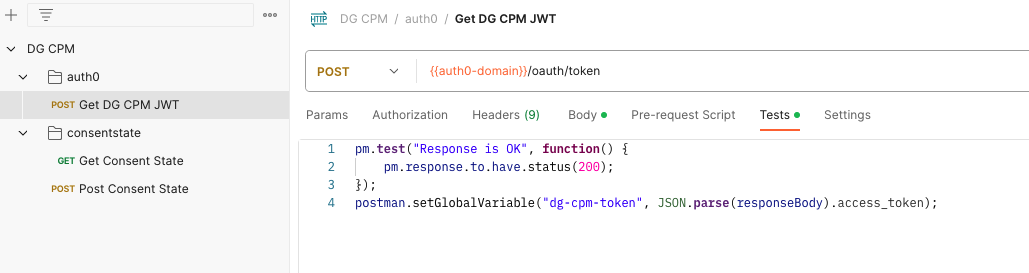
To execute these requests, you must set the Authorization header. You will obtain the necessary "Bearer Token" from the GET DG CPM JWT endpoint as a result of this call. This token is automatically set as a global variable in Postman and is named dg-consent-token .
Setting Authorisation Token
Once you have configured your environment variables and imported DG CPM API collection json file, You need to get dg-cpm-token to use in DG CPM API requests. To get this token you need to request it as shown in below. How this variable is added to global variables after receiving the 200 response can be seen in the Tests tab.
DG CPM Consent State
Data Guard enables businesses to effortlessly gather consents and preferences through the provision of Content Template objects. A consent template comprises three types of content blocks that can be incorporated into the template:
- Permissions / Consent Purposes Block
- Preference Block
- Text Block
The DG CPM Consent State provides enriched template is a unified object that combines the template with the citizen's existing permissions and preferences, making it ready for rendering. Therefore, it is mandatory to provide both the template Id and citizen Id in order to obtain the enriched template.
Getting DG CPM Consent State
API Swagger docs available [here]
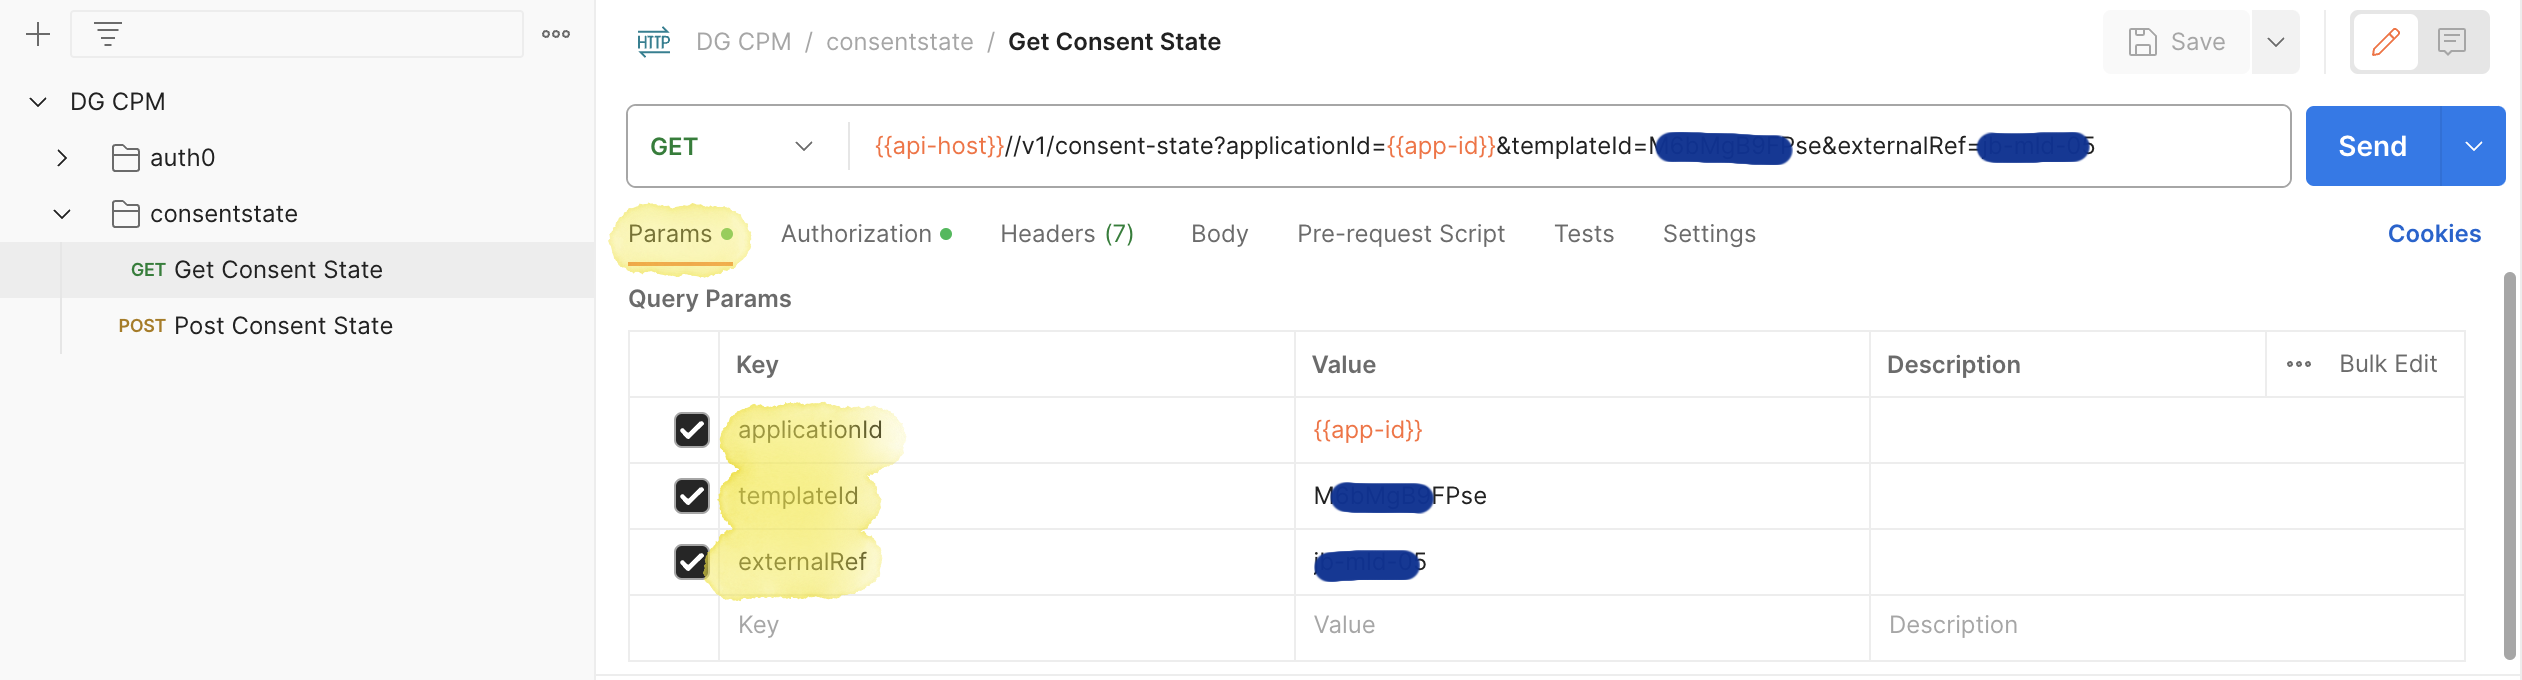
To retrieve consent states for a CPM citizen, open the Params tab.
Configure the following request parameters:
- app-id (environment variable)
- templateId
- externalRef
These parameters should be set as request parameters, as illustrated below
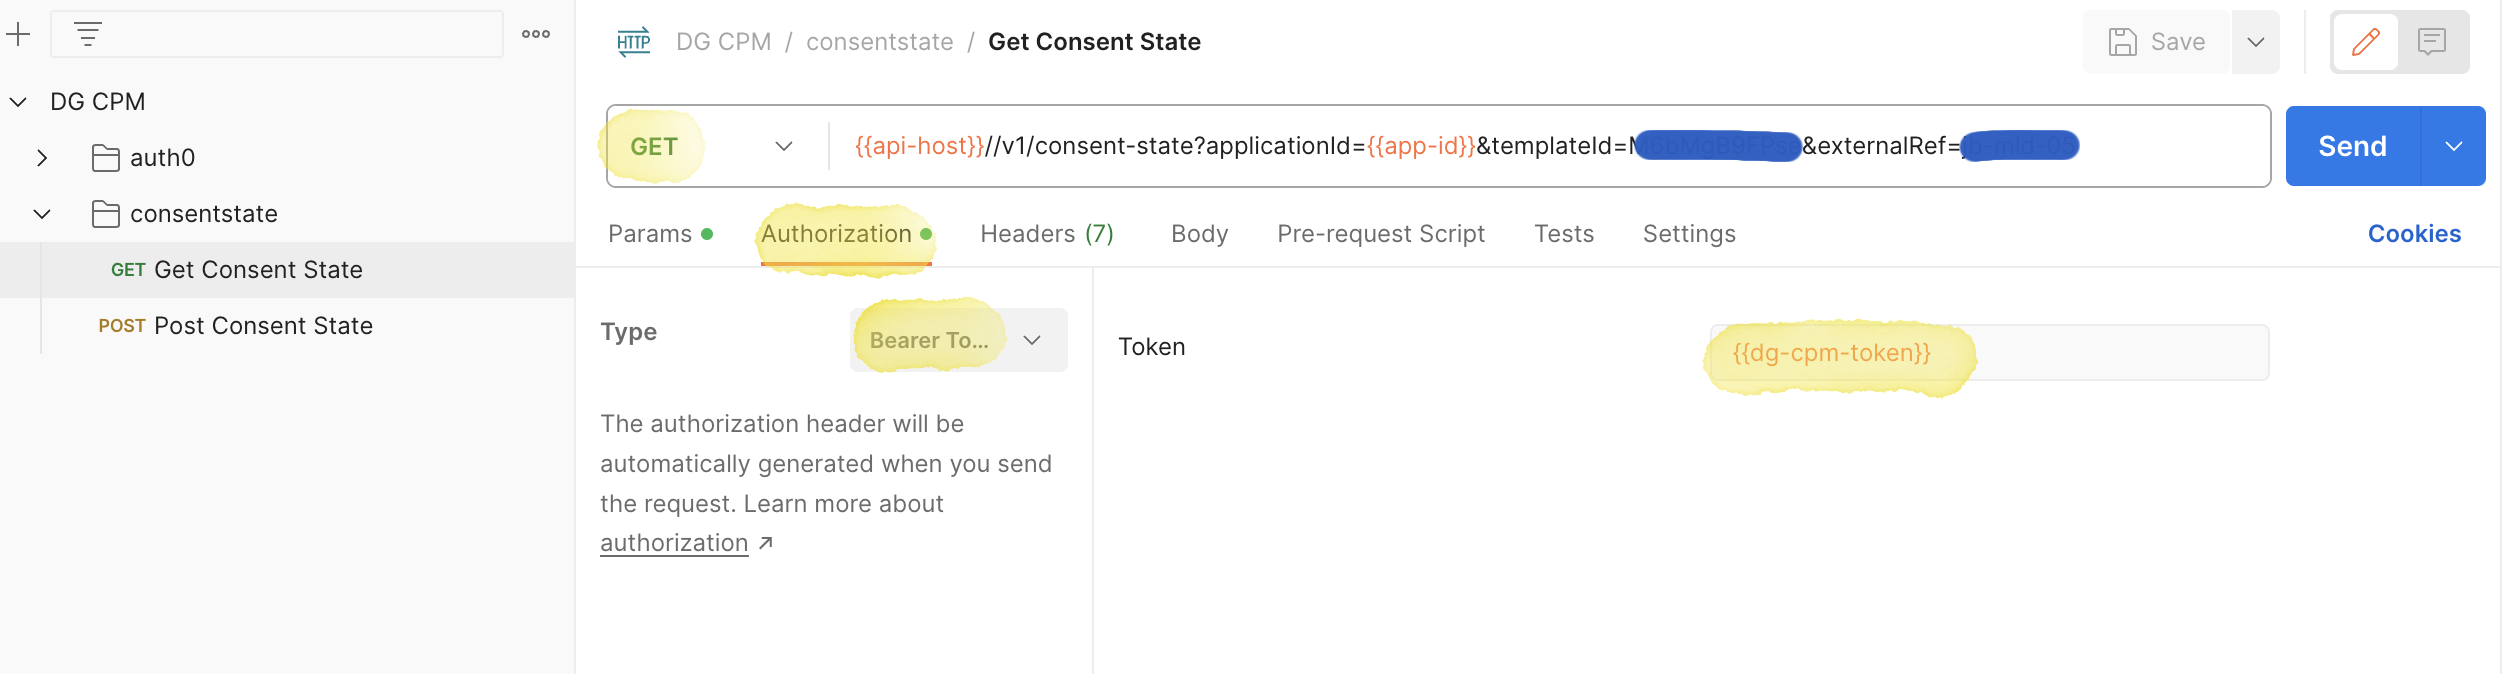
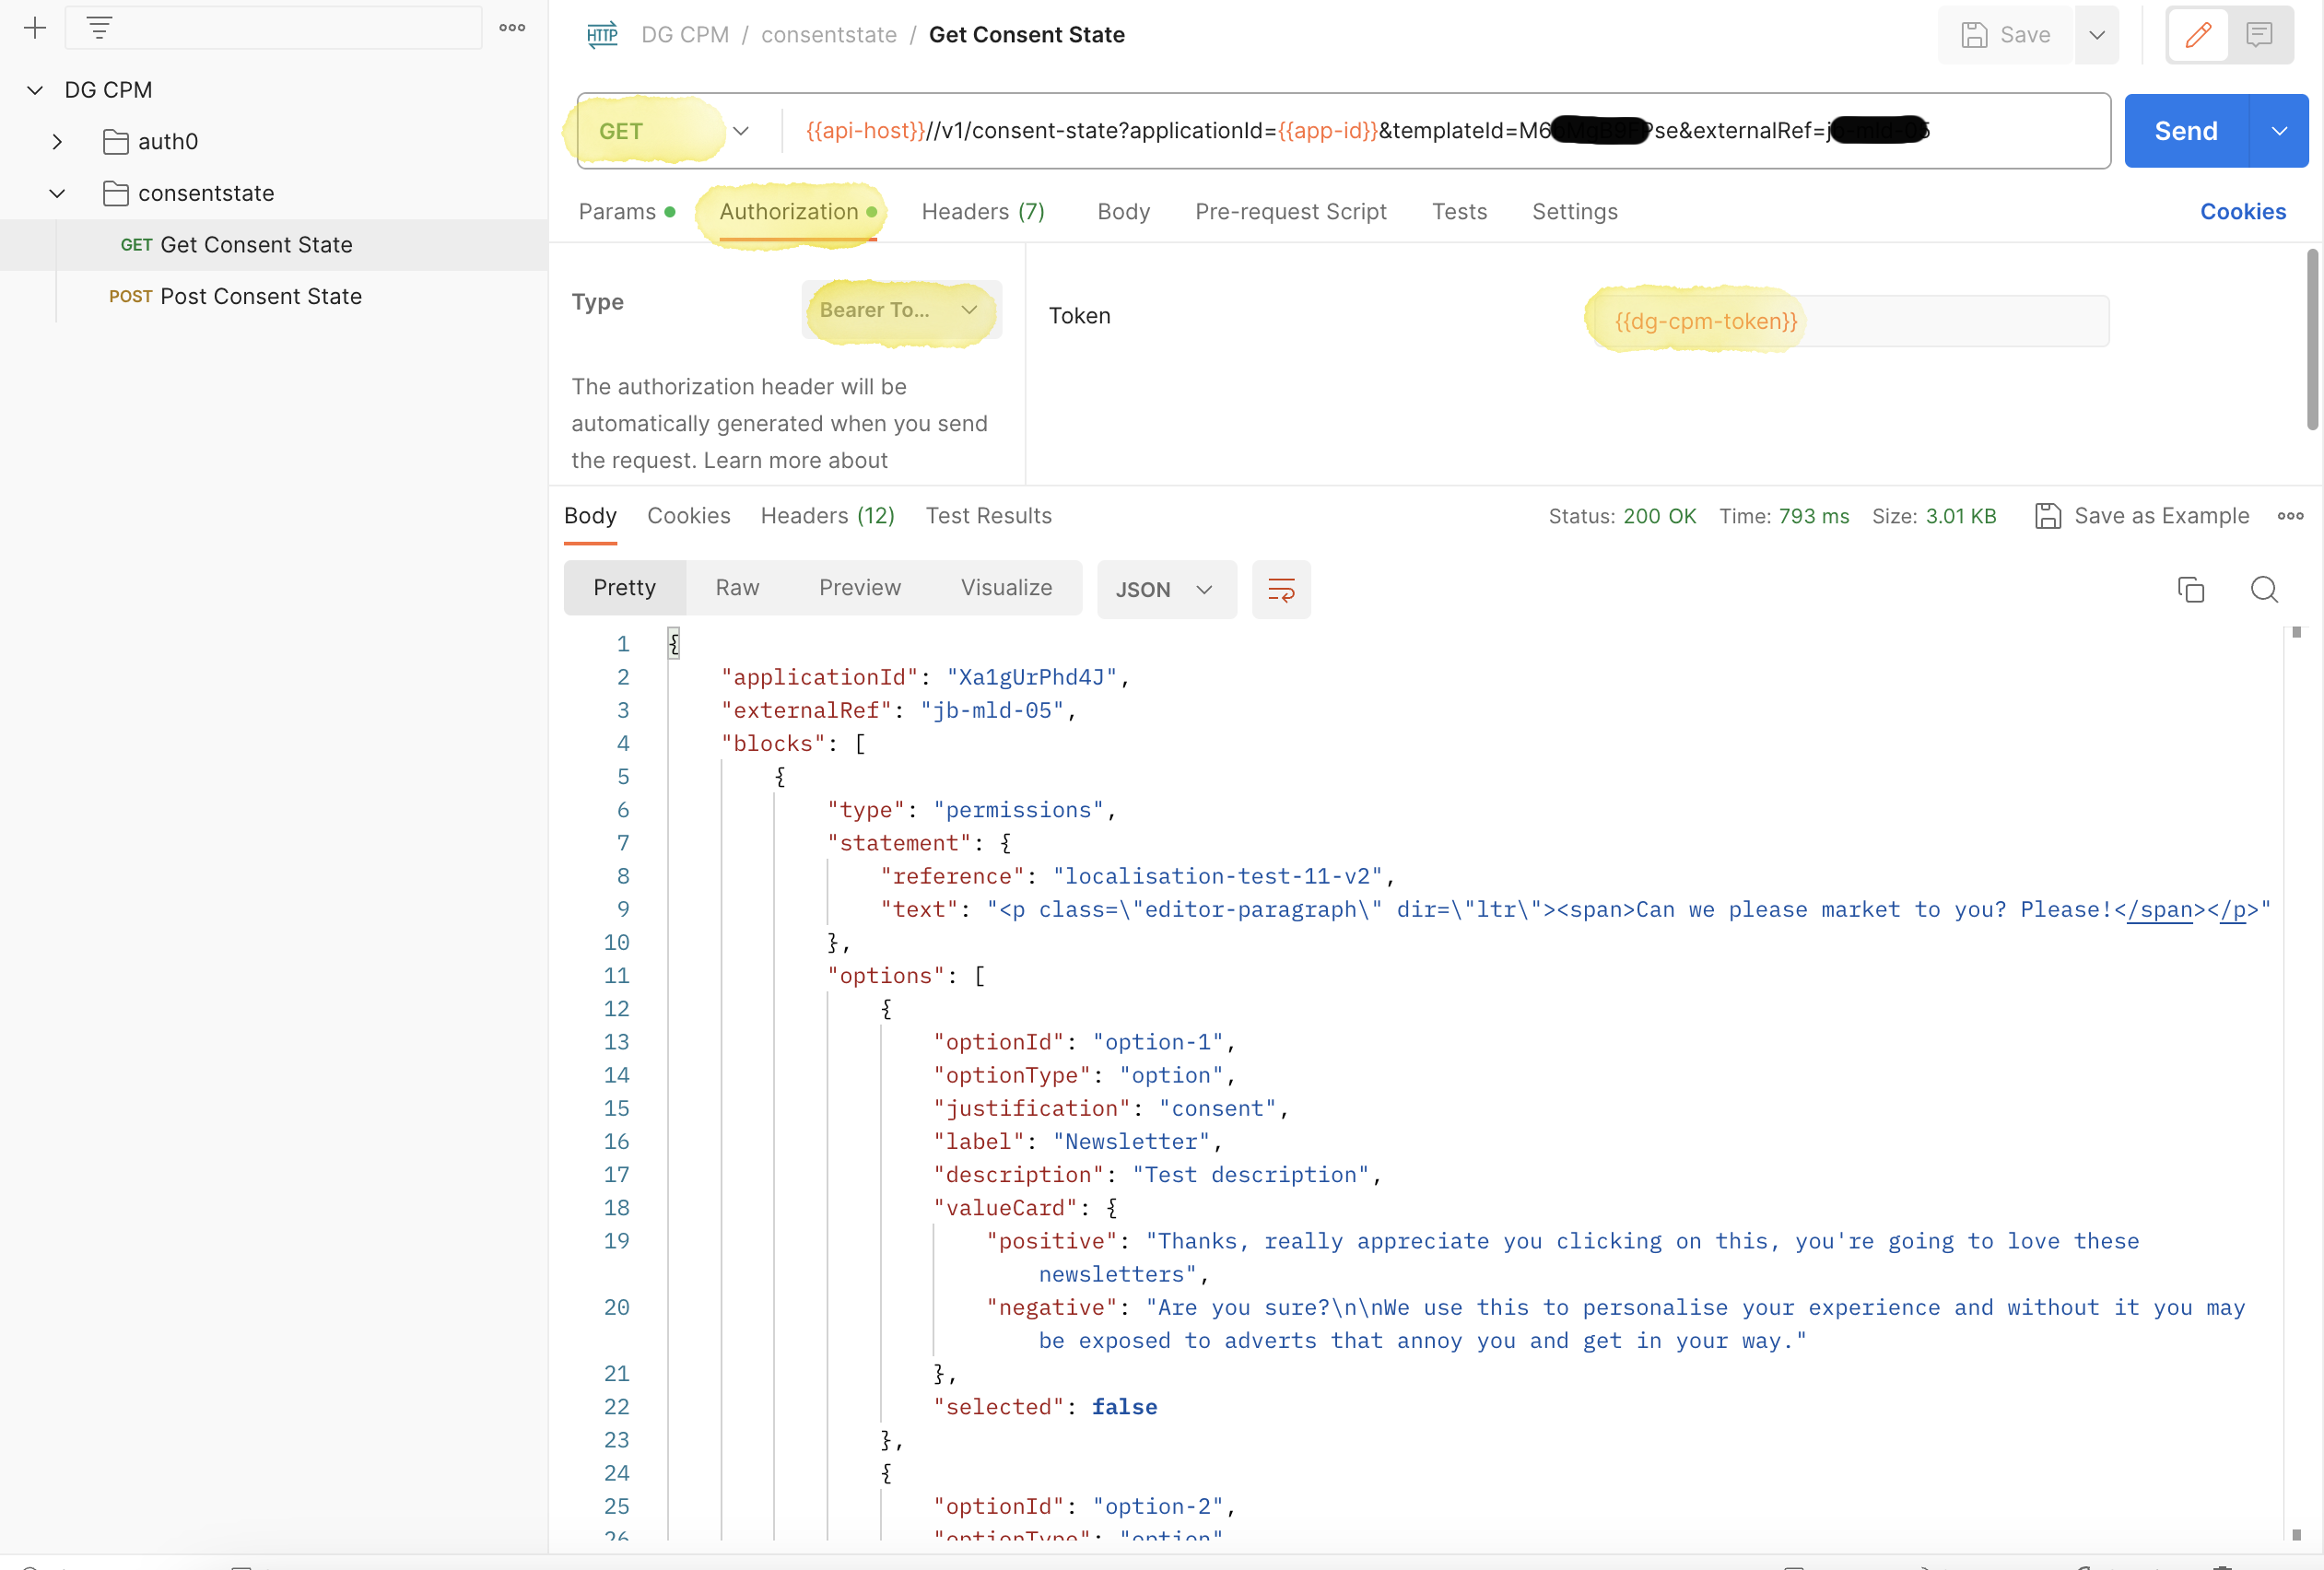
To initiate a call to the Consent State's GET method, you need to set the authentication header for the request in Postman. Follow these steps
- Open the request in Postman.
- Go to the Authorization tab.
- Change the Type to Bearer Token.
- Place the value of the Token inside double curly brackets, like
{{dg-cpm-token}},as it is a global variable, as shown below."
If the citizen is not found, the request will be treated as successful, and all permission and preference values will reset to their default state, which is typically 'false' or 'null.' An example of a successful response is illustrated below.
Updating DG CPM Consent State
API Swagger docs available here.
To modify the Permissions and Preferences for the data subject, you must provide an Enriched Template filled with the relevant values and use the POST method to request the permissions API.
It is crucial to note that the complete Enriched Template object needs to be modified and sent to the consent state endpoint, as it contains essential metadata necessary for the proper processing of the request. You can make changes to the entire enriched template JSON object after retrieving the response body from the GET method.
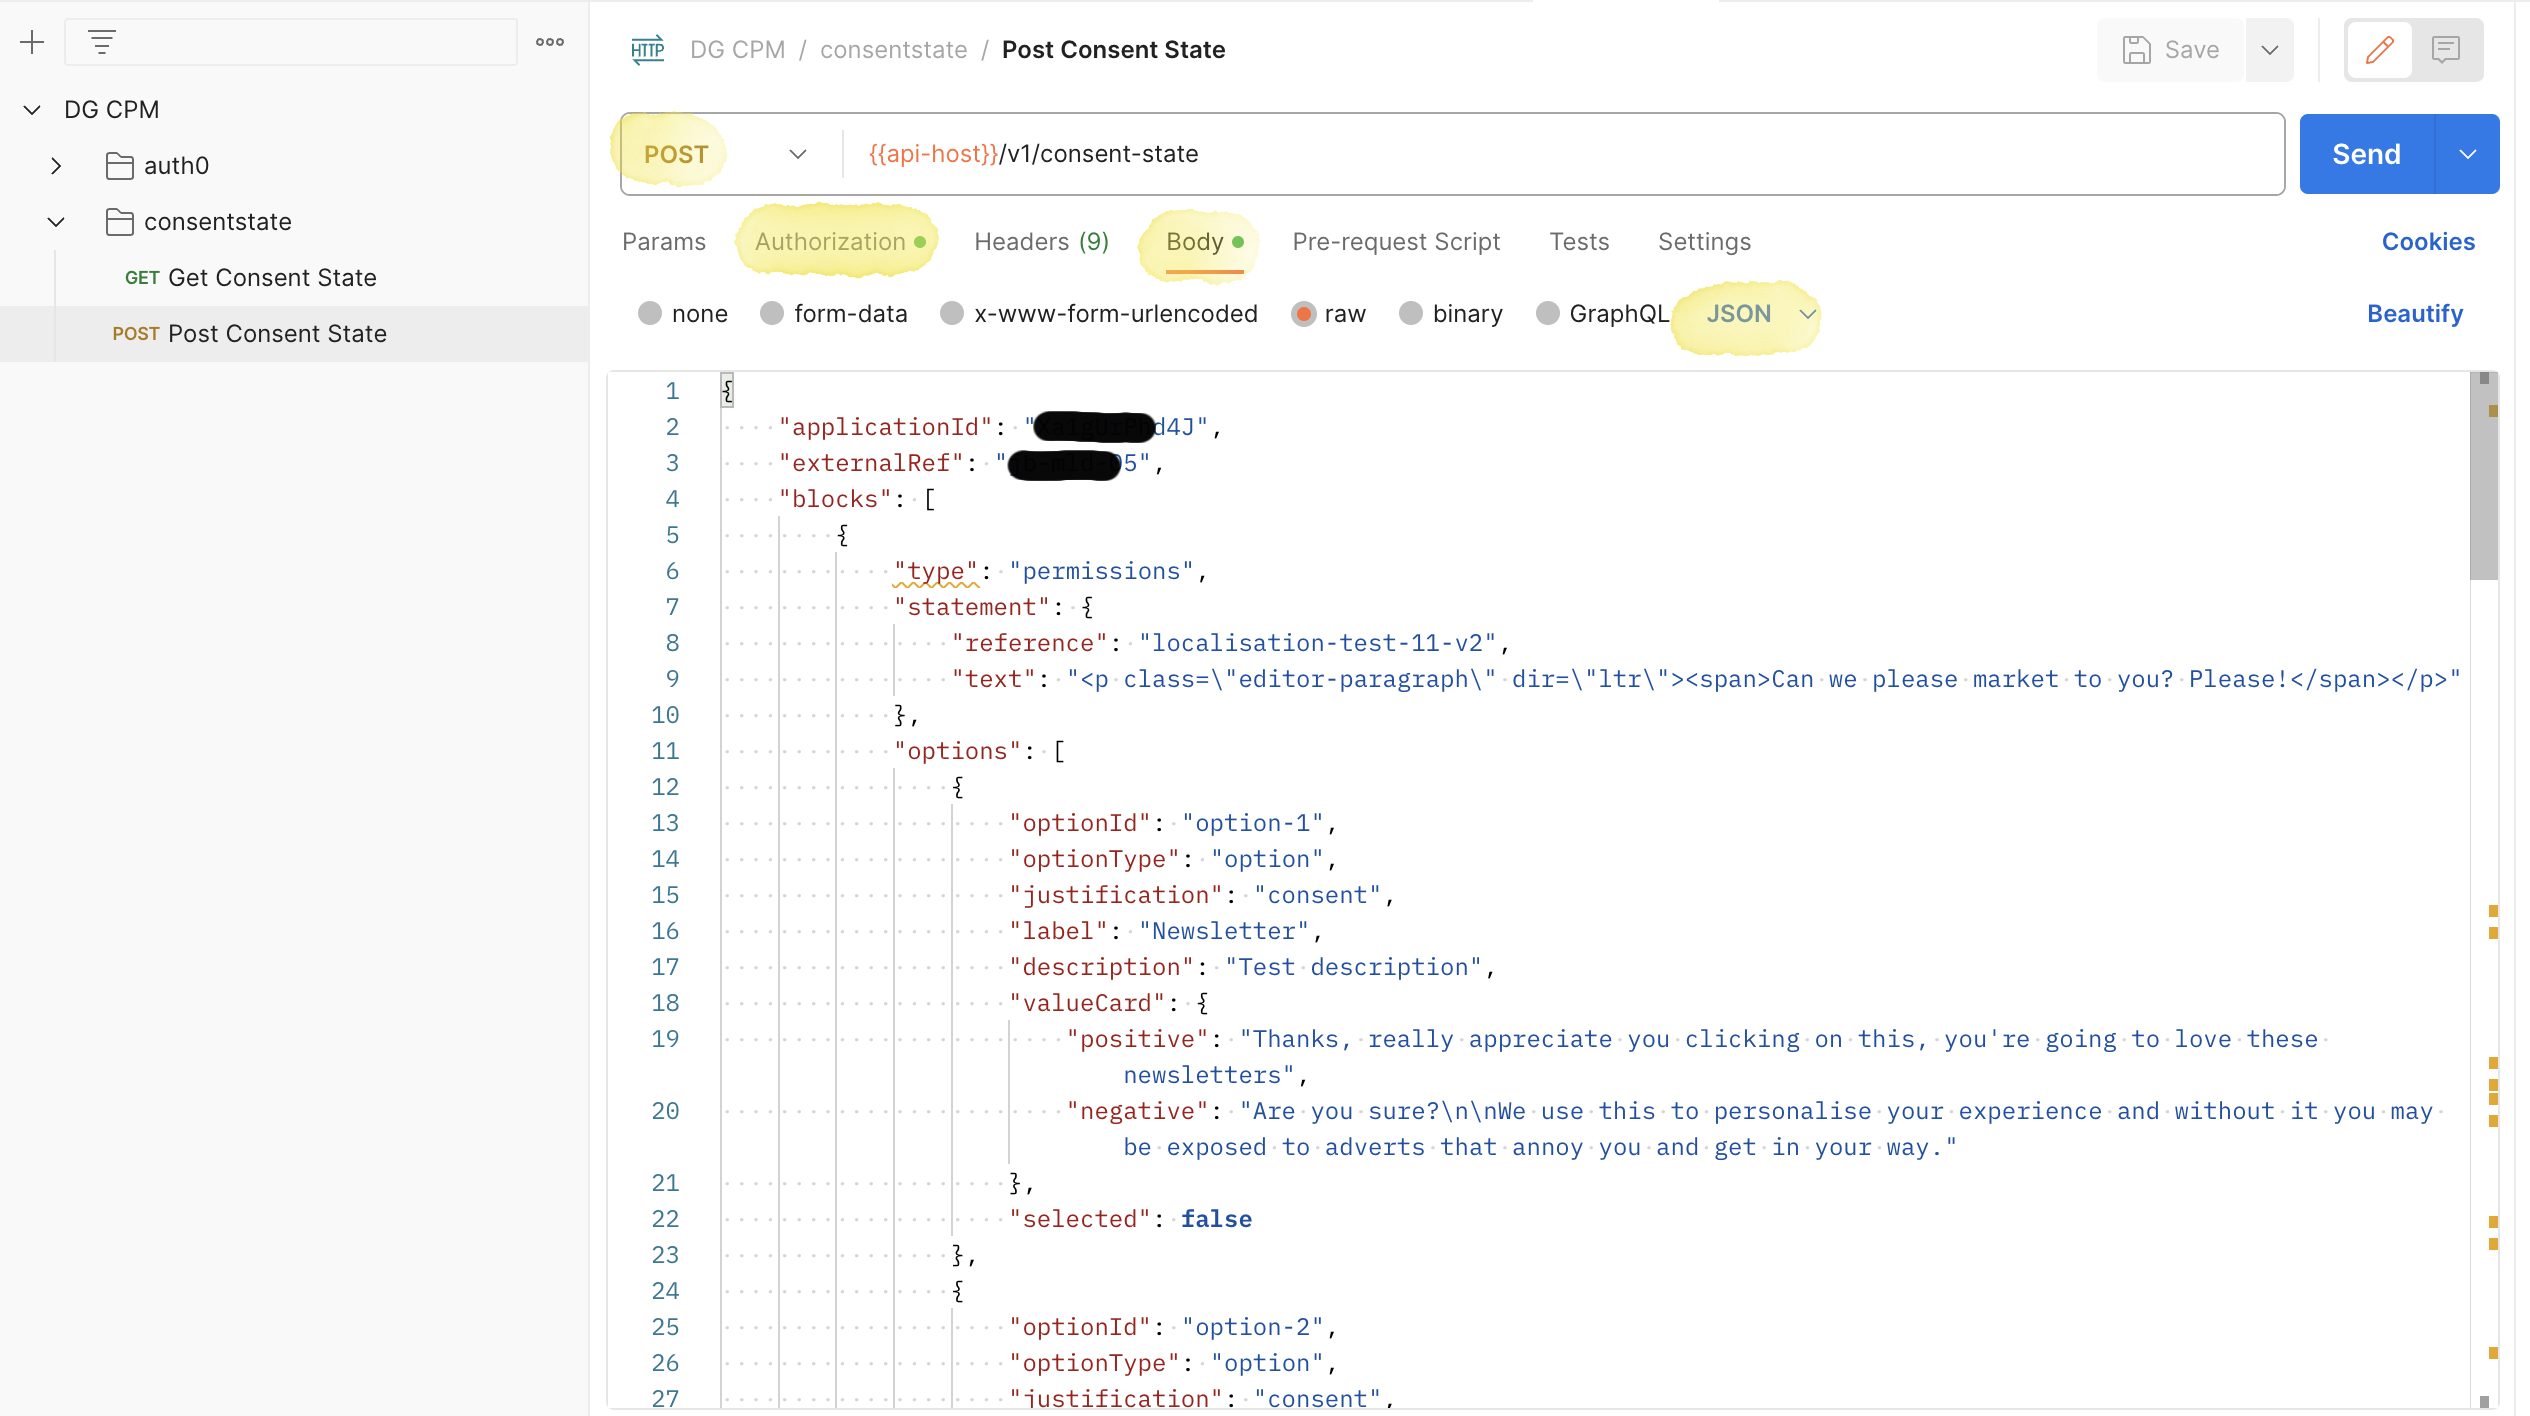
To initiate a call to the Consent State's POST method, you need to set the authentication header for the POST request in Postman, just as you did for the GET request. Open the Authorization tab, change the Type to Bearer Token, and enter the Token's value as {{dg-cpm-token}}, which is a global variable, as shown below.

After configuring the authorization header, navigate to the Body tab. Paste the enriched template within the body tab. It's essential to select the body type as raw and specify JSON at the end of the line.
If the request results in a 2xx response code, it indicates that the permissions and preferences for the citizen have been successfully saved and will be synchronized across any other systems integrated with the platform.
Updated 7 months ago