Brevo
This integration supports communication between DataGuard and the Brevo platform. Use this integration to synchronize consent data between CPM and Brevo for Contacts attributes. This integration includes synching of data for default as well as custom attributes.
Pre-requisites
Brevo Account
Obtain the API Key for REST APIs as the initial step.
- Go to
Your account name > SMTP & API
- Click
Generate a new API key - Name your API Key and click
Generate

- Copy your API key and store it in a safe environment.
For more information related to API Keys in Brevo, please, refer to this link.
DataGuard CPM-Brevo Integration
To set up the integration instance, select 'DataGuard CPM-Brevo' from the list. This action will open a popup window with options to either create new instances or reconfigure existing ones. To create a new instance, click on the 'Add Instance' button.
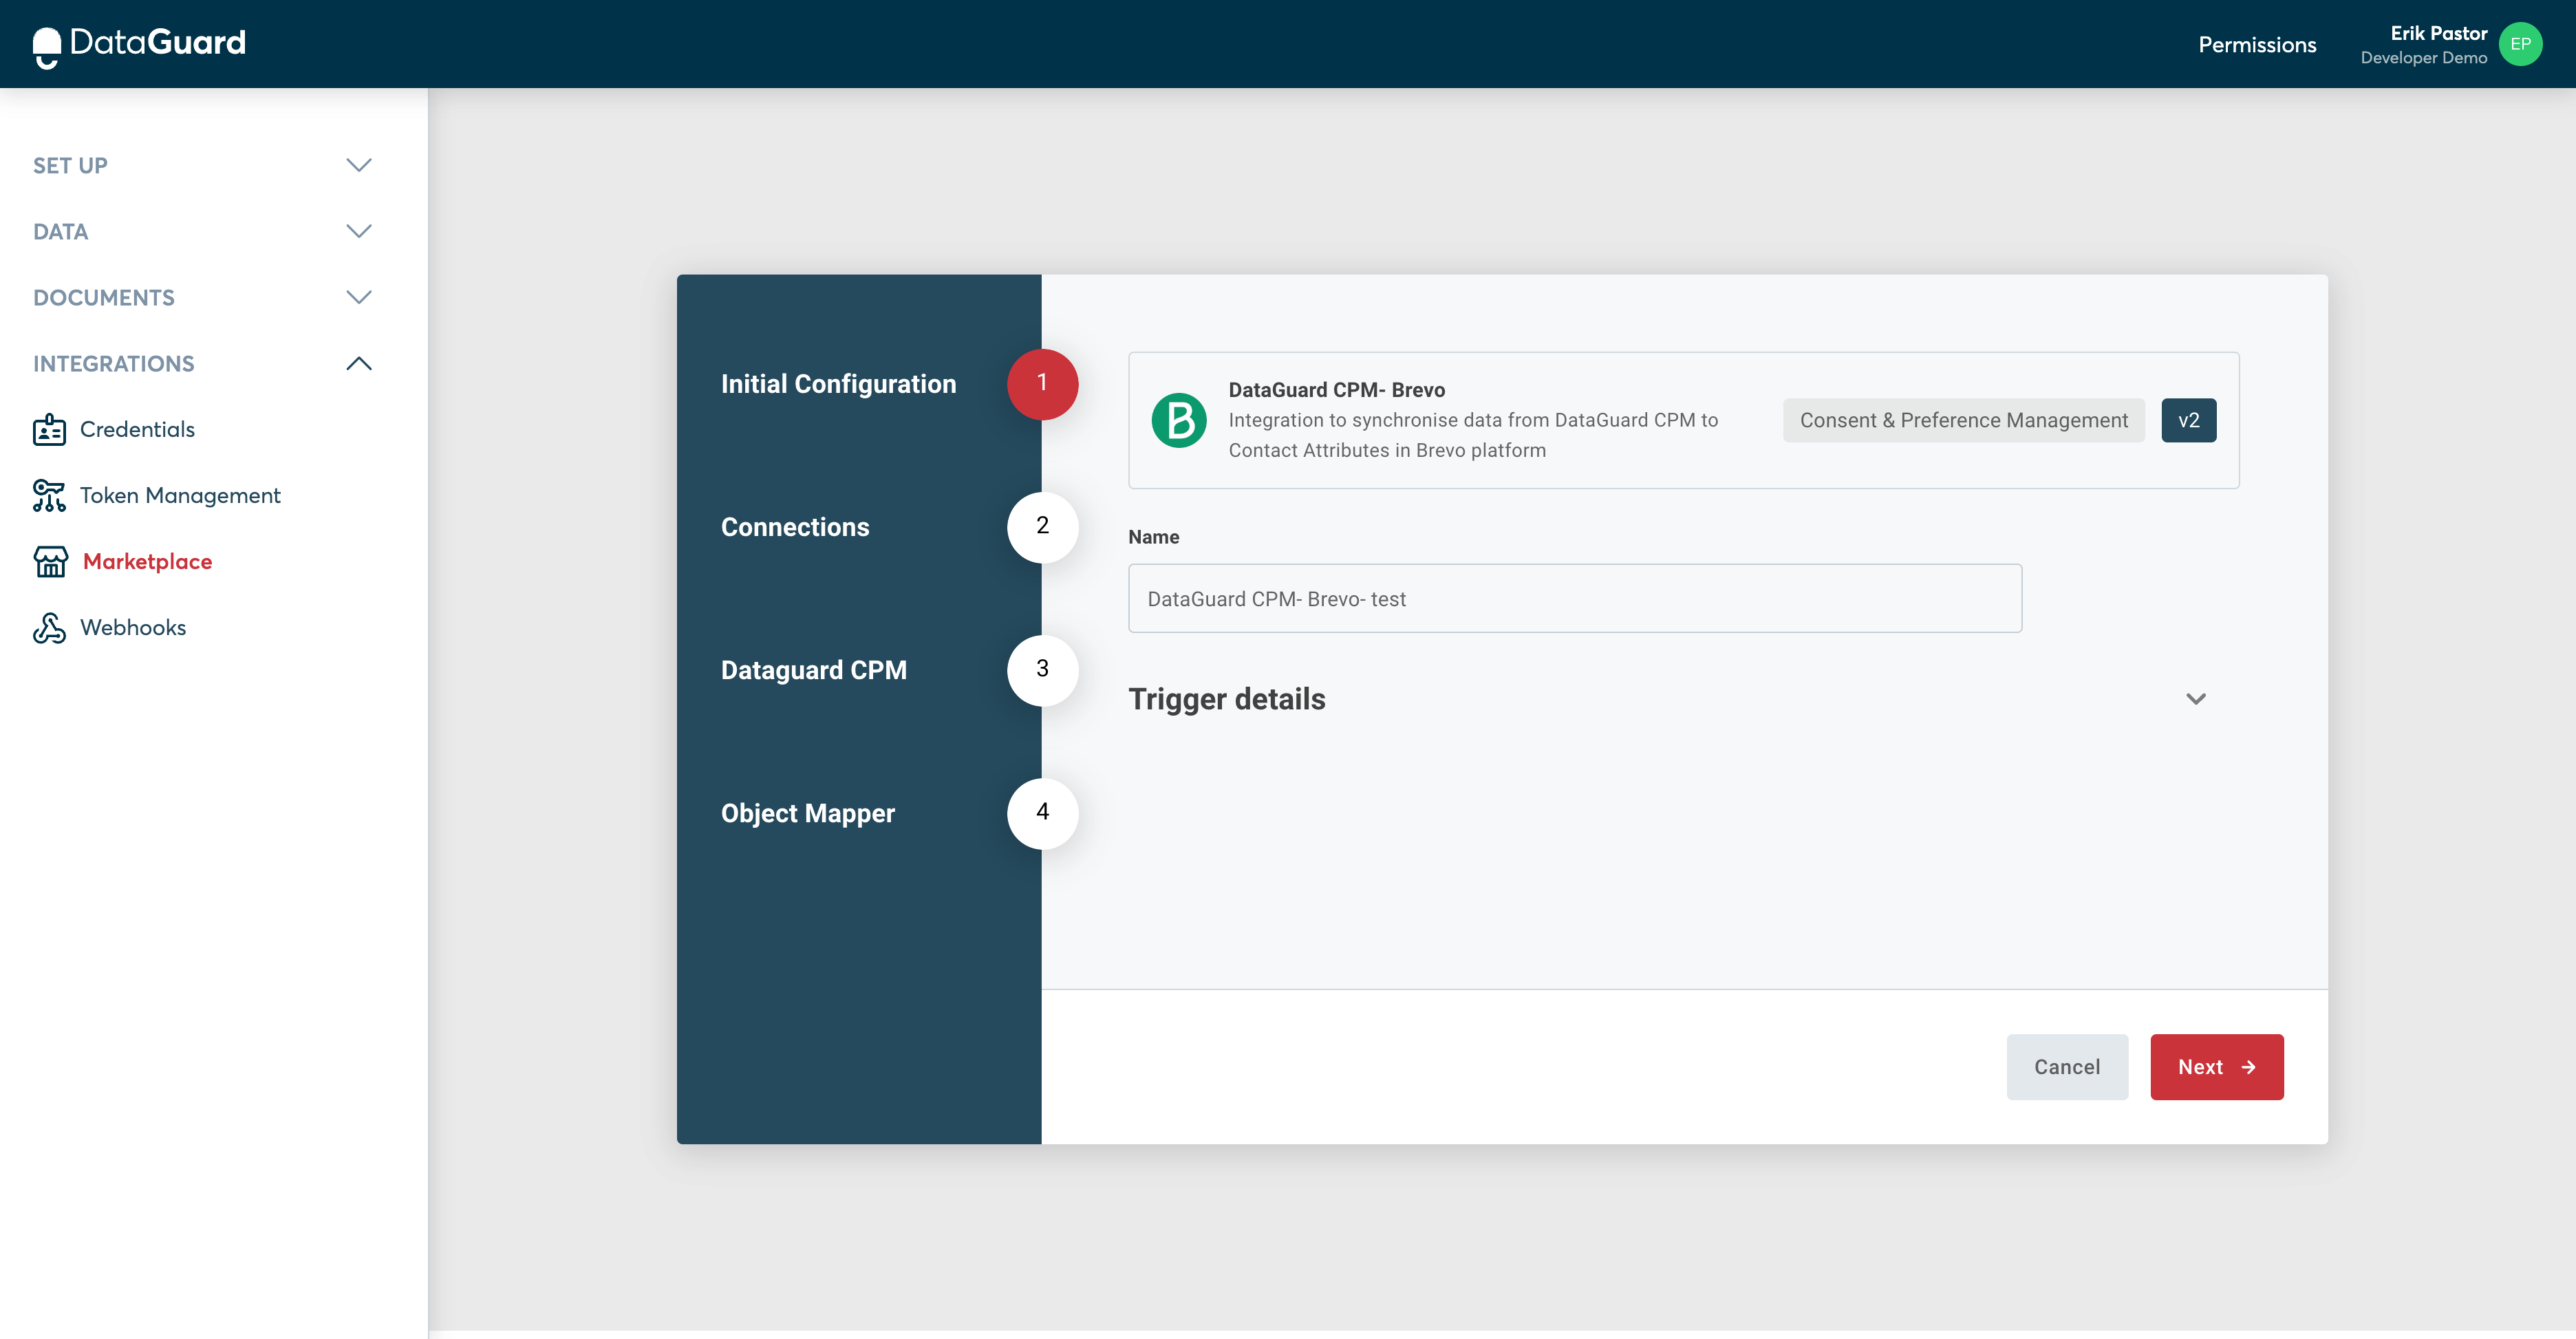
Step 1: Initial configuration
This step shows the name, current version, description, and other details of the connection.
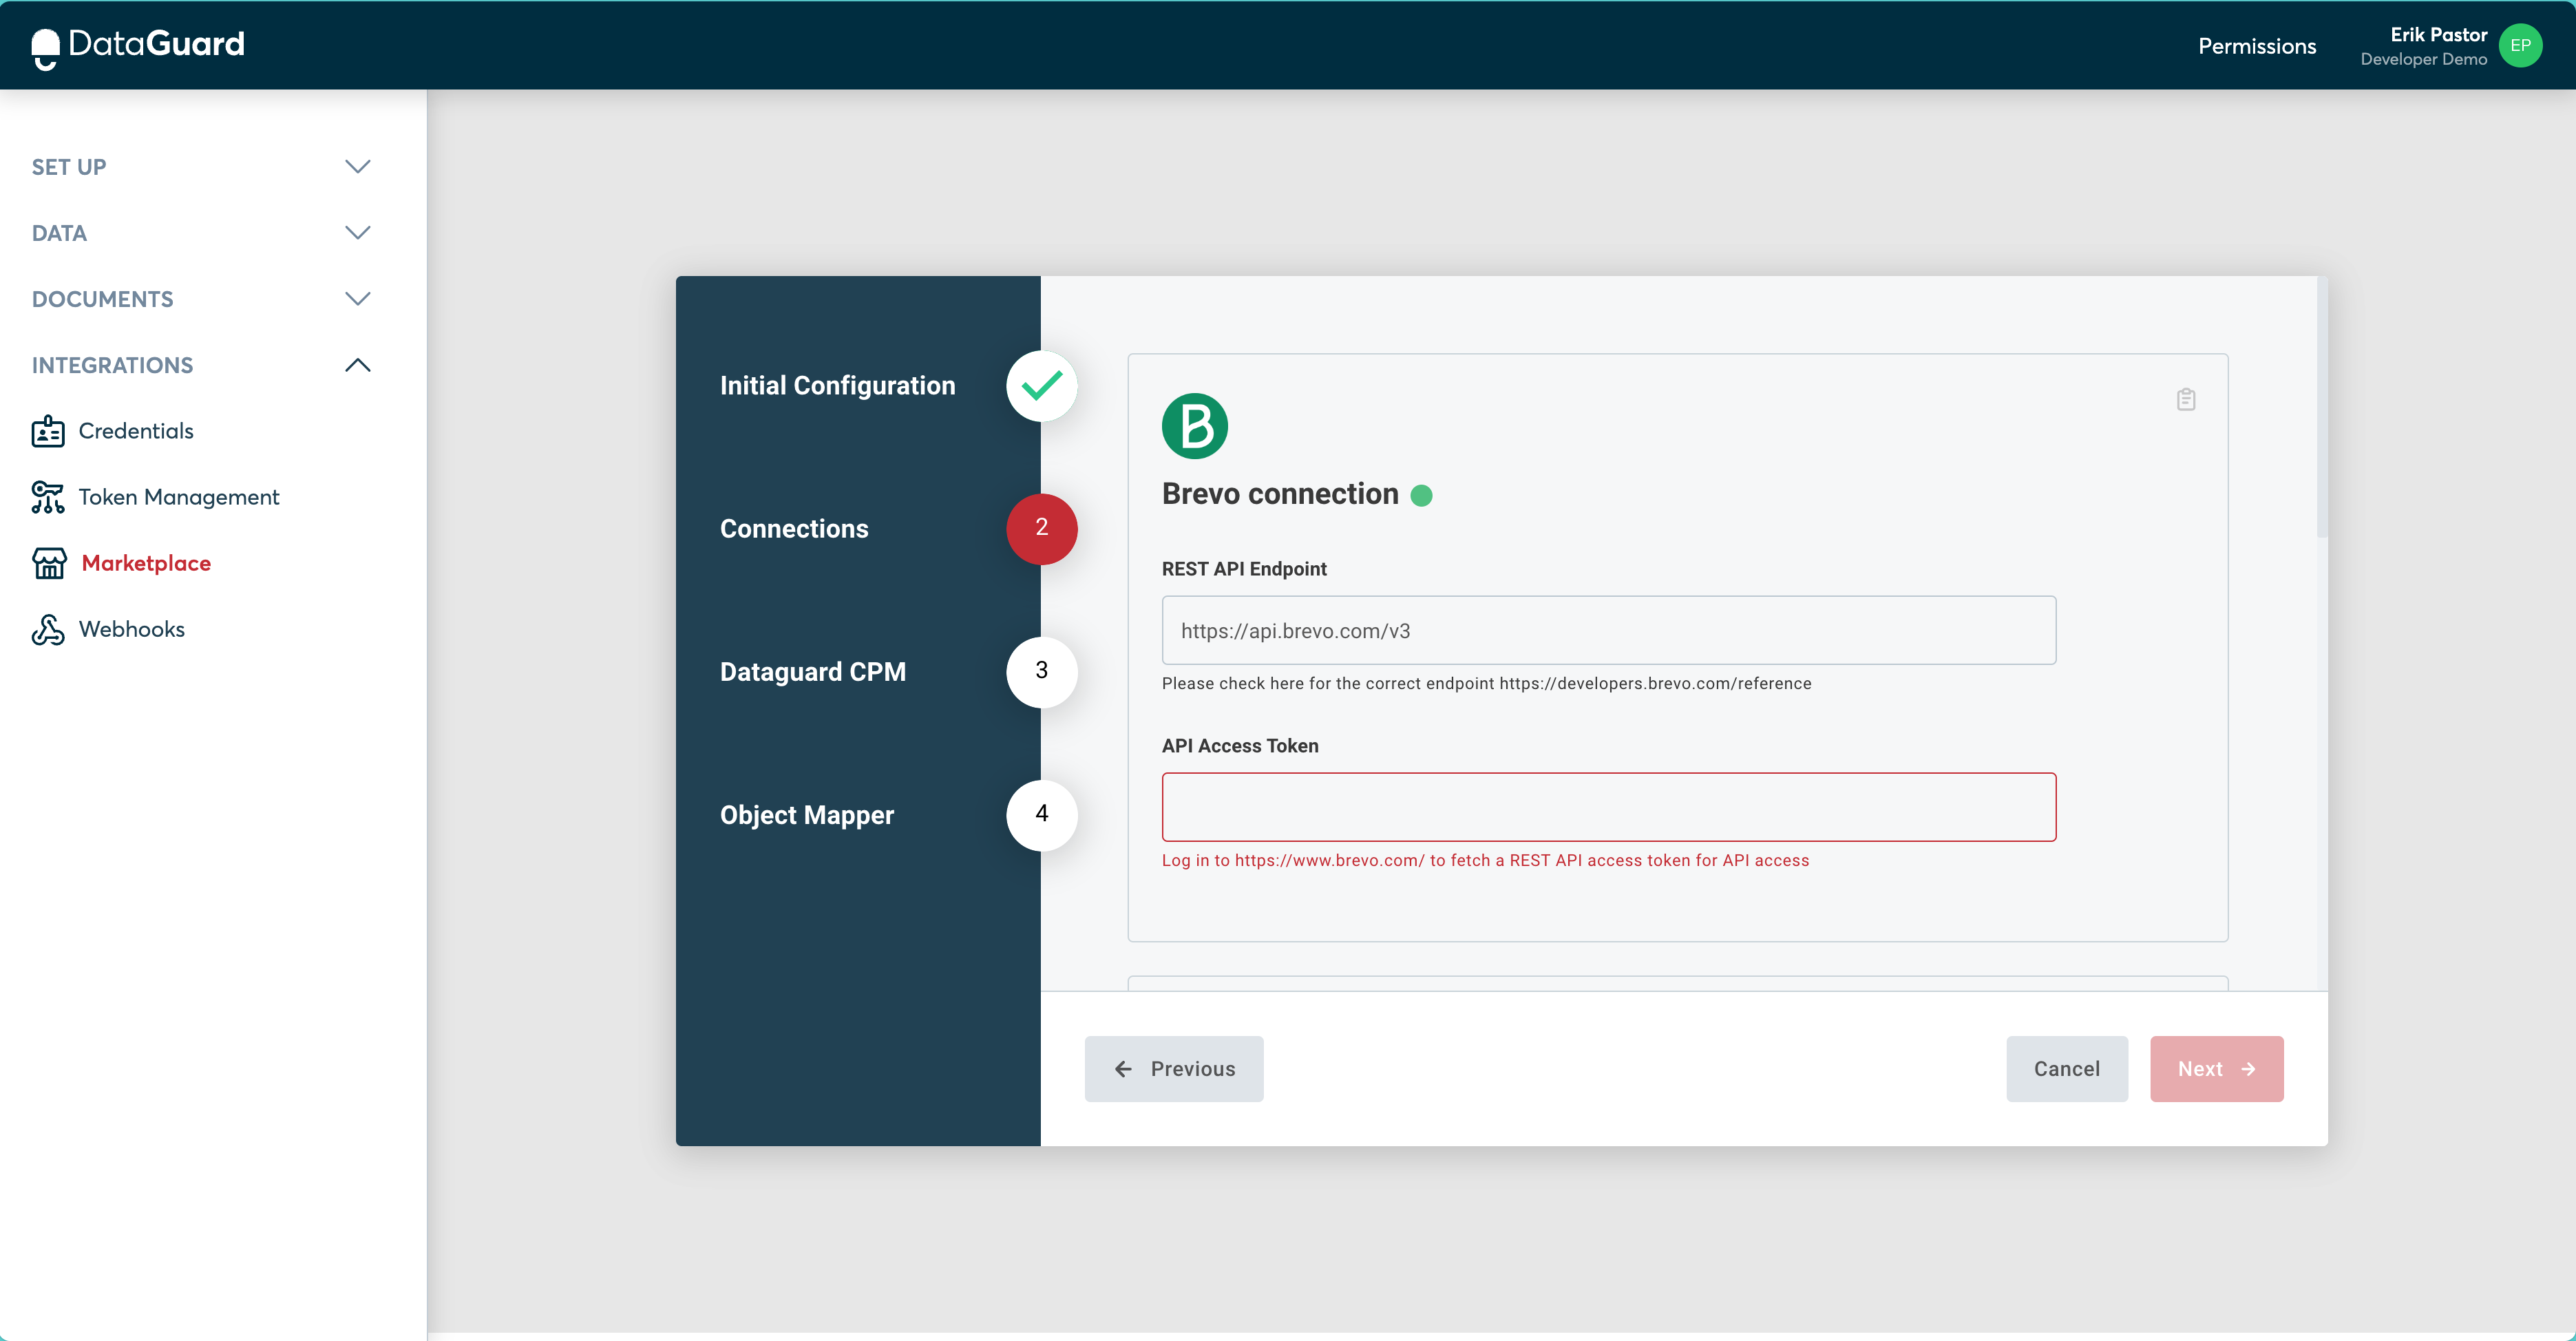
Step 2: Connections
Brevo connection
Fill in the Brevo connection fields in the instance configuration popup. You should already have them as part of the prerequisites.
Brave API endpoint will be: https://api.brevo.com/v3
The API Access token will be the API Key you have saved in the prerequisite step.
Once both fields are filled out, the Brevo connection will turn green if both fields are correct.
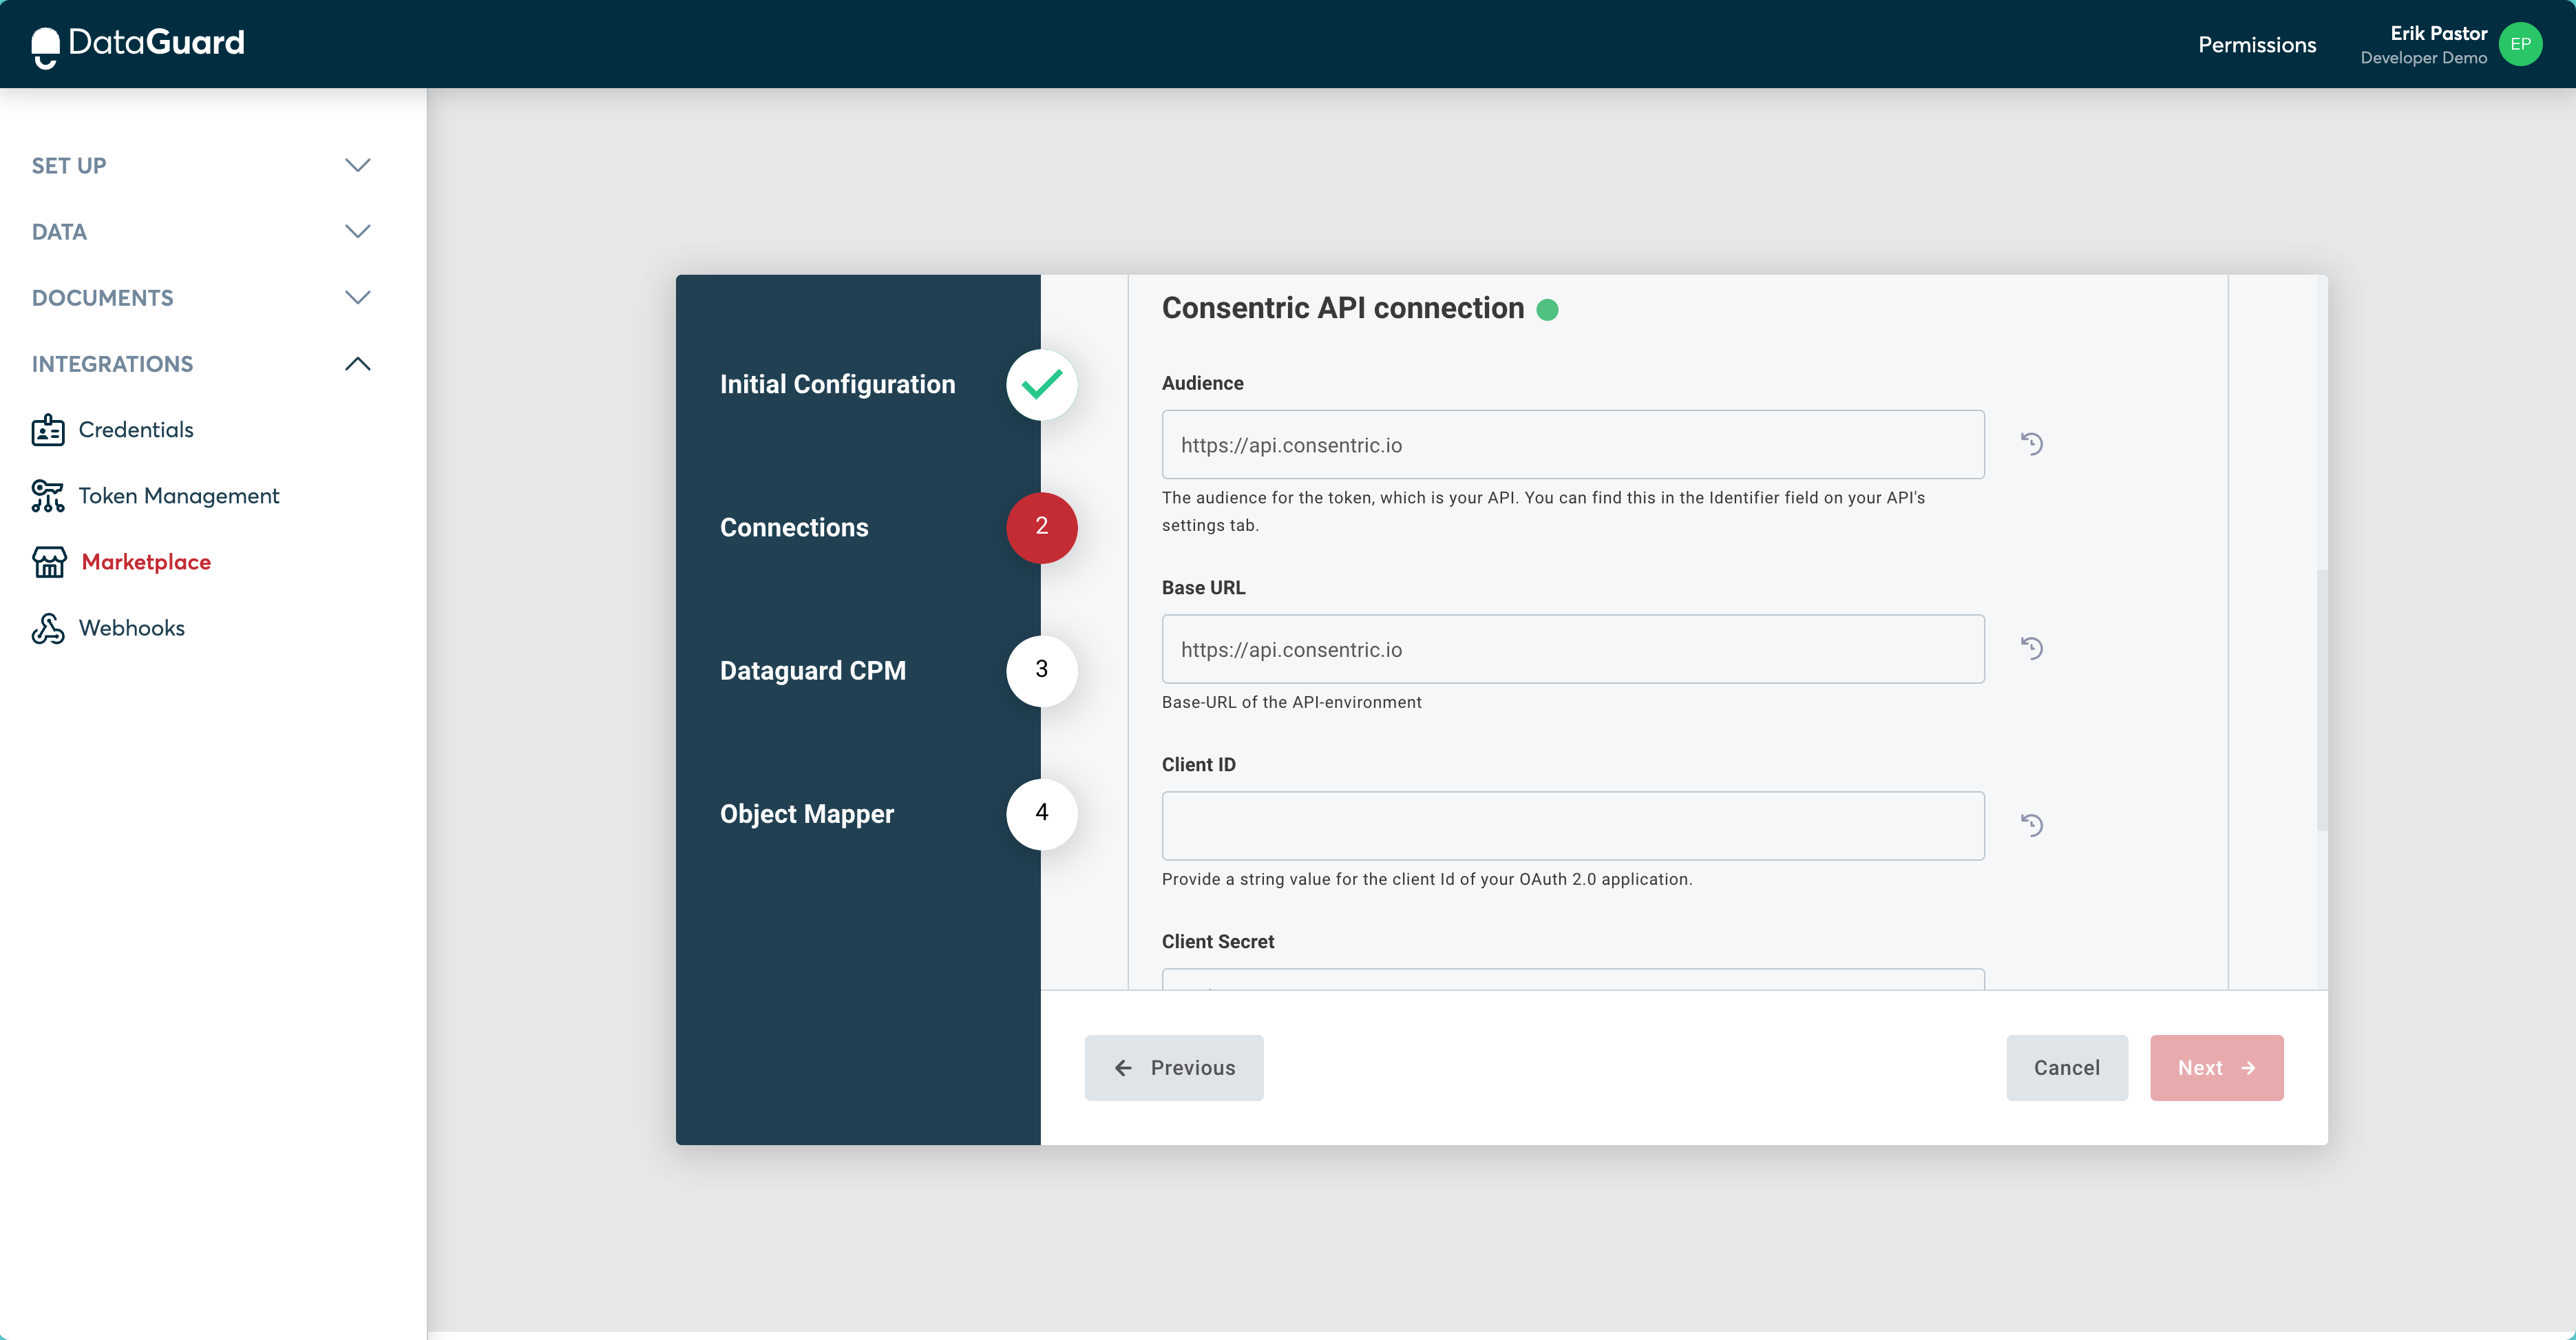
Consentric API Connection
Scroll down to see the section for Concentric API connection and fill up the field details. These details will be provided to you via an email during your initial setup process in DataGuard, in case you don't have these details, please contact DataGuard support
Token URL(required)Audience(required)Client ID(required)Client Secret(required)Base URL(required)
Click on the 'Connect’ button after filling up the details. This will again open a page in a new tab showing that you have successfully connected to DataGuard.
Step 3: Dataguard CPM
Application ID
This is the Dataguard CPM Tenant ID. This is provided by DataGuard in an email during the initial setup process.

Step 4: Object Mapper
Consent purpose mapping
Option Id - Contact Attribute Name
In this step, you're linking an individual Consent Purpose from DataGuard to a corresponding default attribute in Brevo. The available Consent Purposes for mapping will be presented in a dropdown menu.
It's important to note that mapping is exclusively for citizens' permissions and does not extend to their preferences. The preferences of CPM citizens are incorporated into the Brevo User as custom attributes during the synchronization process.
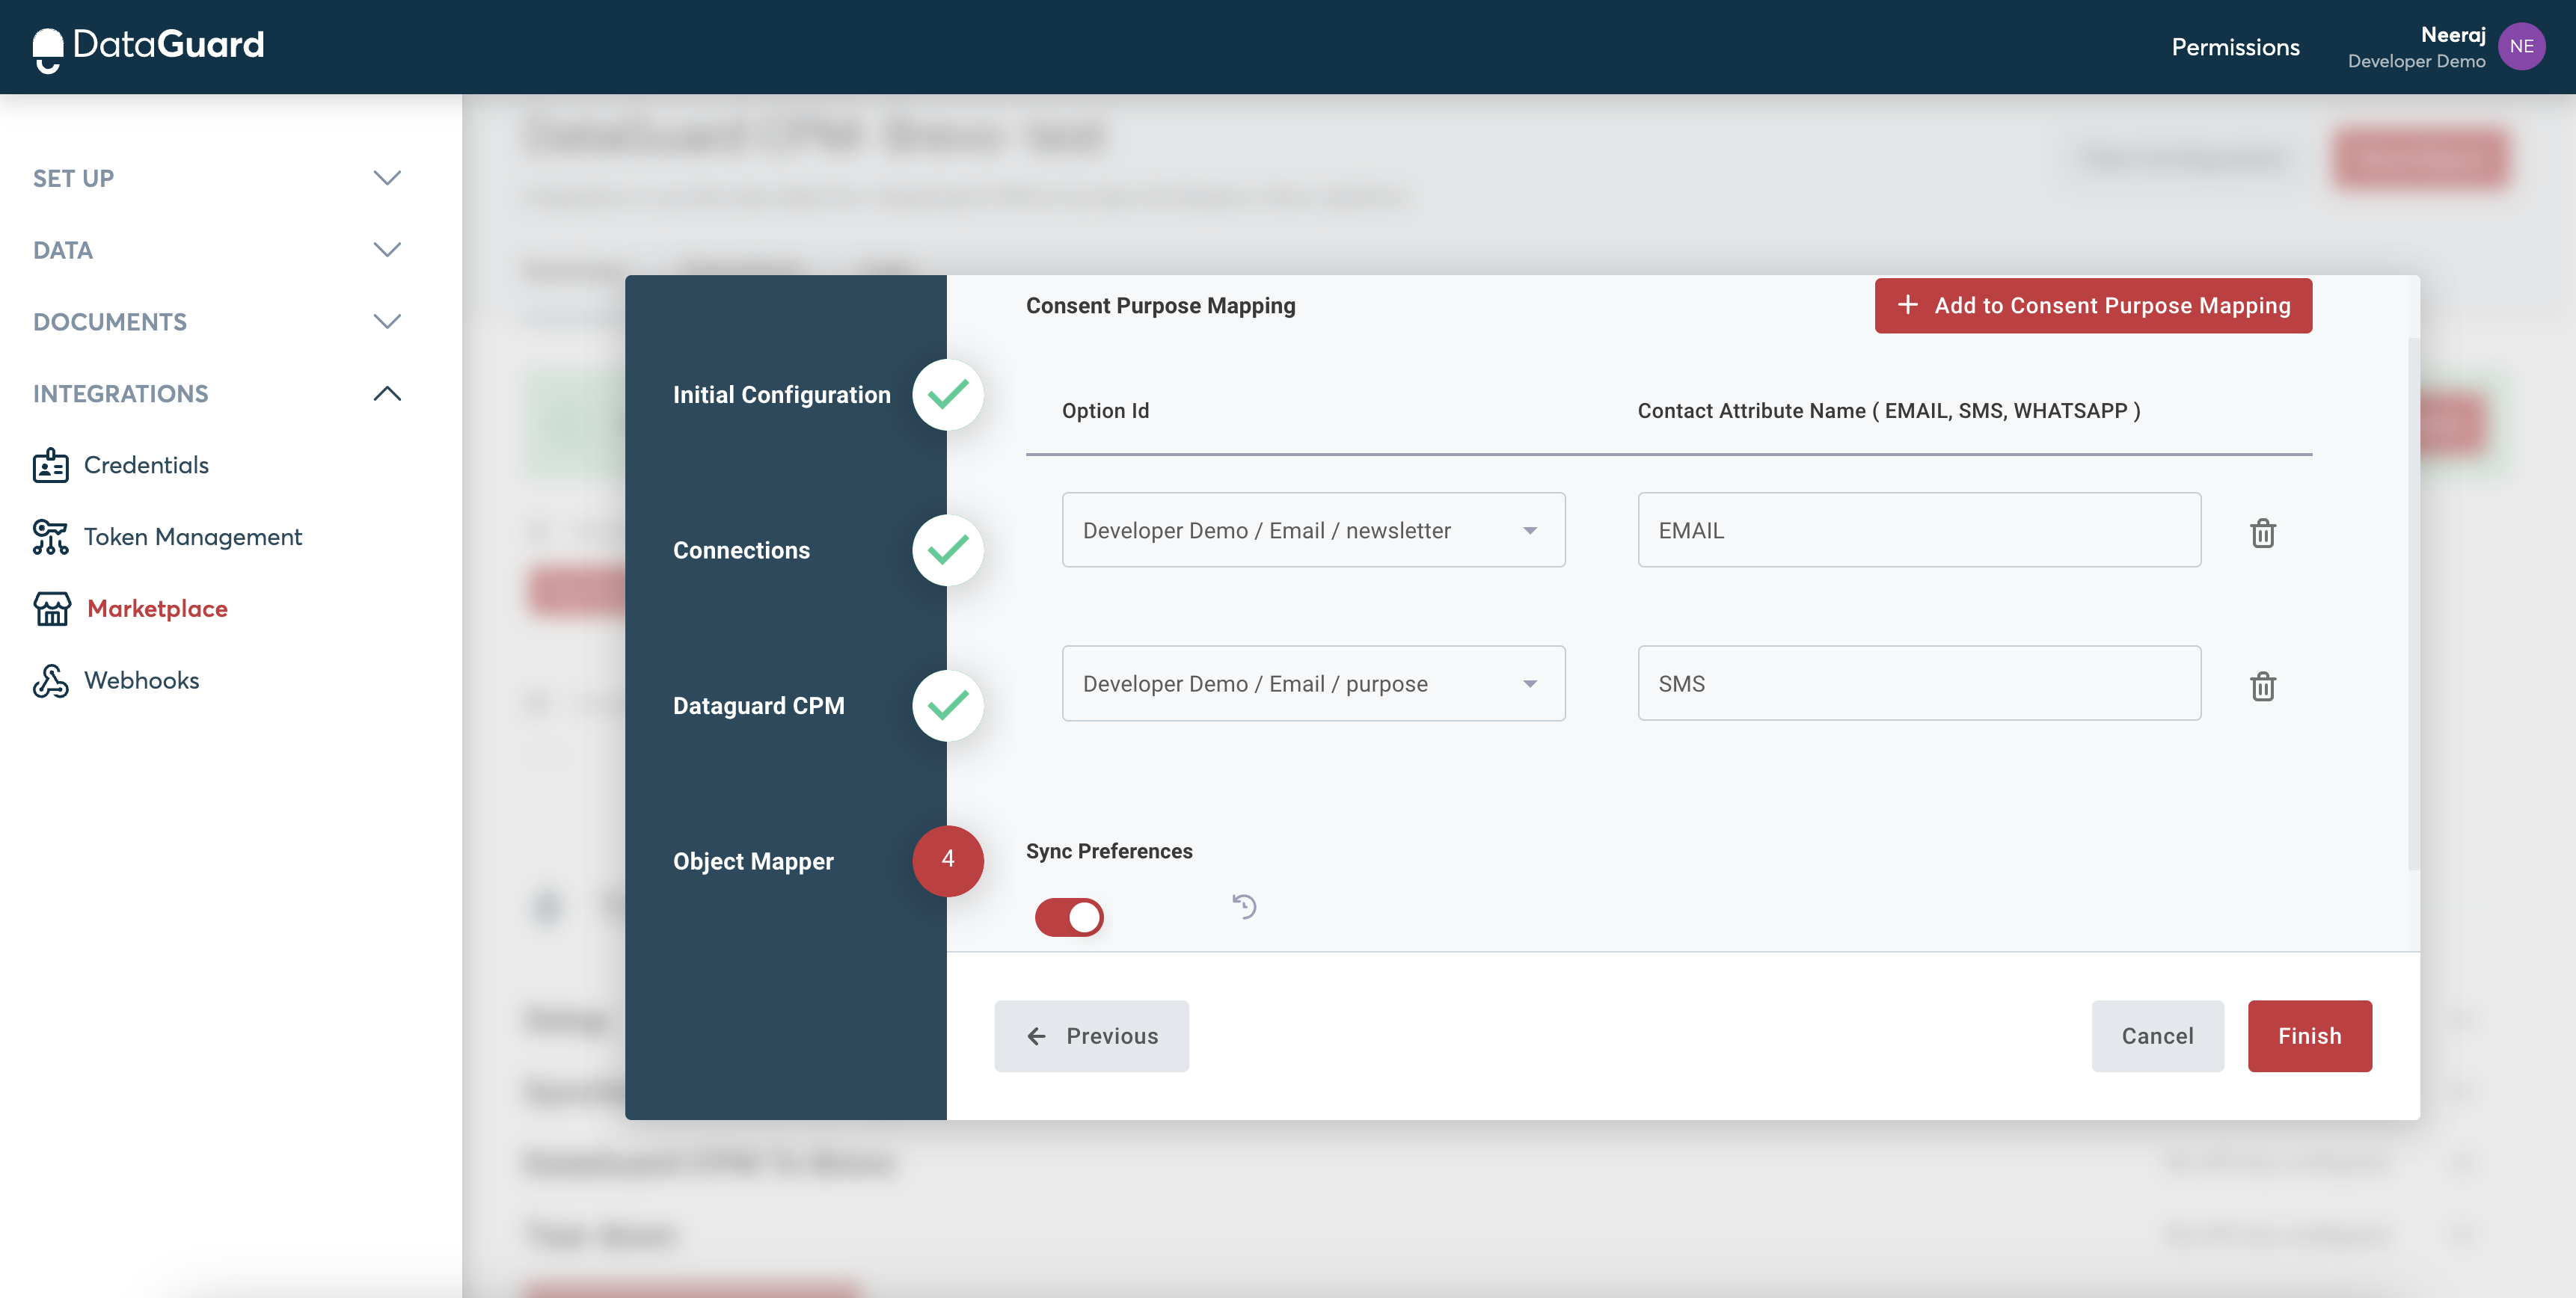
Sync preferences
The Sync preferences toggle allows syncing CPM citizen preferences to Brevo.
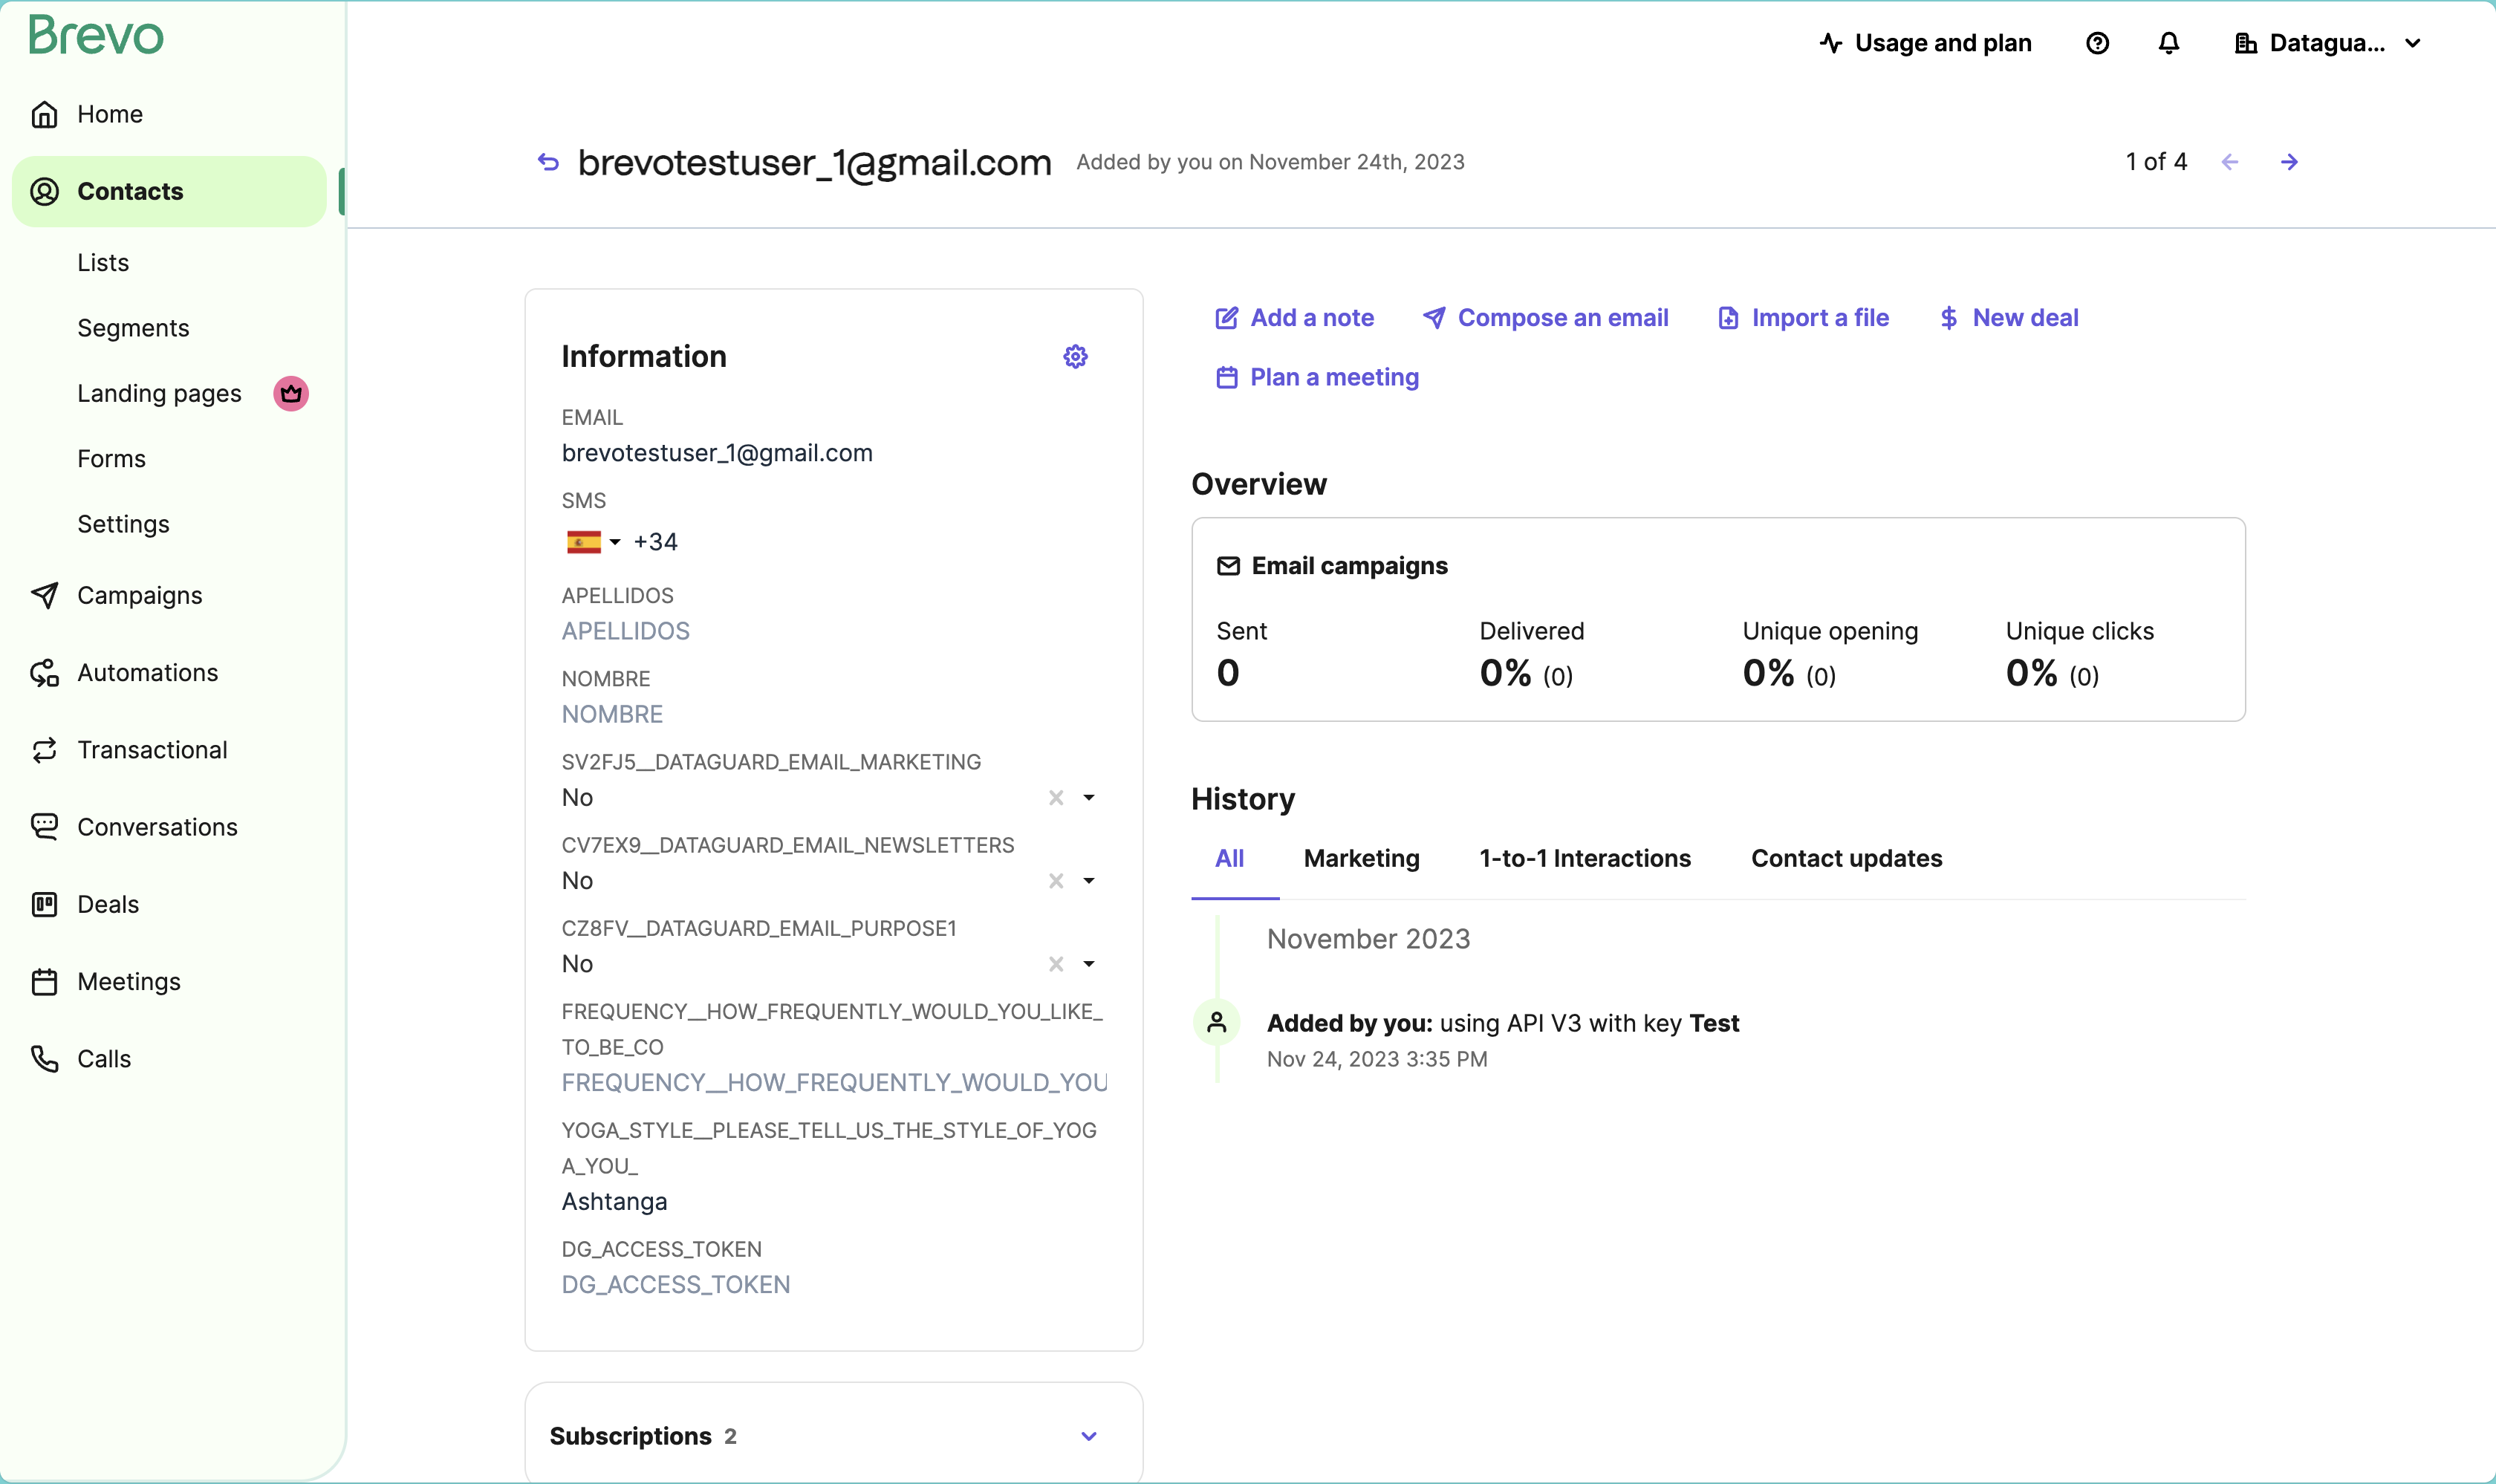
User permissions and preferences in Brevo
After successfully configuring the integration, a step-by-step example of how the user's permissions and preferences are reflected in Brevo is illustrated by adding them to CPM using the signup widget.
After a user submits their email address, permissions, and preferences through the Dataguard widget, the synchronization process is initiated in the Brevo connector. Brevo subsequently creates a user profile that corresponds to the CPM citizen, complete with their permissions and preferences. If the user does not already exist in Brevo or if there are updated consents, Brevo will create or update a new corresponding user using its latest information.
To see the user, navigate to Contacts and enter the user's email address in the search box.
The permissions and preferences can be found within the information widget on the account page.
Updated 5 months ago