Webhooks
Capture real time updates using our subscription webhooks

In DataGuard, you can stay continuously informed about any modifications in citizen data by receiving live updates using our platform's Webhooks section. To avail of this feature, you just need to set up a webhook according to your preferences, allowing you to conveniently receive all the updates on your end.
How to add a new webhook
To access the Webhooks UI feature on the platform, follow these simple steps:
- Login to the DataGuard consent & preference management platform.
- Go to the "INTEGRATIONS" section-> Click on "Webhooks"
- You will land on the page for creating new webhooks. There, you'll find a table with existing webhooks along with their URLs and status.
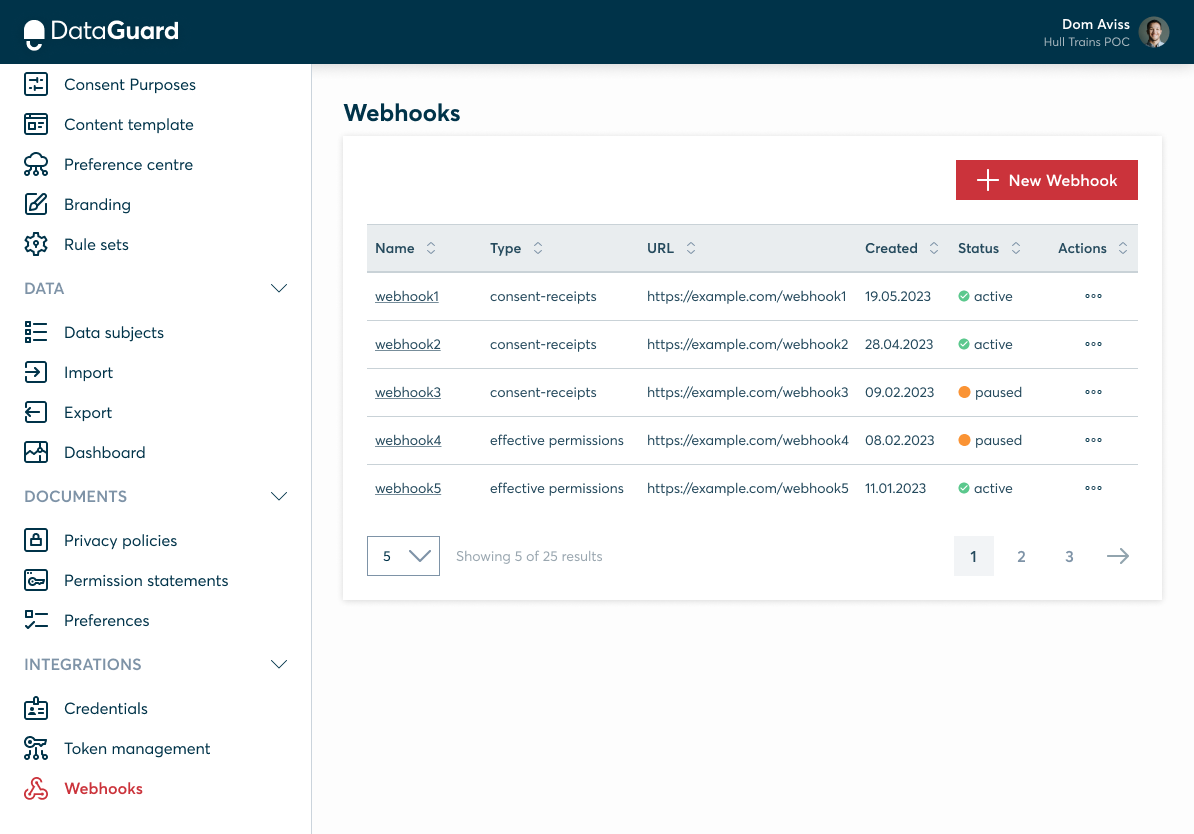
- Click + New Webhook button
- On the New Webhook page, specify a human-readable name for the webhook
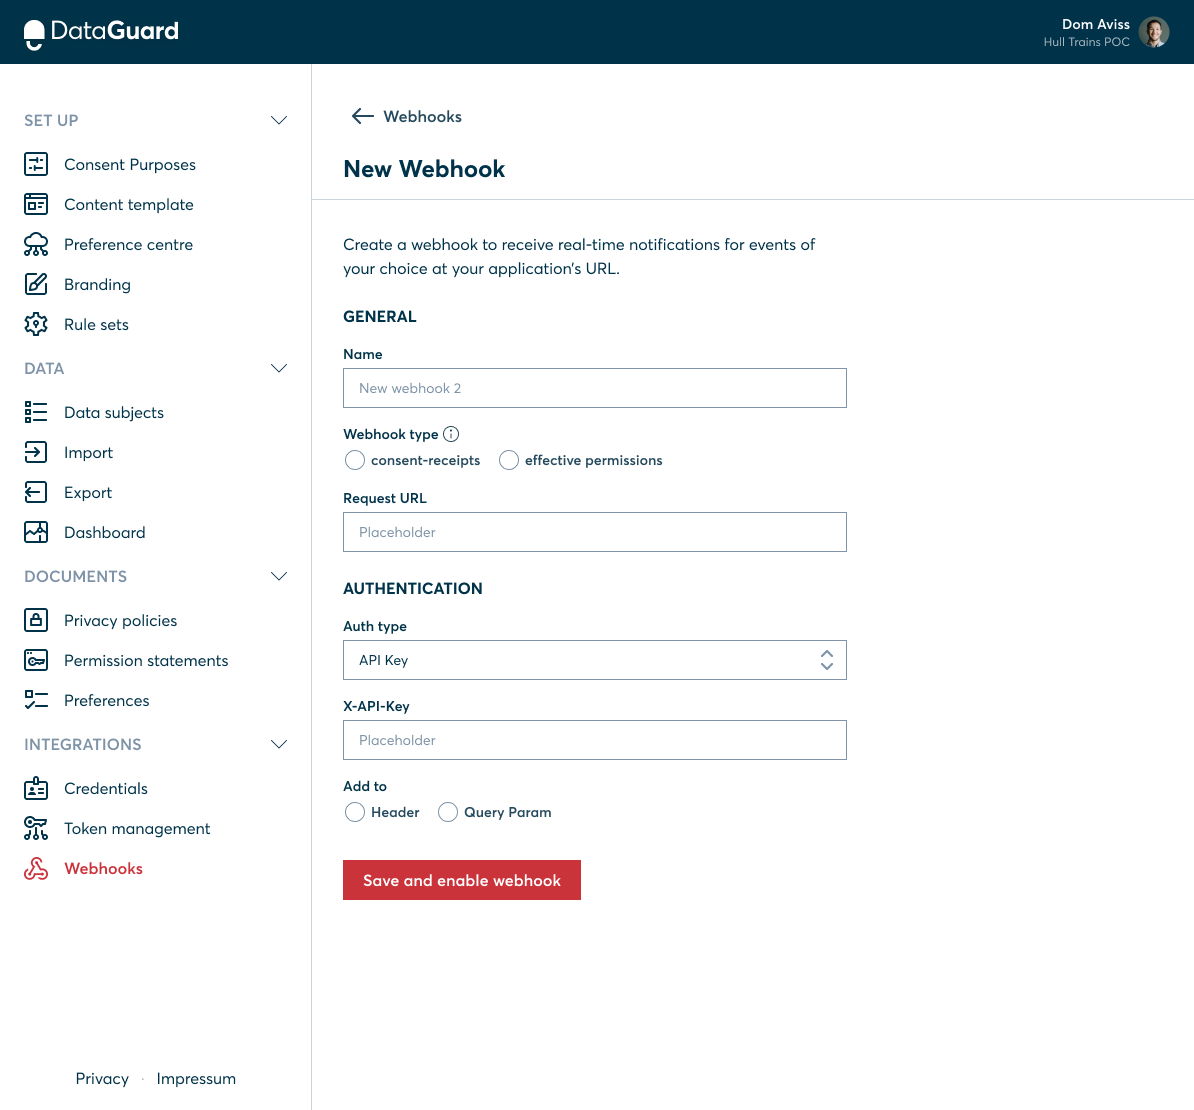
- Select the required webhook update type (consent-receipts or effective-permission). It represents the payload the client will receive.
consent-receipts vs effective-permission
If you wish your webhook to update entire the consent and preferences state of a citizen after every change then you should choose 'effective-permission'. However, if you wish to receive updates only for the changes to the citizen's consents and preferences since the previous update then you should choose 'consent-receipts'. Please note that currently it is supported only for changes to permissions.
- Specify the destination Request URL where the webhook should push the updates.
- Select the required Authentication type (API Key or None) and add respective details
Auth type
To enhance the security of your webhook, it is recommended to add an authentication type unless you specifically intend to keep it open without any authentication.
- Click on "Save and enable webhook"
- Upon successful creation of the webhook, a toast notification will be displayed, indicating the operation's success. You will then be automatically redirected to the home page, where you can find a table listing all the existing webhooks, including the newly created one. In the event of an error during the creation process, a toast notification will be presented, displaying an error message.

Editing a webhook
To perform actions like Edit, Activate/Pause, or Delete on a webhook, click on the ellipsis (...) located under the "Actions" column. Alternatively, you can directly click on the name of the webhook to edit it.
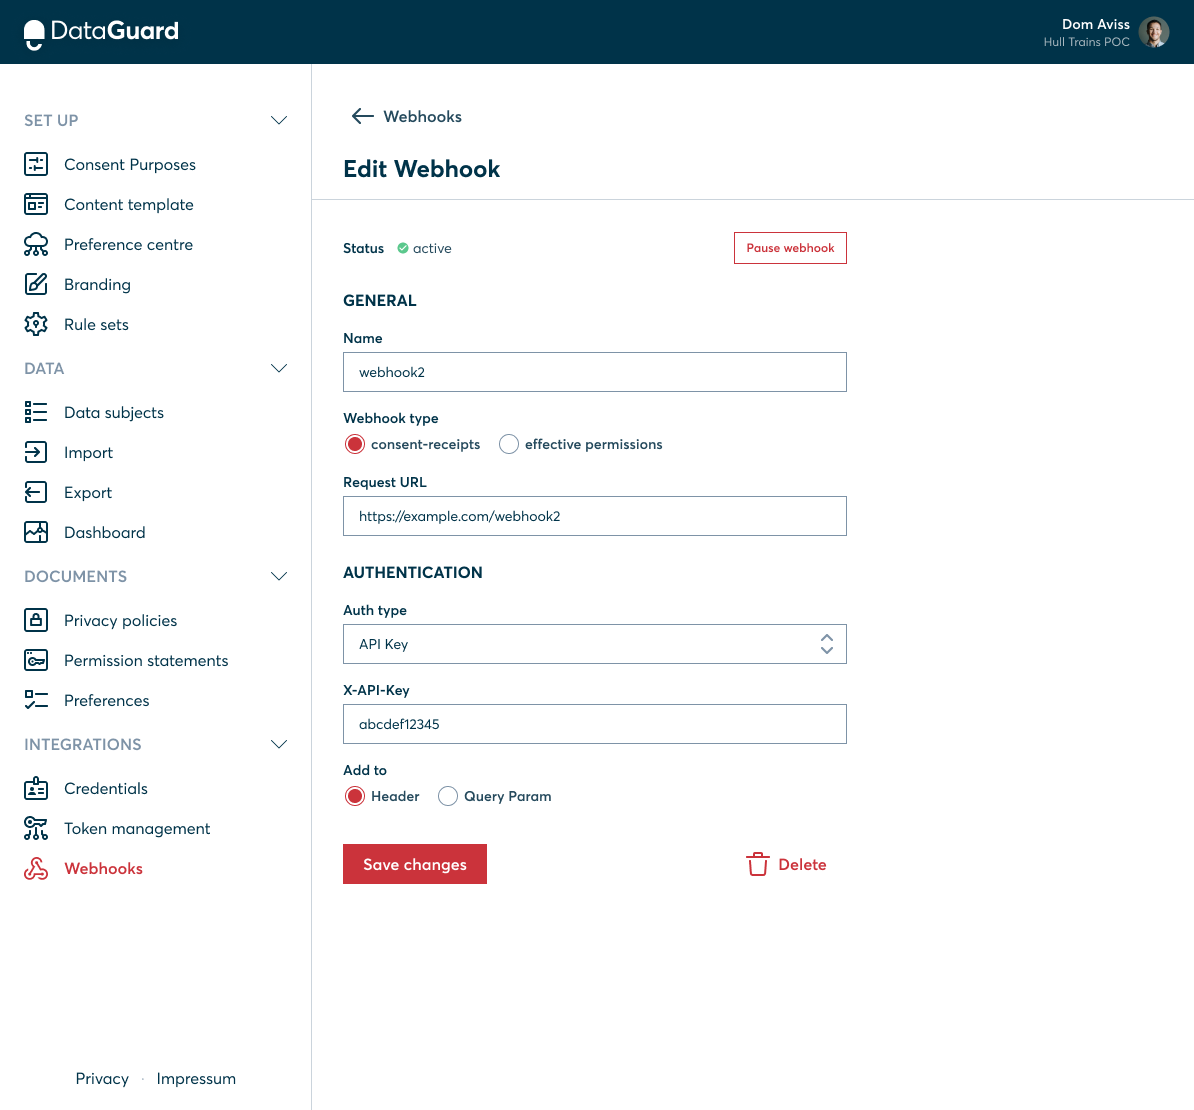
Once you have made the necessary changes to the configuration, remember to click the "Save changes" button to ensure your modifications are saved.
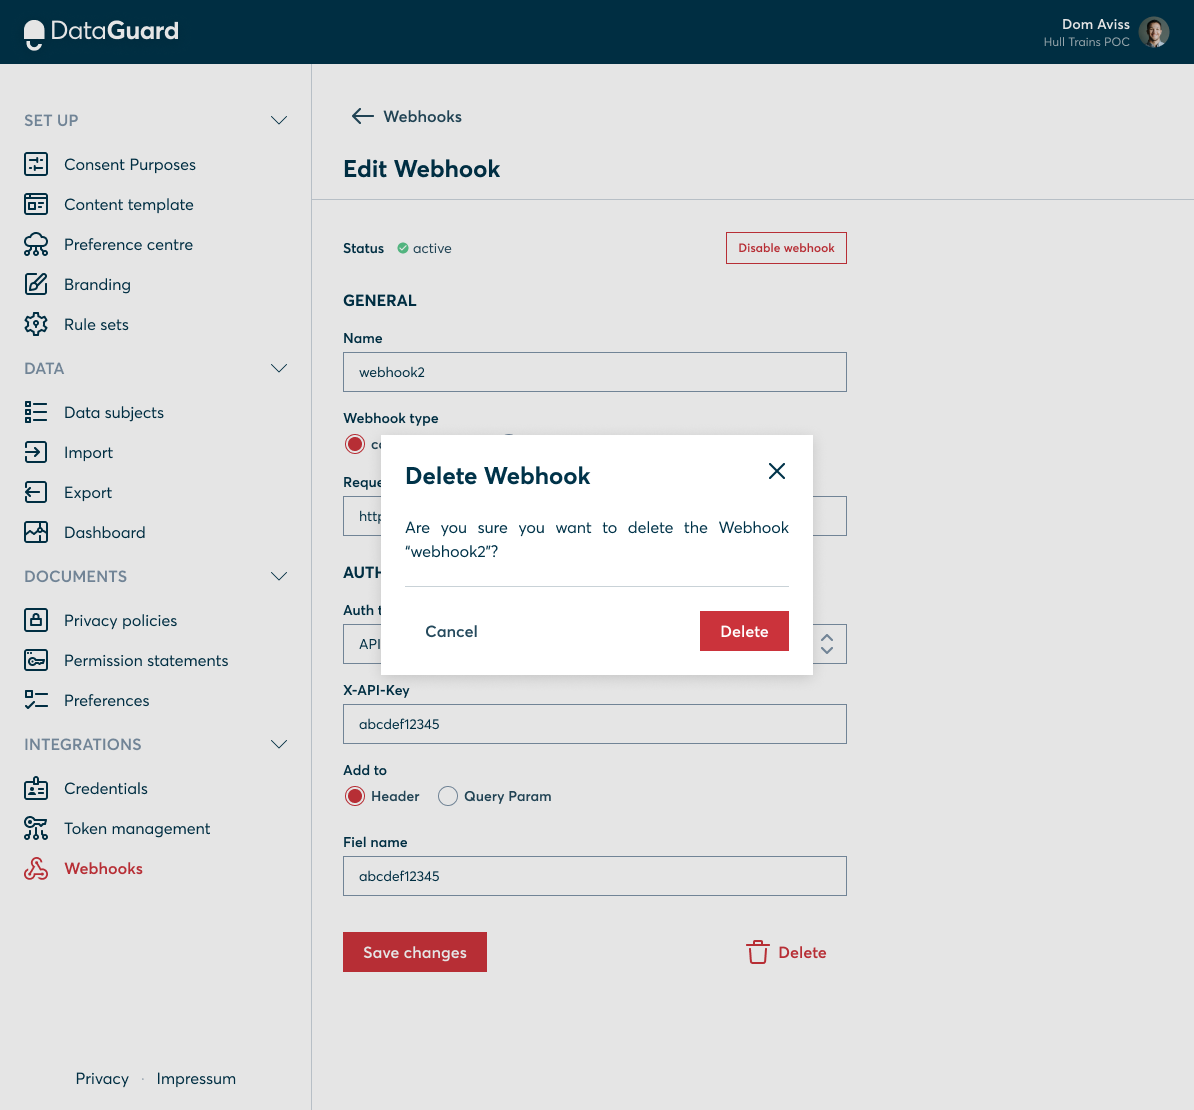
Deleting a webhook
If you want to remove an existing webhook, simply click the "Delete" button on the Edit page. This action will prompt a confirmation popup, and upon confirming, the webhook will be successfully removed from the system.
Further details
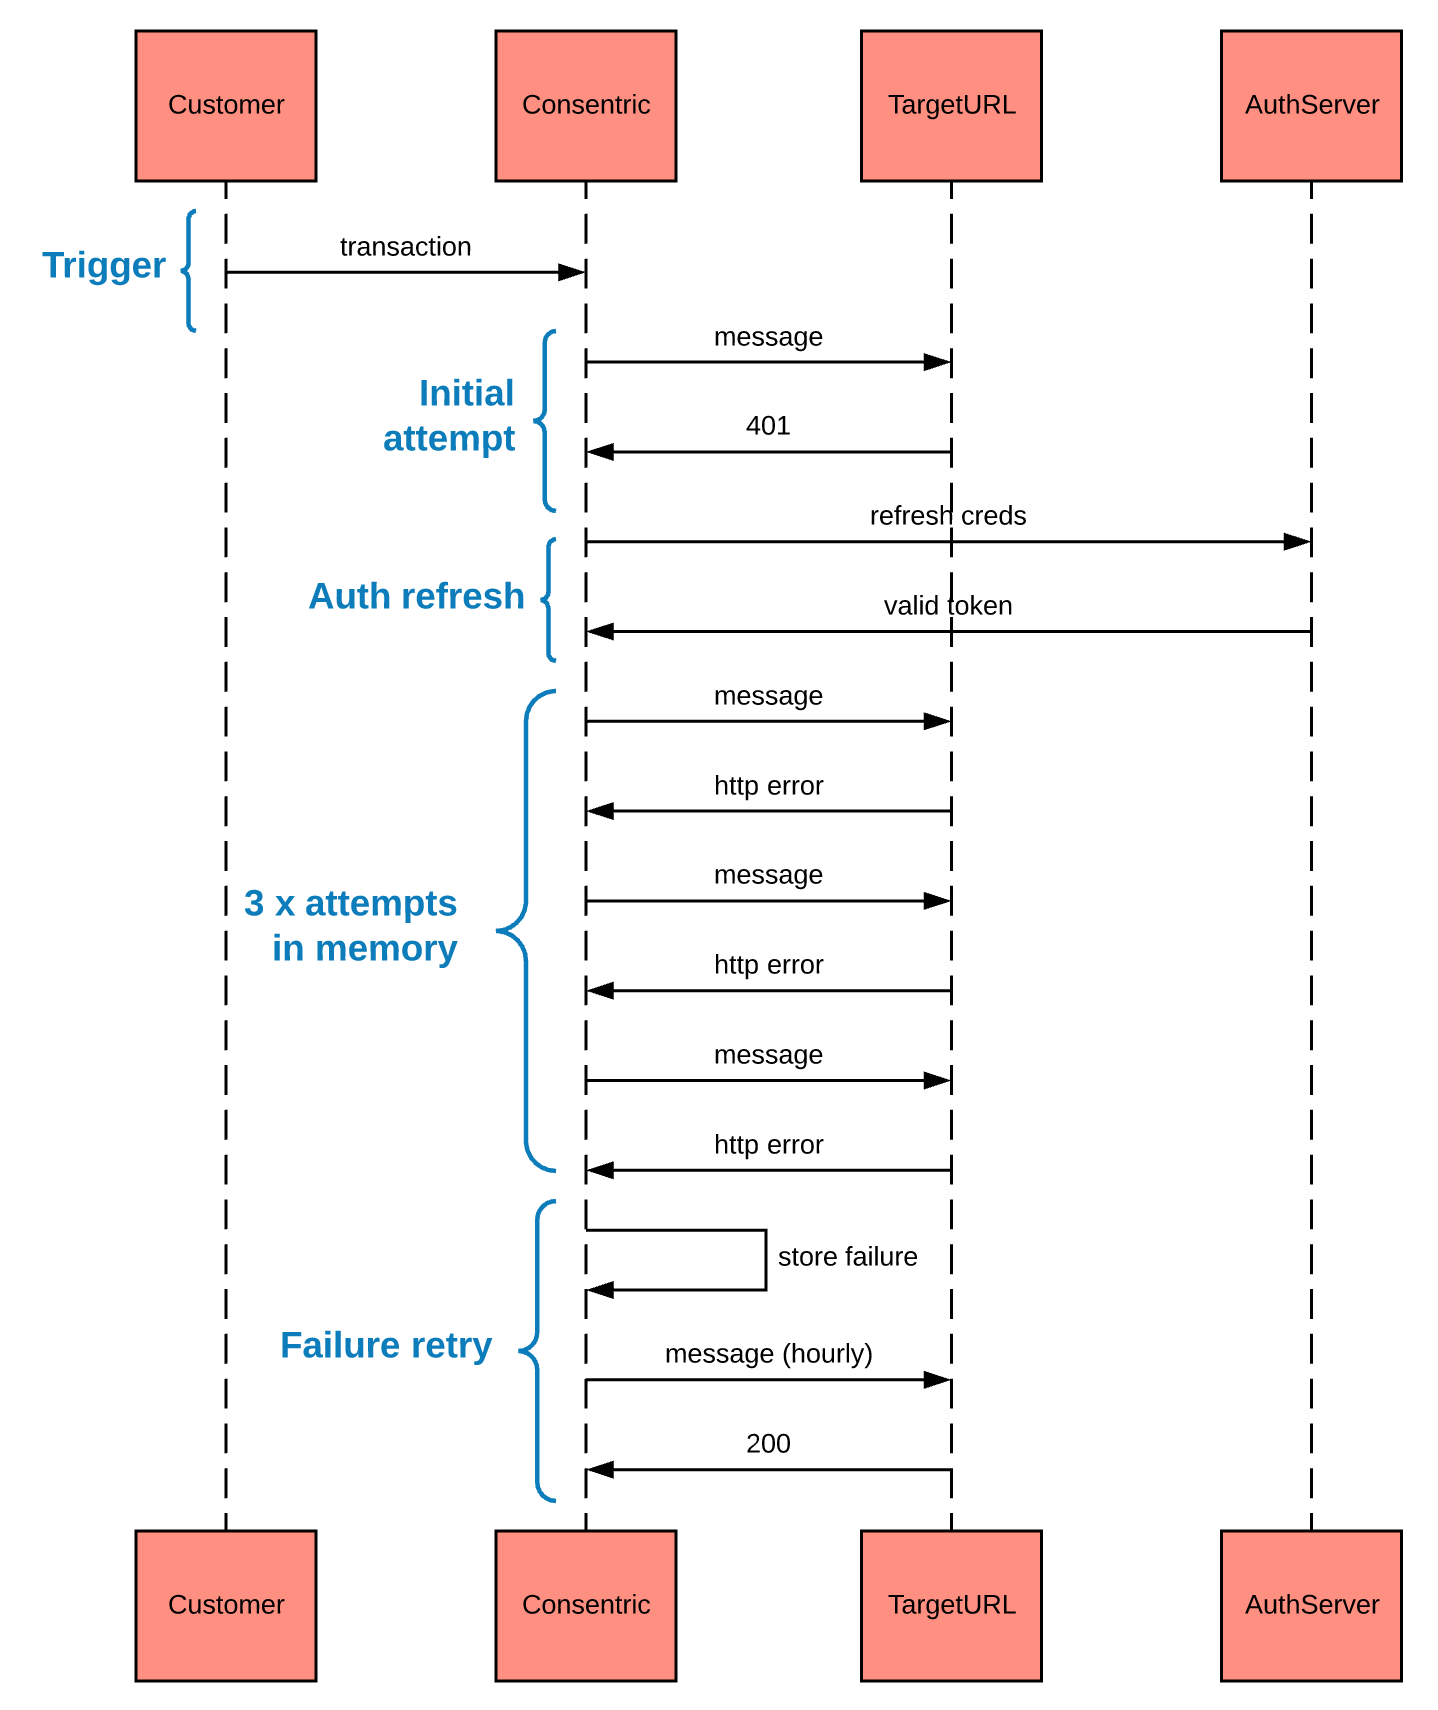
The API docs relating to webhooks are available here. The webhook message updates are attempted up to 3 times initially depending on an HTTP error response being received. If 3 successive attempts of the same message fail the payload is persisted in a failures database to be periodically retried every hour.
UML sequence for subscriptions following an Oauth2 flow is shown below:
Following is an example for a message payload for a webhook
{
  "applicationId": "your-app-id",
  "citizenId": "DataGuard-id",
  "externalRef": "your-customer-ref",
  "permissions": [
    {
      "transactionId": "permission-transaction-id",
      "optionType": "option/group",
      "optionId": "option-id",
      "justification": "lawful-basis",
      "state": "STATE",
      "channel": "channel-txn-received-via",
      "campaign": "attributed-campaign-id",
      "privacyPolicyId": "privacy-policy-id-in-DataGuard",
      "privacyPolicyRef": "reference-of-above",
      "permissionStatementId": "permission-statement-id-in-DataGuard",
      "permissionStatementRef": "reference-of-above",
      "recordedBy": "id-of-who-recorded-txn",
      "recordedByName": "name-of-above",
      "recordedClient": "system/client-id",
      "recordedClientName": "system/client-name",
      "delegatedAuthorityId": "id-of-delegate-who-recorded-txn",
      "delegatedAuthorityName": "name-of-delegate-who-recorded-txn",
      "recordedAt": "iso-timestamp",
      "obtainedAt": "iso-timestamp",
      "validFrom": "iso-timestamp",
      "validUntil": "iso-timestamp"
    }
  ],
  "preferences": [
    {
      "preference": "ref-of-preference",
      "choices": [
        {
          "reference": "ref-of-choice-made",
          "label": "human-readable-label-of-choice"
        }
      ],
      "label": "display-label-of-preference",
      "submissionId": "preference-submission-id",
      "updatedAt": "iso-timestamp"
    }
  ],
    "sentAt": "iso-timestamp"
}
Use sentAt timestamp
The DataGuard subscription webhook will provided a sentAt ISO8601 timestamp in the message payload. This can be used in the logic for updating your synced system records.
NOTE - the messages will contain the full set of permissions and preferences on each update (not just the changed values).
Updated 9 months ago