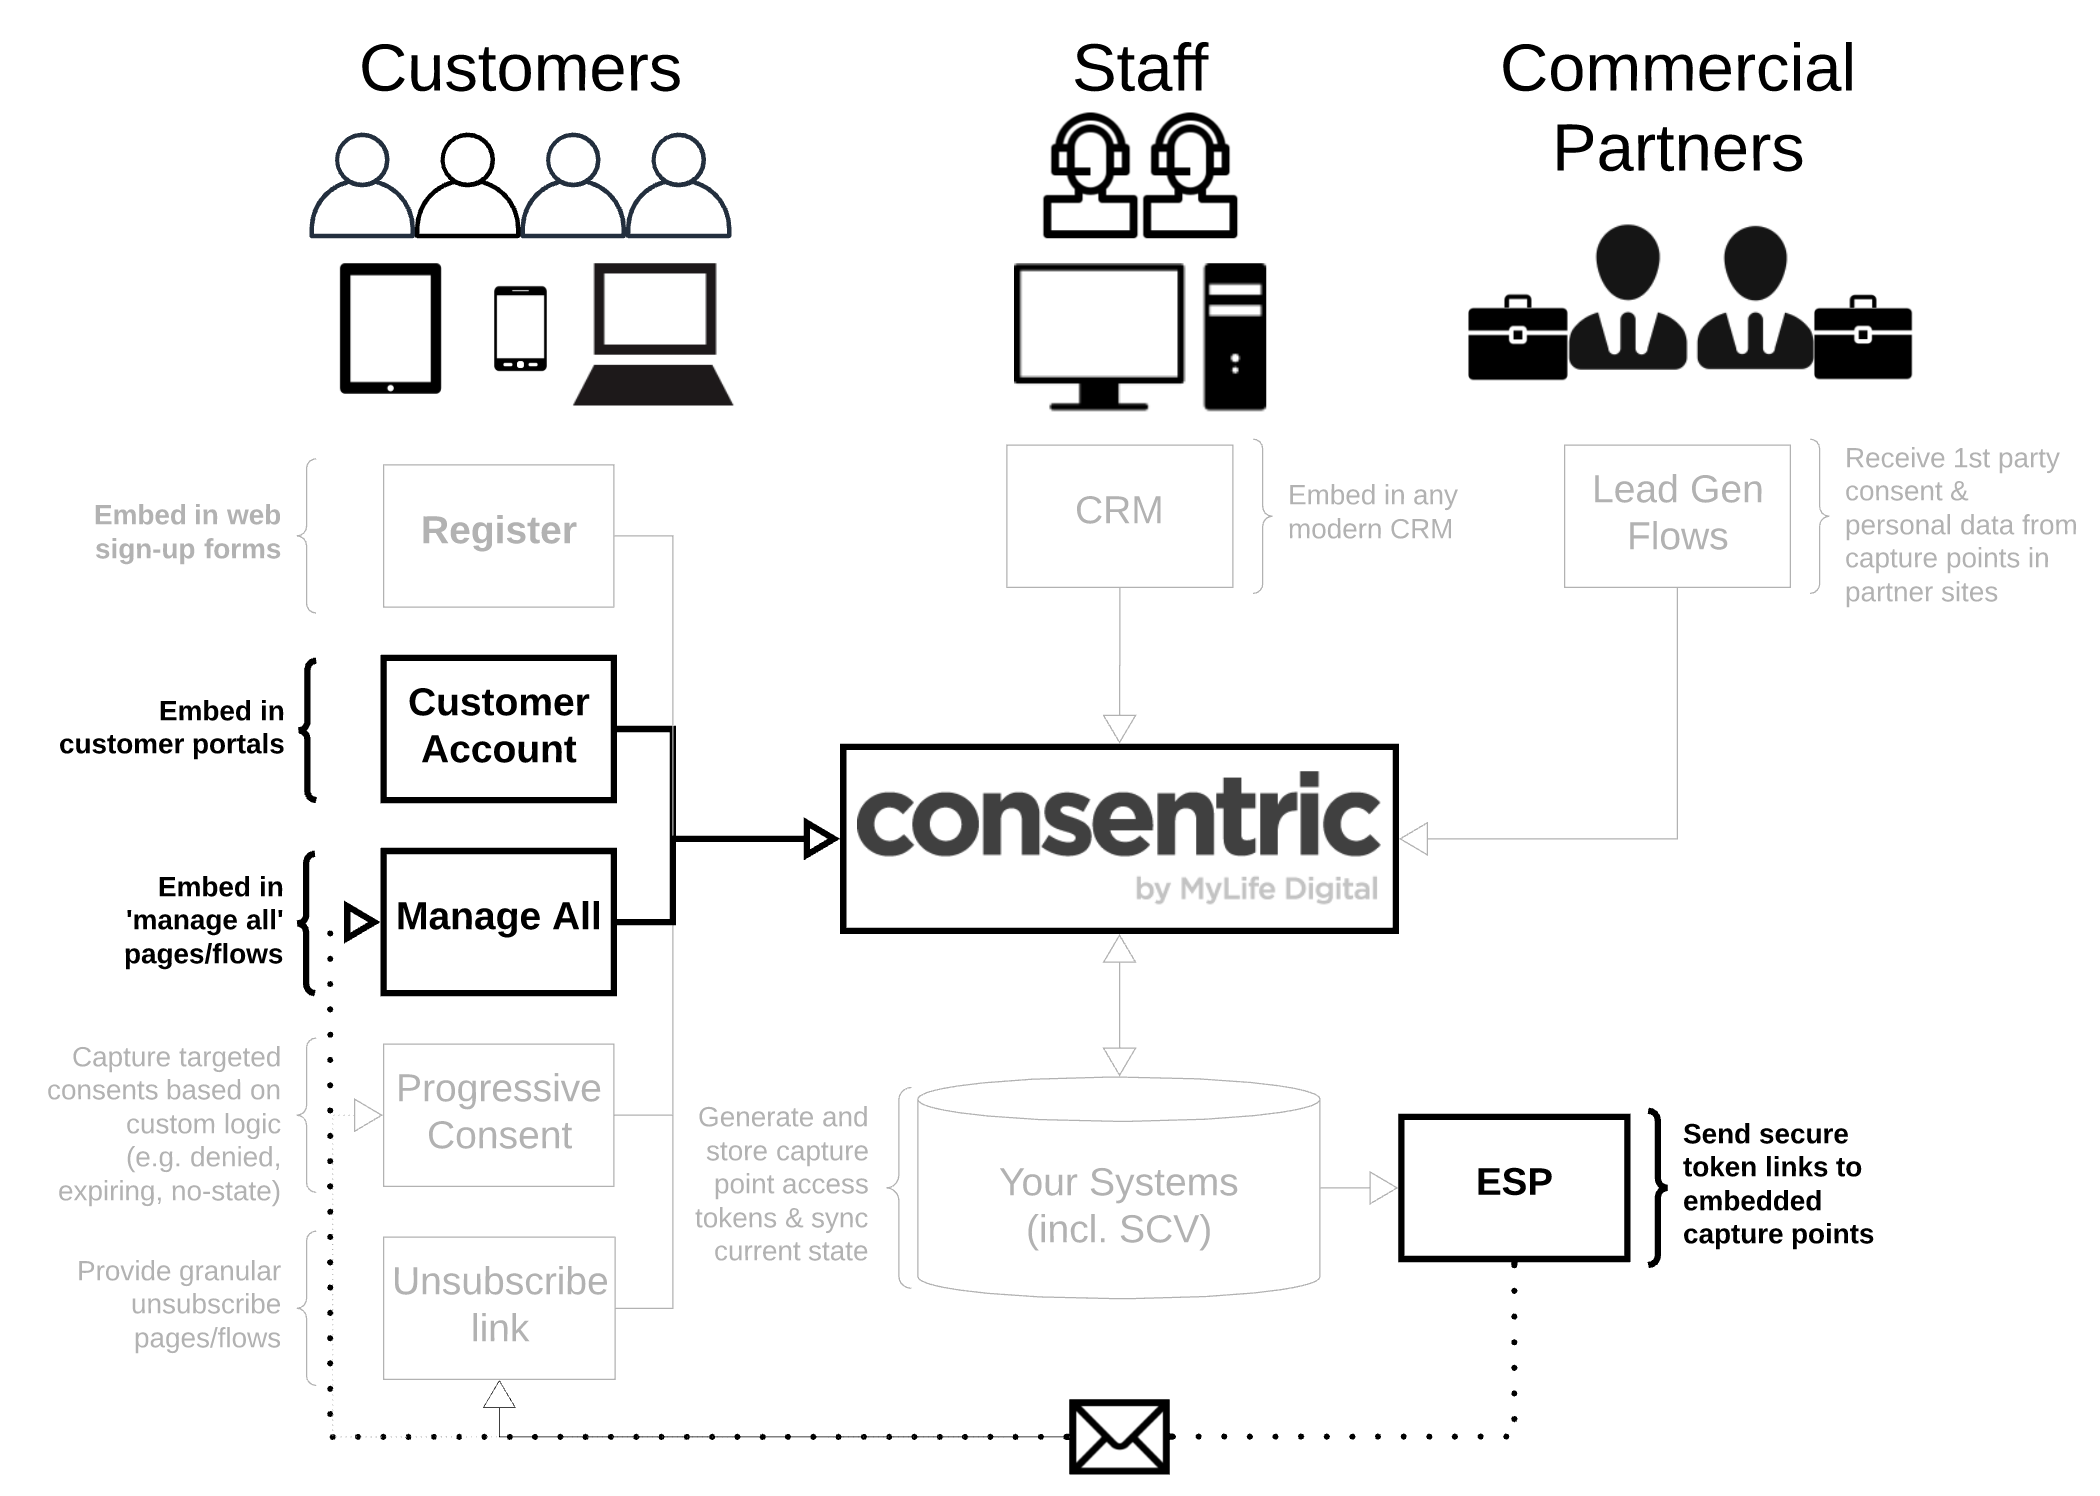
Customer 'manage-all' (Collect+)
Allow customers to see & control their permissions

Set-Up
The 'Collect+' contact point runs using the standard configuration shown in the main Capture Points page. Follow the set-up and configuration steps there to get your capture point embedded and styled to fit your requirements.
This type of capture point runs using access tokens to identify the customer, and to render their existing state to allow informed selections to be made. This requires the StatefulWidget.load function.
Via Customer Portal
If you have a secure customer portal where you authenticate users at log-in, you can use the on-demand access tokens to ensure you only generate these secure tokens as and when required. Full details on how to do that are available here
Via Email Link
No customer portal? No problem
If you wish to offer a widget to allow customers to manage all permissions centrally without having a secure online portal you can achieved that with a 'Manage All' link in your email correspondence.
Generate tokens
If you don't provide an authentication portal for your customers you can still utilise capture points to allow customers to view and manage their own permissions. In this situation, we suggest that you generate customer access tokens in batches, and store these within your own system (see how to generate batches of tokens here).
Define target customers
You should have a process in place to interpret the customers who are contactable for the purpose you are emailing regarding (e.g. service messages, marketing), and may wish to account for their specific preferences (e.g. topics of interest, frequency of contact).
Email target customers
As part of setting up the email campaign you can include a hyperlink to the host page of your capture point. To ensure the customer sees their current state, you must include the token as a parameter in the URL query string - e.g. www.yourtargetpage.com?token=<TOKEN>.
Updated over 3 years ago
