Set up your preference centre
Page types & what they do
| Sign-up | Request email link | View & manage | |
|---|---|---|---|
| Primary Use Case | Collection of initial consents, preferences and selected personal data at the point of new user subscription | Allows users to request a link via email to view & update their consent & preference choices (each link valid for 7 days) | Displays the current state of selected consents & preferences to the end user and saves changes to Dataguard platform |
| Built-in Functionality* | Mandatory email address capture field to ensure users can use the email link journey Creates user records in the consent platform with no integration cost Value cards (dynamic text display) to show user the value of what they gain/lose by opting in or out | Points user to a specific view & manage hosted page to self-manage their consents & preferences | Value cards (dynamic text display) to show user the value of what they gain/lose by opting in or out |
| Optional Functionality | Phone number capture field (data model can be extended, please enquire) Double opt-in email flow for consent capture (legal requirement in Germany, but provides a more secure consent basis) |
- All pages handle multiple languages via Dataguard content template translations & locales in page URL
Pre-requisites
| Sign-up | Request email link | View & manage |
|---|---|---|
| Content template This controls the permisison & preference inputs that are displayed, plus prvides a link to the current privacy policy, and optional text copy | View & manage hosted page The links within the emails sent to the end user point them to a specific view & manage type preference centre, so a page must exit before you create the email link page | Content template This controls the permission & preference inputs that are displayed, and provides a link to the current privacy policy and optional text |
Set-up steps
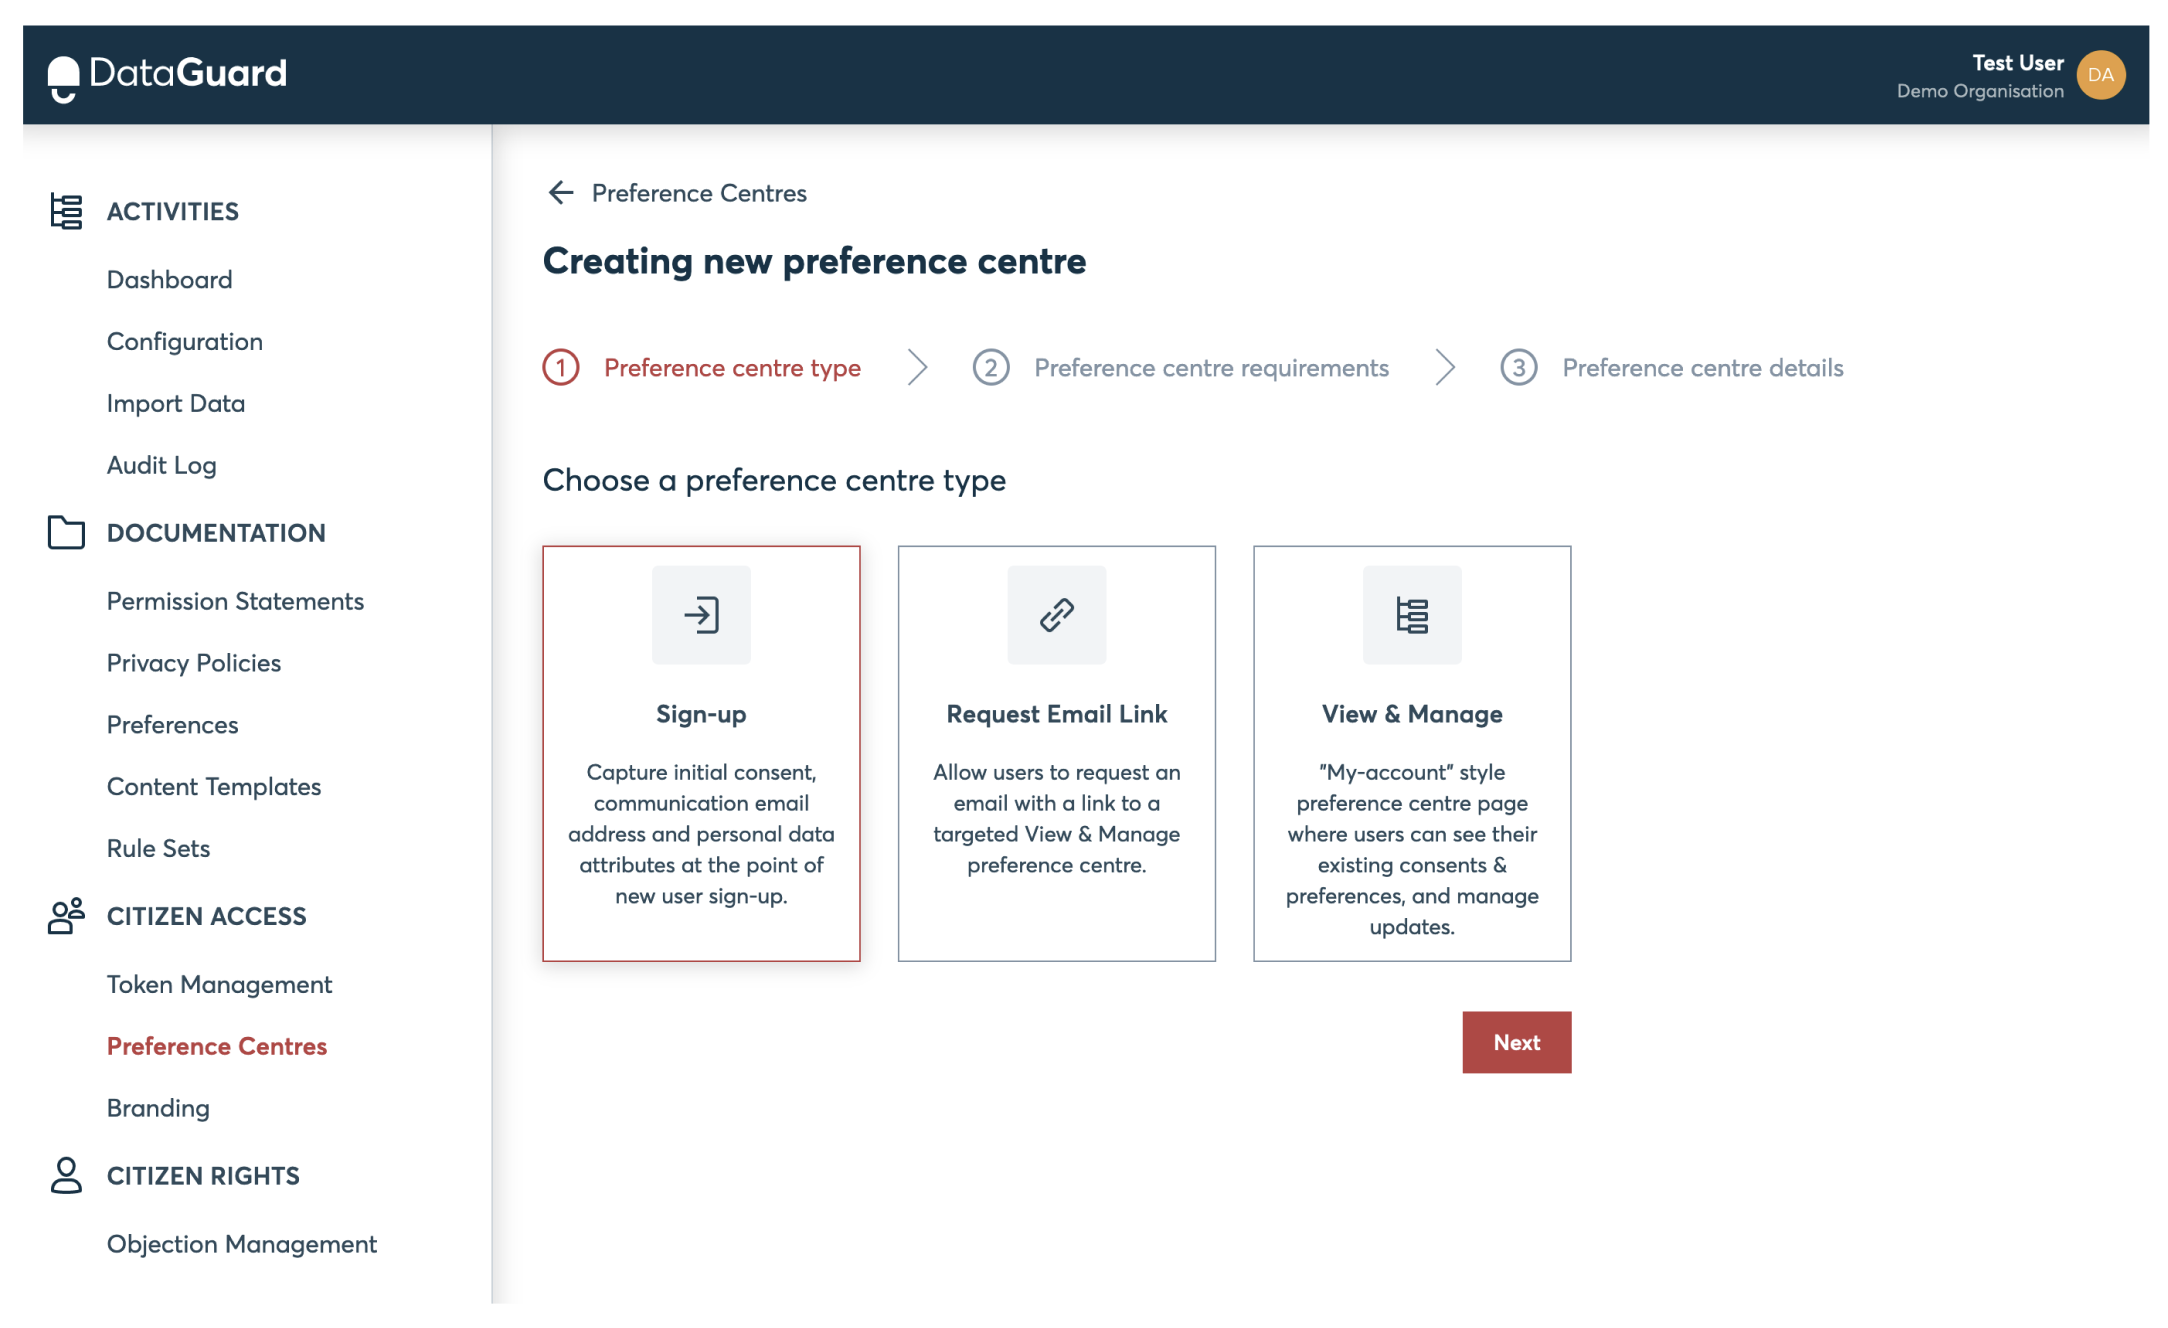
- Log into the Dataguard consent platform admin portal, select the "Preference Centres" link from the navigation bar and click the "+ New preference centre" button

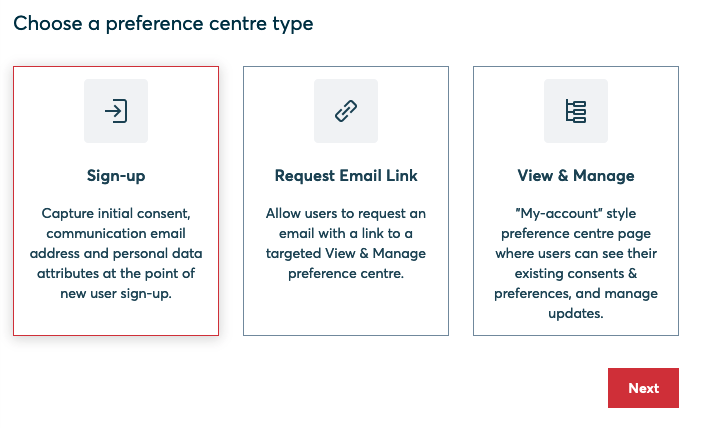
- Select the required preference centre type and click "next"
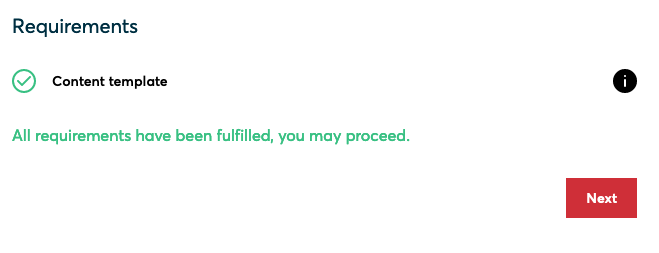
- Check pre-requisite requirements have been met, and click "Next" (if you are shown a warning that requirements are not met, please follow the requested steps and retry)
- Follow page-type specific steps below
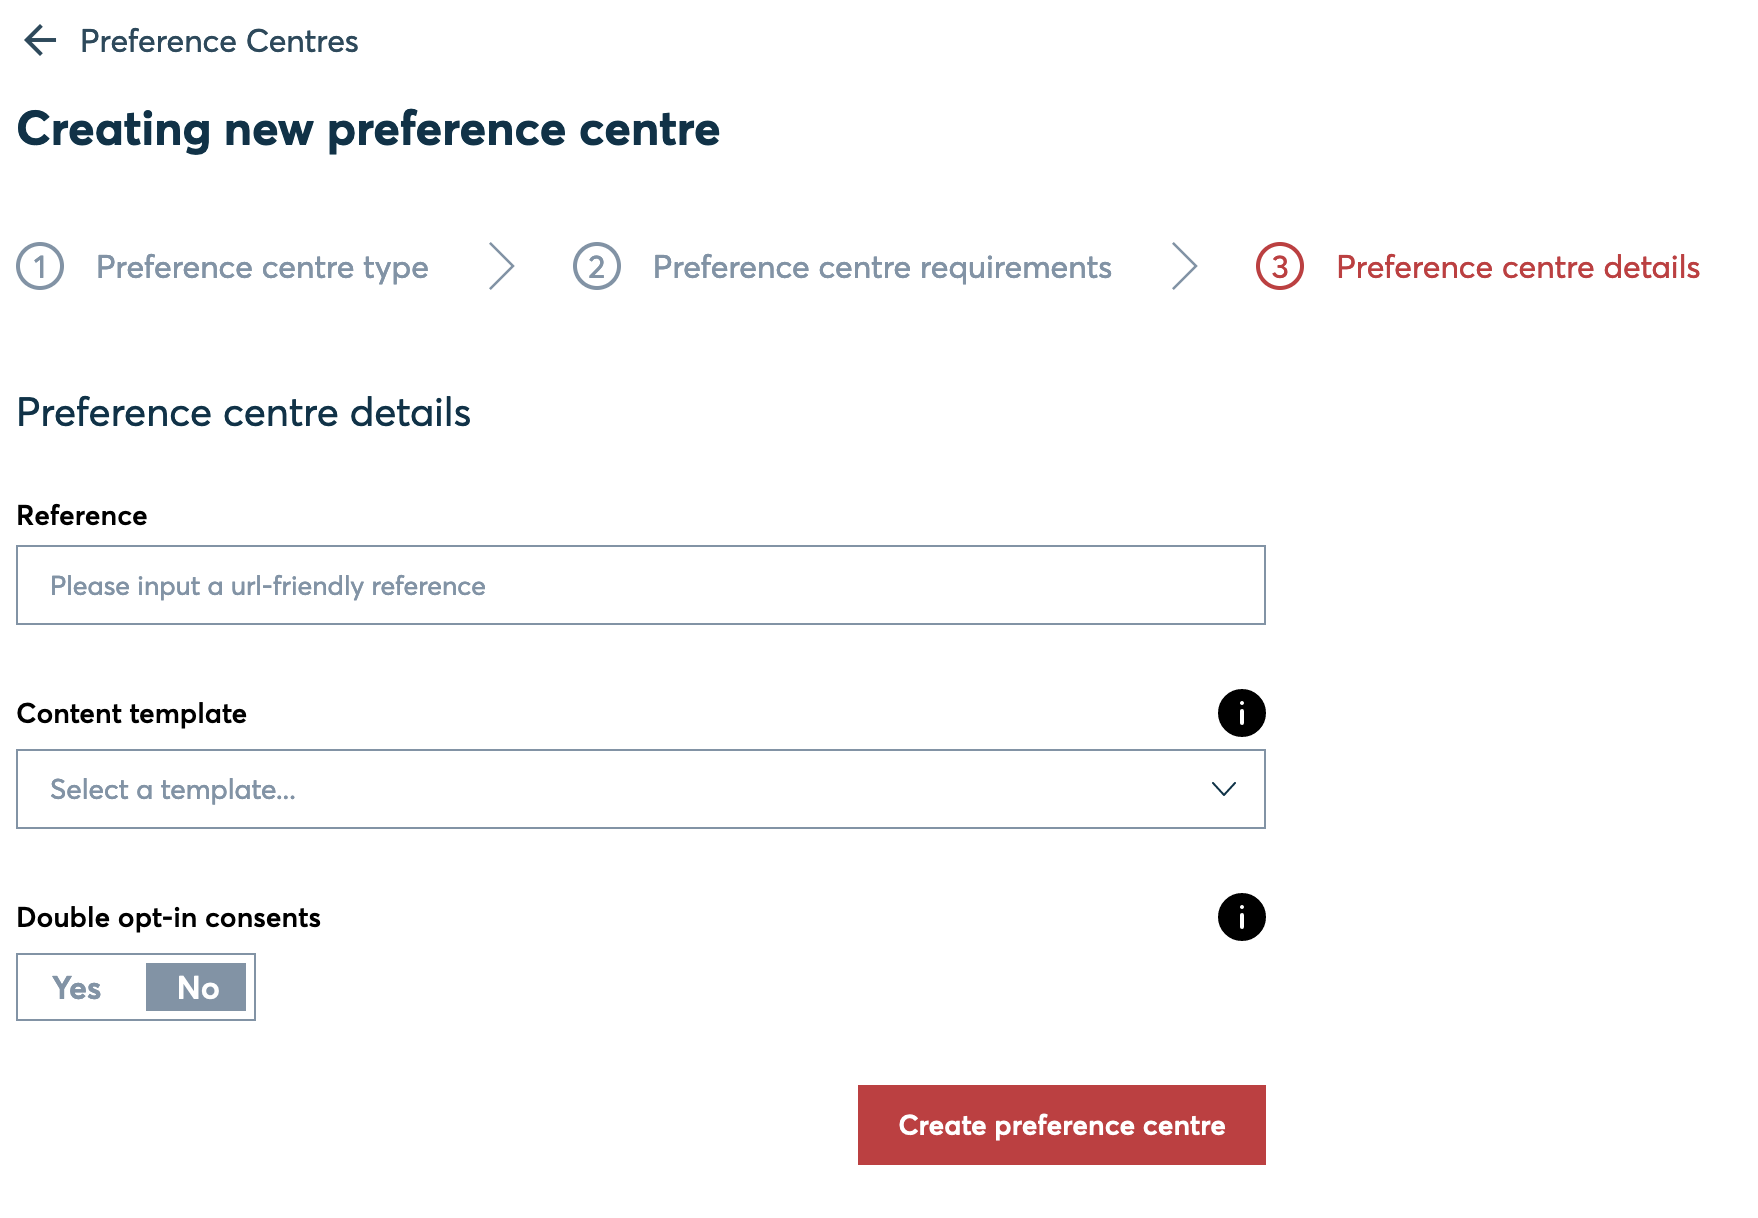
Sign-up
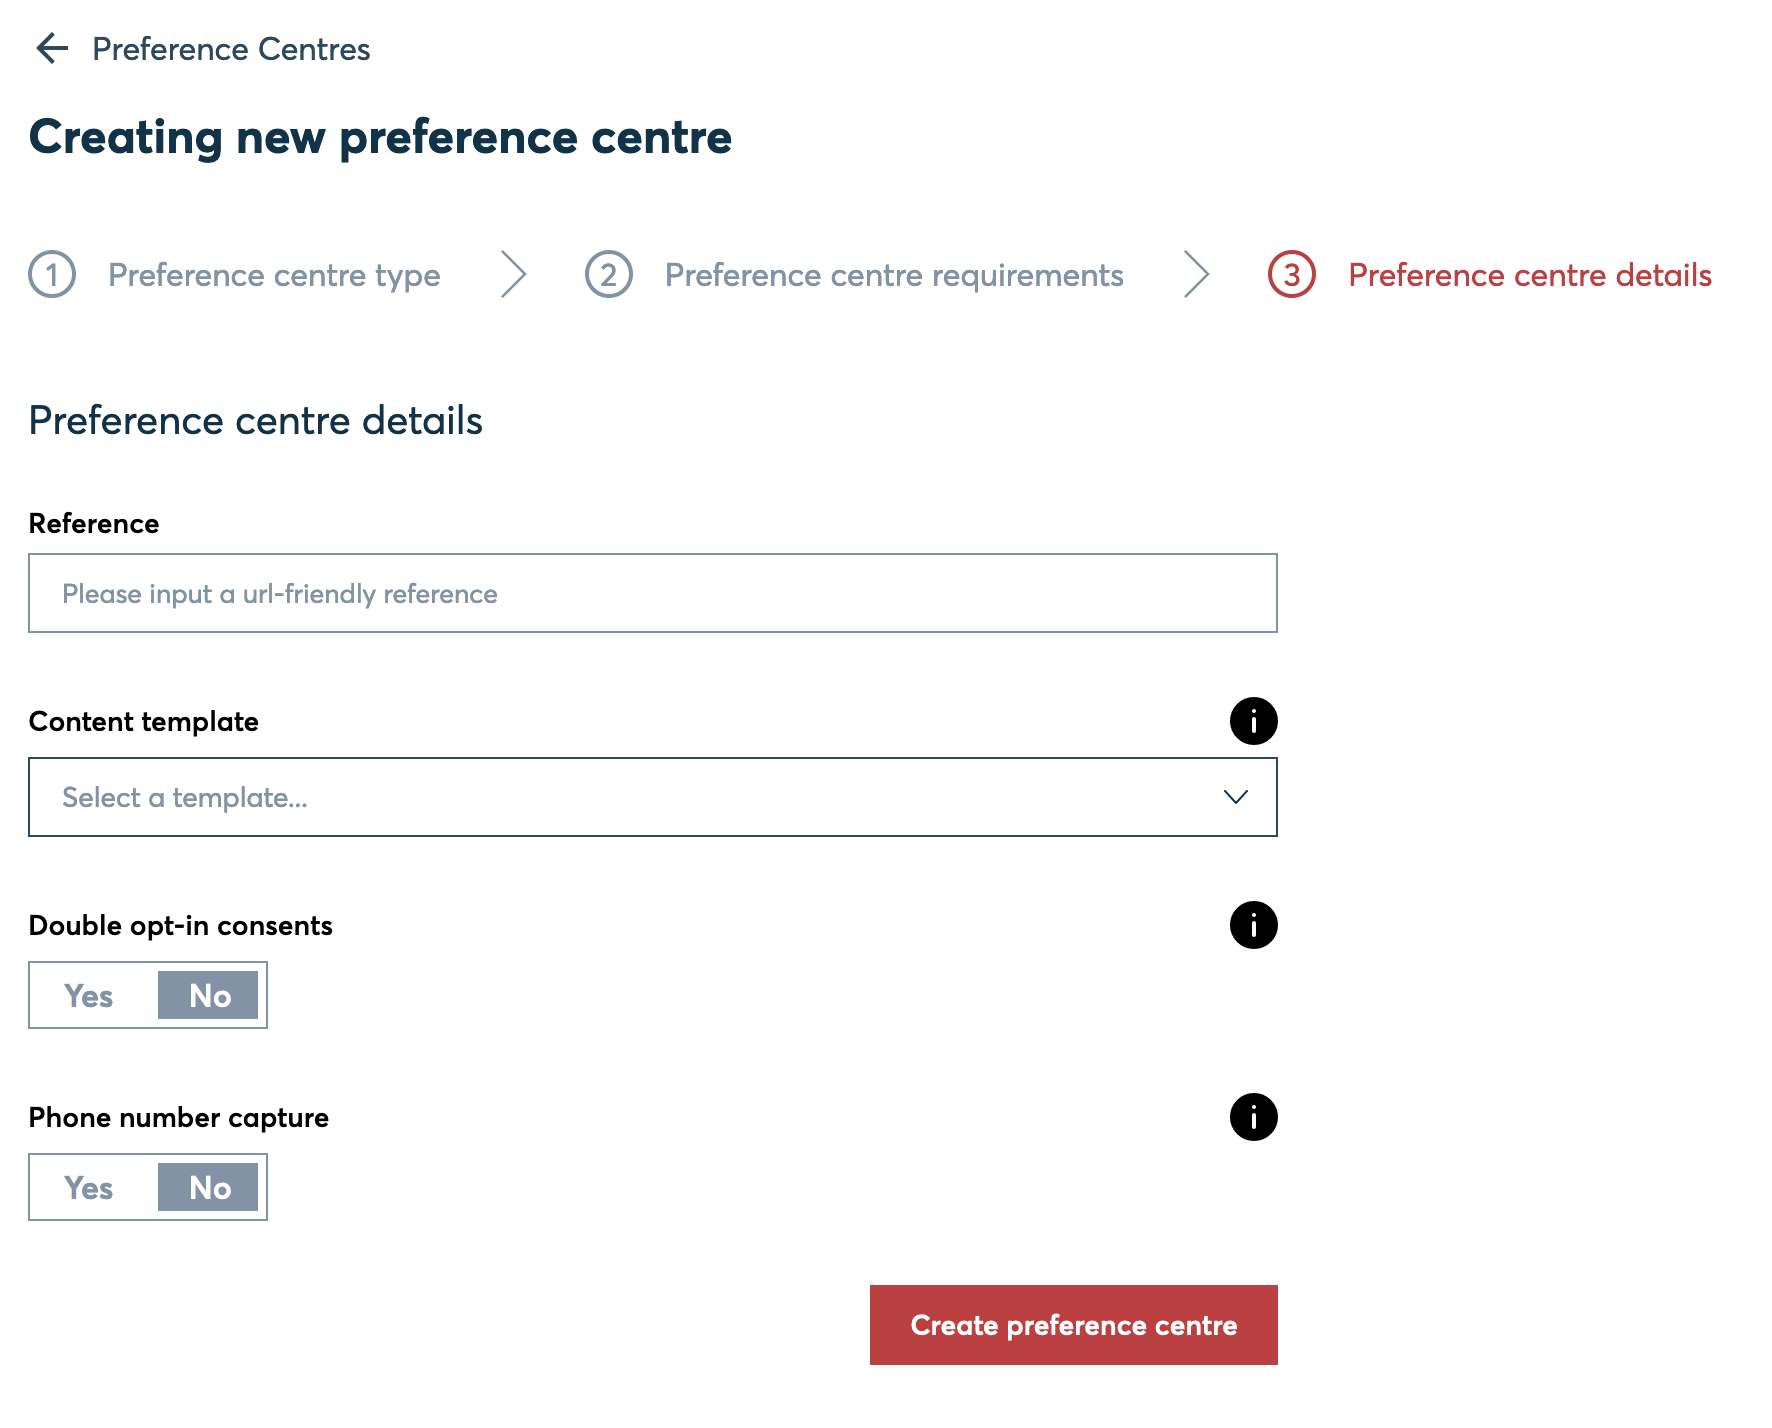
- Enter a page reference which details the hosted page function. This will be displayed in the view preference centres screen, and must contain no white spaces or special characters (e.g. website-sign-up)
- Select a content template from the dropdown list
- Specify double opt-in preference (if enabled the user will be sent an email to confirm consent)
- Specify phone number capture preference (if enabled an optional phone number submission field is displayed)
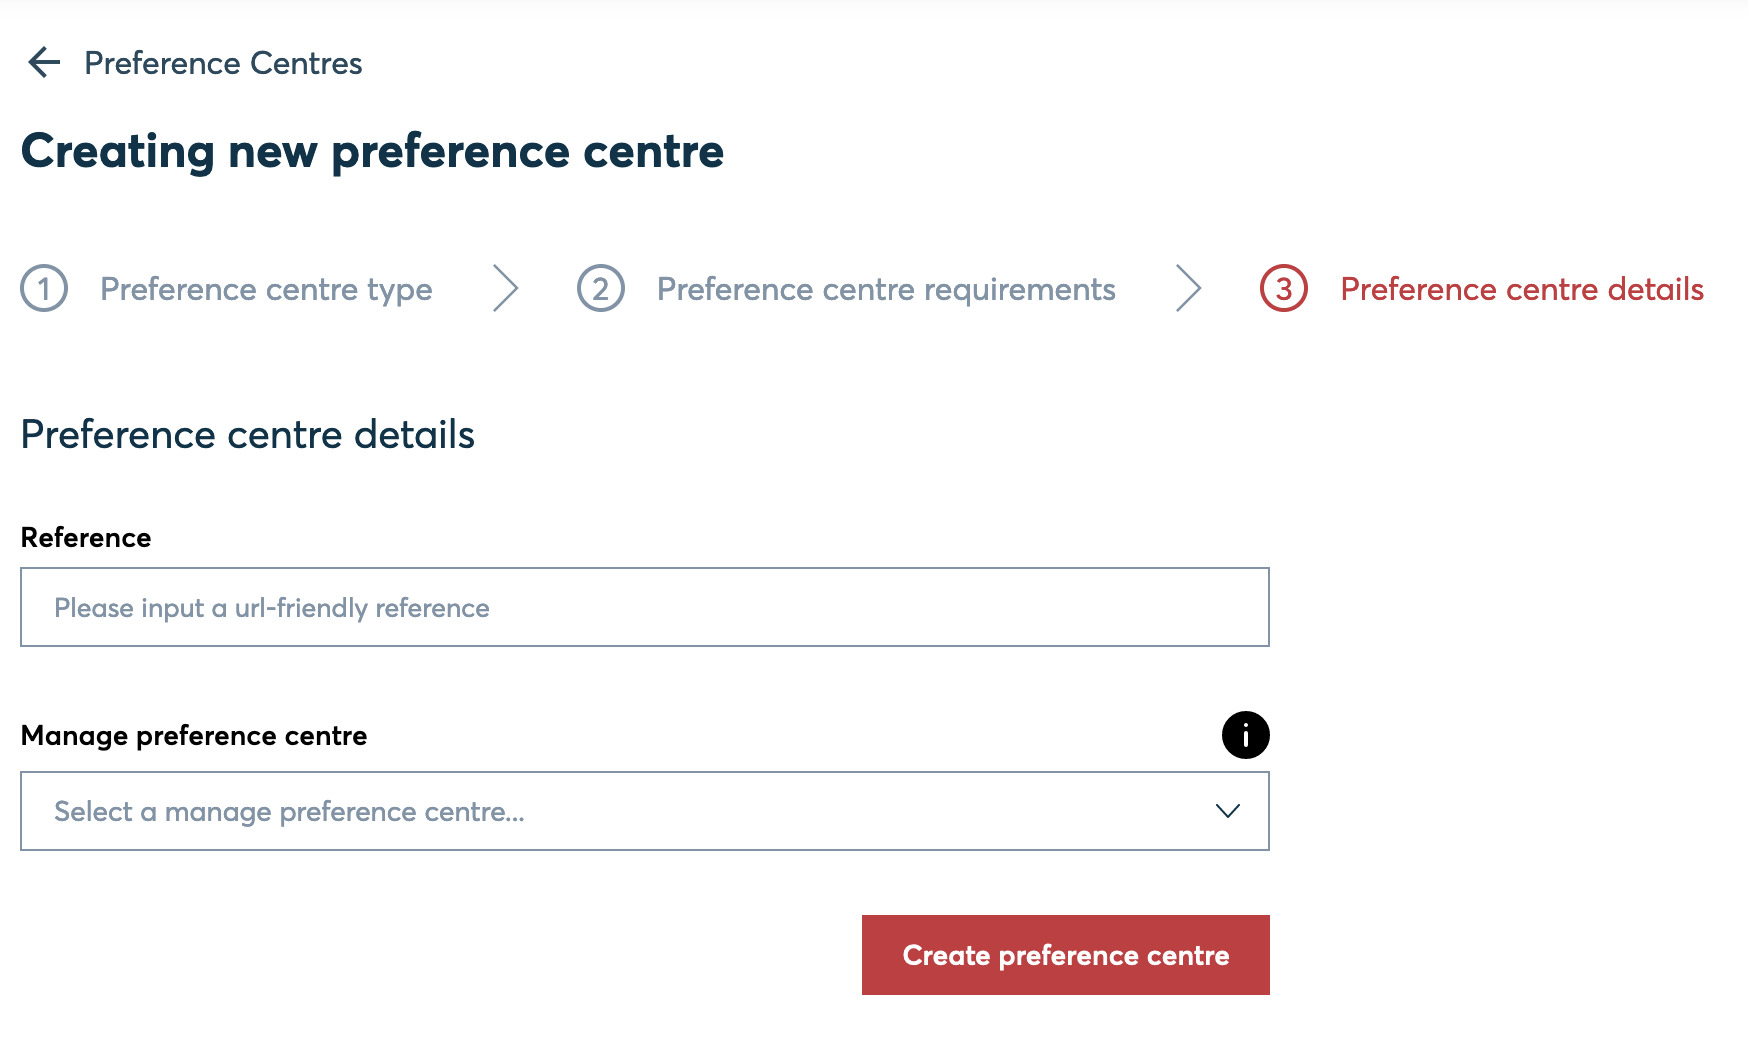
Request email link
- Enter a page reference which details the hosted page function. This will be displayed in the view preference centres screen, and must contain no white spaces or special characters (e.g. my-account-email)
- Select an existing view & manage hosted page from dropdown list (this defines the page that the links requested from the page will point at)
View & manage
- Enter a page reference which details the hosted page function. This will be displayed in the view preference centres screen, and must contain no white spaces or special characters (e.g. my-account-page)
- Select a content template from dropdown list
- Specify double opt-in preference (if enabled the user will be sent an email to confirm consent)
- Click "Create preference centre" button

Updated 11 months ago