Ping Identity
DataGuard CPM provides a simple out of the box integration with Ping Identity. This is a one-way integration that creates Citizens in DataGuard CPM when a User is created in Ping Identity. This integration requires your Ping Identity environment id as well as OAuth 2.0 credentials to access your Ping environment. The rest of the setup will be automated. The instructions below explain the setup process.
This integration is new and changing. Please get in touch with us if it doesn't currently meet your requirements.
Prerequisites
Before getting started, make sure you have access to the following:
- The DataGuard CPM Platform.
- Ping Identity environment with the ability to create "Applications".
If you don't have access to the DataGuard CPM Platform, please contact us.
Getting Started
The setup for the integration can be done from the DataGuard CPM Platform. The instructions below describe how to find the integrations marketplace.
- Navigate to the DataGuard CPM Platform.
- In the menu bar, expand the "Integrations" section.
- Navigate to the "Marketplace".
If the Marketplace link is not present, please contact us.
Creating a Ping Identity Integration
You will see the "DataGuard CPM - Ping Identity" integration in the list of all integrations available. Click on the integration and then click on the "Configure" button to start the setup process.
Ping Identity integration
Step 1: Initial Configuration
You will then see an "Initial Configuration" page, you can update the "Name" of the integration if you would like, otherwise click "Next" to go to the next page.
Step 2: Connections
The "Connections" section configures the authentication for both Ping Identity and for the DataGuard CPM platform.
Create an "Application" in Ping Identity
Before adding the Ping credentials to the integration configuration, an "Application" needs to be created in the Ping environment. Follow these steps to create an Application:
- Sign in to Ping in a new tab.
- In the menu bar, expand the "Connections" section.
- Navigate to "Applications".
- Click the "+" button at the top of the page.
- Give the application a Name, e.g. "DG CPM Integration".
- Set the "Application Type" to be "Worker".
- Click "Save" to create the Application.

Add Application configuration
The newly created Application now needs to have Roles applied to it to give it the access required by the integration. The following steps explain how to add these Roles:
- Click on the newly created Application to edit it.
- Click on the "Roles" tab.
- Click on "Grant Roles".
- Find the "Environment Admin" Role, and click the checkbox on the right hand side to grant access to this Role.
- Click "Save".
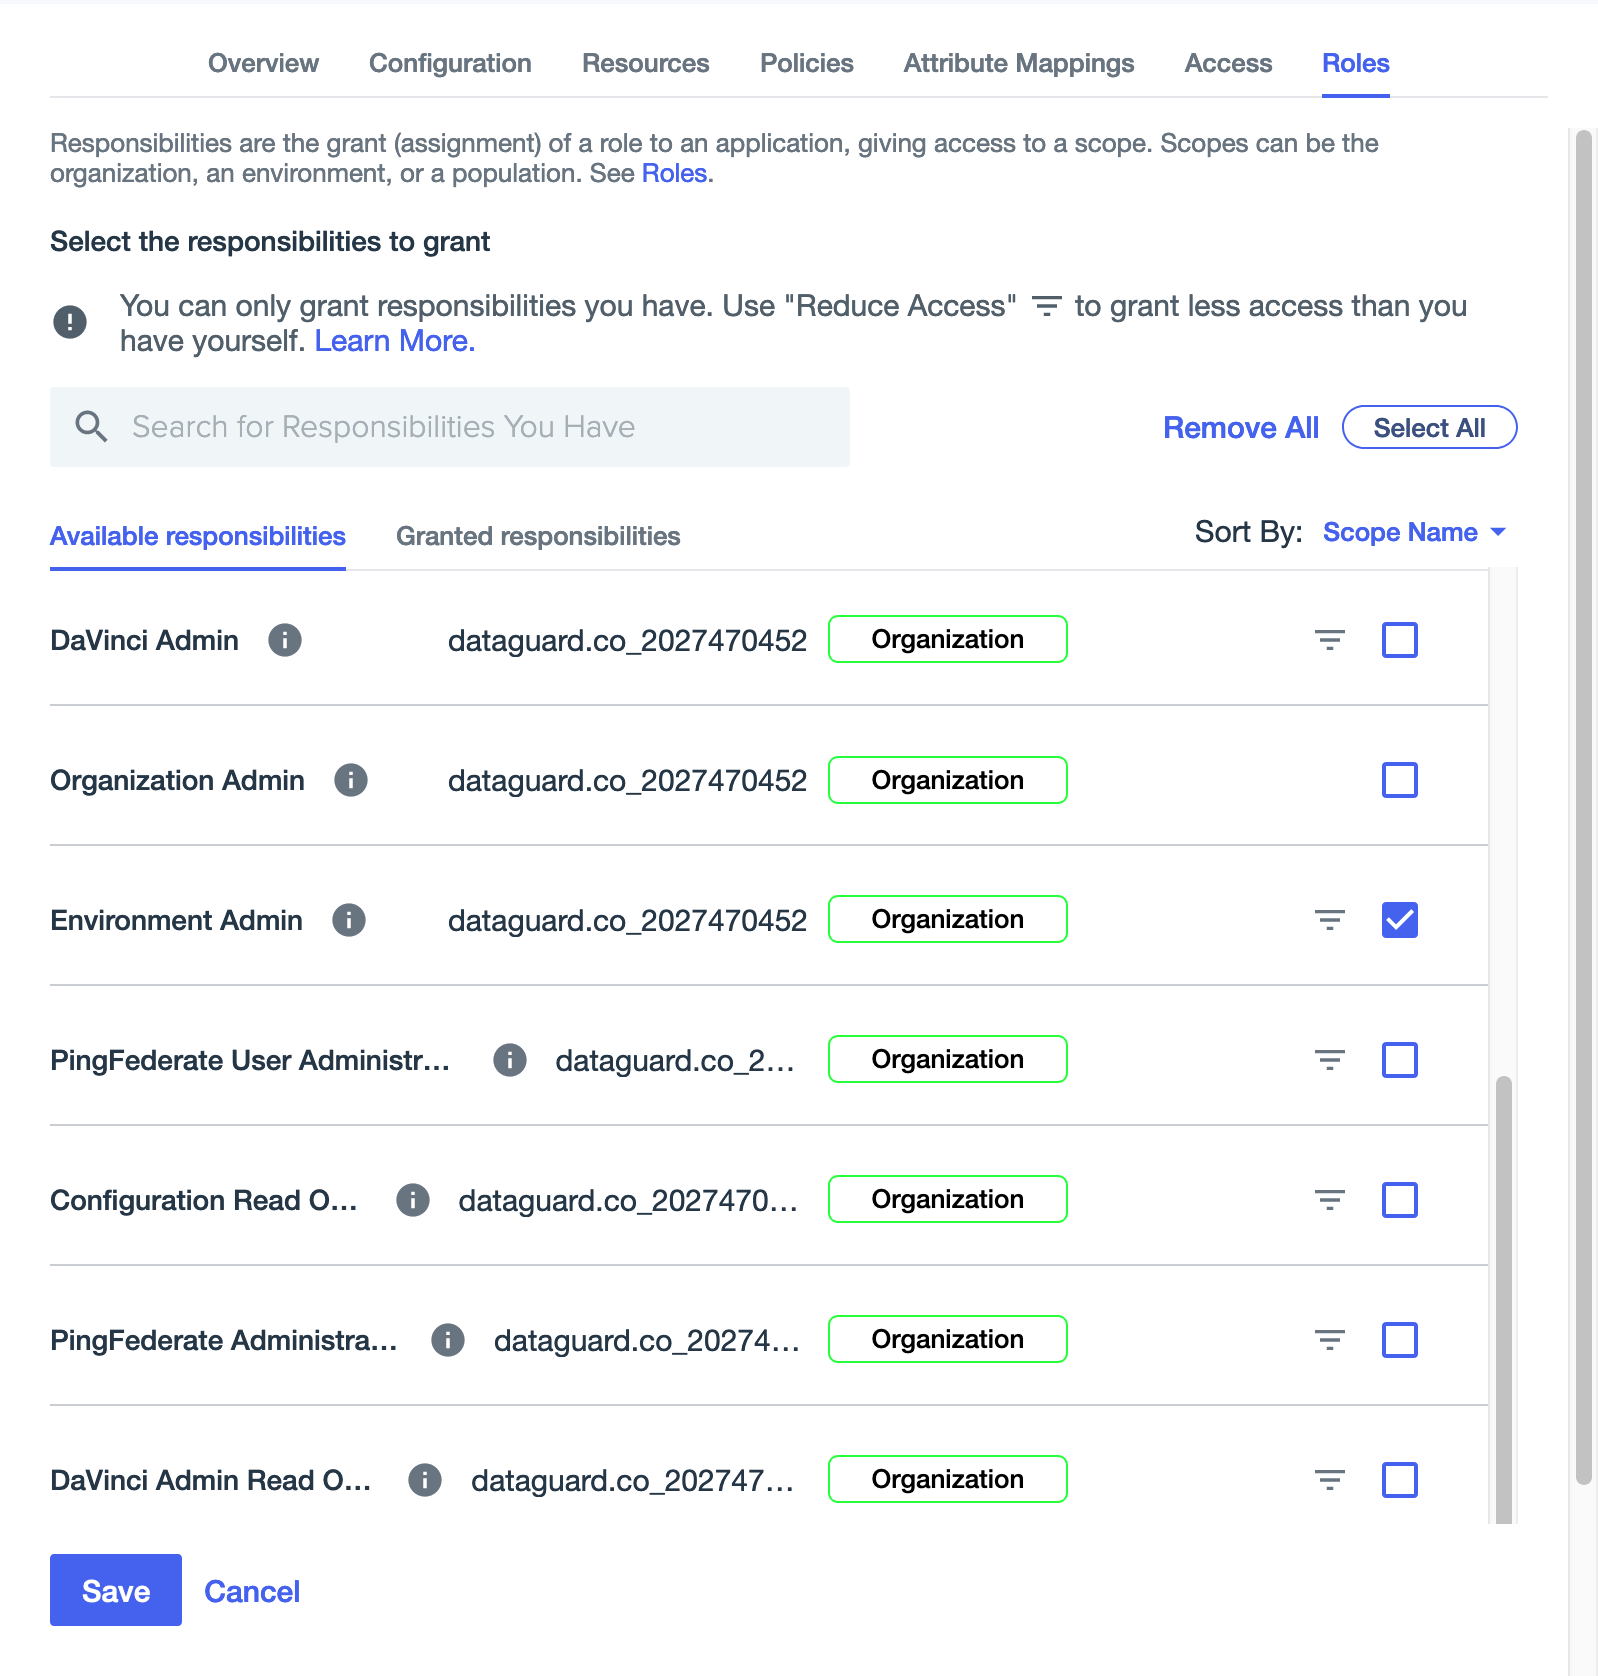
Application Roles tab
Finally, enable the Application by toggling the slider at the top of the screen as shown in the image below.

Application header bar with enabled toggle
Configure the Ping Identity Connection
Now the Ping Application has been created, the credentials can be added to the integration.
- In the Ping Identity UI, navigate to the "Configuration" tab of the Application.
- Copy the value of the "Client ID" field and paste it into the "Client ID" field in the DataGaurd CPM UI.
- In the Ping Identity UI, copy the value of the "Client Secret" field and paste it into the "Client Secret" field in the DataGaurd CPM UI.
- In the Ping Identity UI, open the "URLs" section then copy the value of the "Token Endpoint" field and paste it into the "Token URL" field in the DataGaurd CPM UI.
- Click the "Connect" button to test the connection, if the connection fails check the values you have entered and try again.
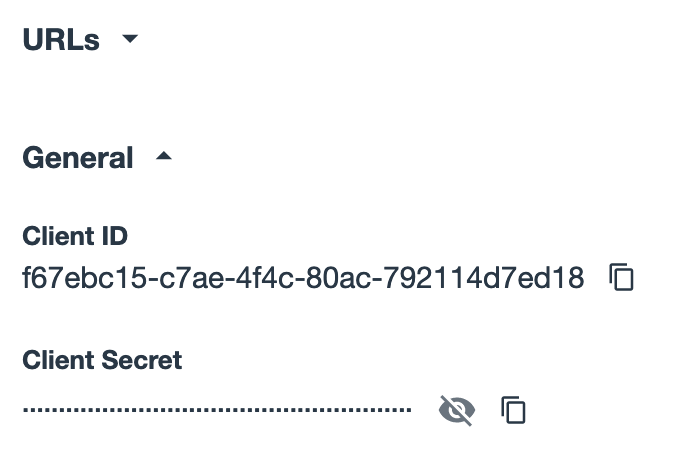
Ping Identity Application configuration
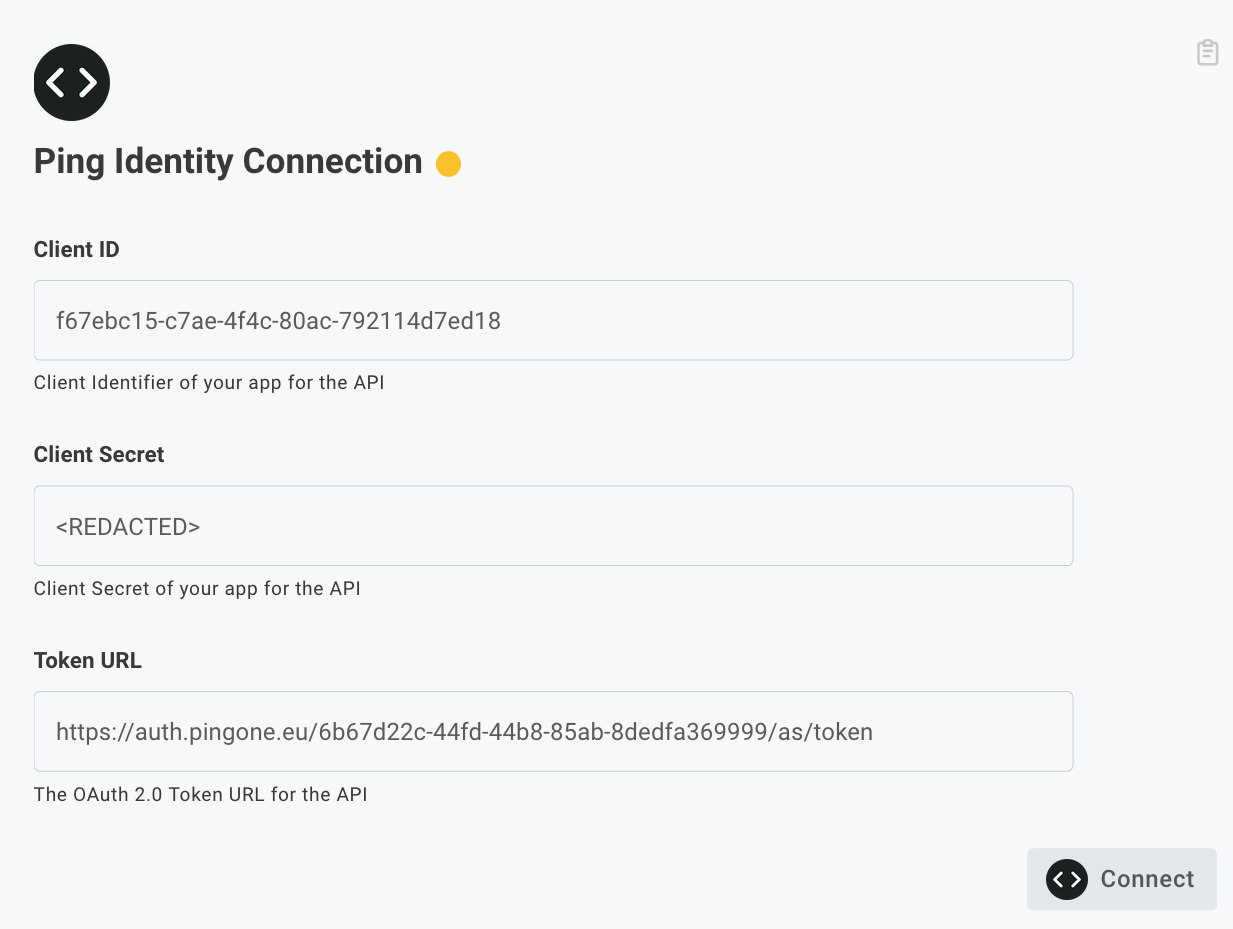
DataGuard CPM Ping Identity Connection configuration
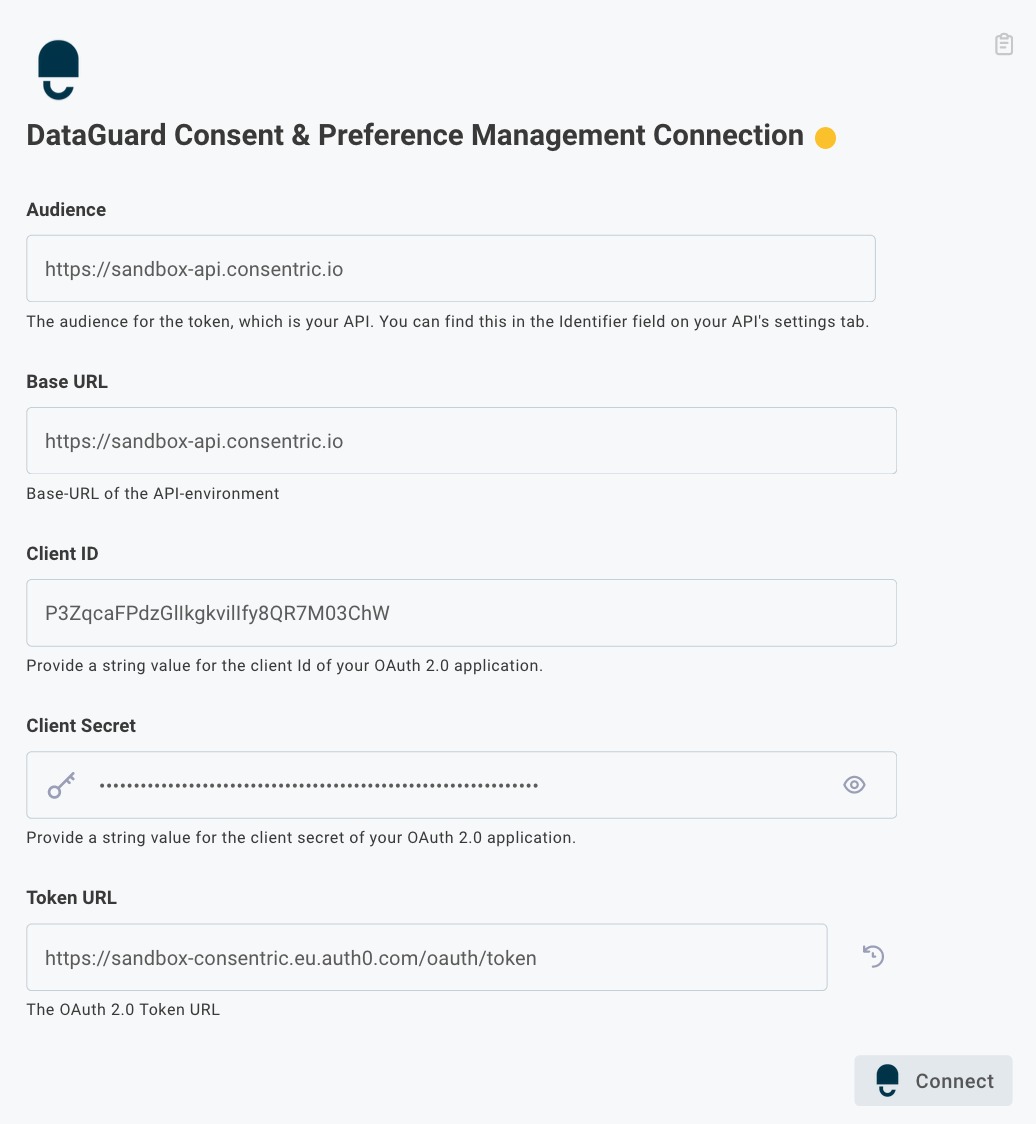
Configure the DataGuard Connection
Next, the DataGuard credentials need to be configured. Scroll down to the "DataGuard Consent & Preference Management Connection" section. This section needs to be filled in using the details received in the DataGuard CPM welcome email. If you no longer have access to these details please contact us.
The "Audience", "Client ID" and "Client Secret" can all be found in the welcome email or on the credentials page. The "Token URL" and "Base URL" are different depending on your environment. If you do not know these values please contact us.
After entering these details, click the "Connect" button to test the connection, if the connection fails check the values you have entered and try again.
Click "Next" to go to the next page.
DataGuard CPM Connection configuration
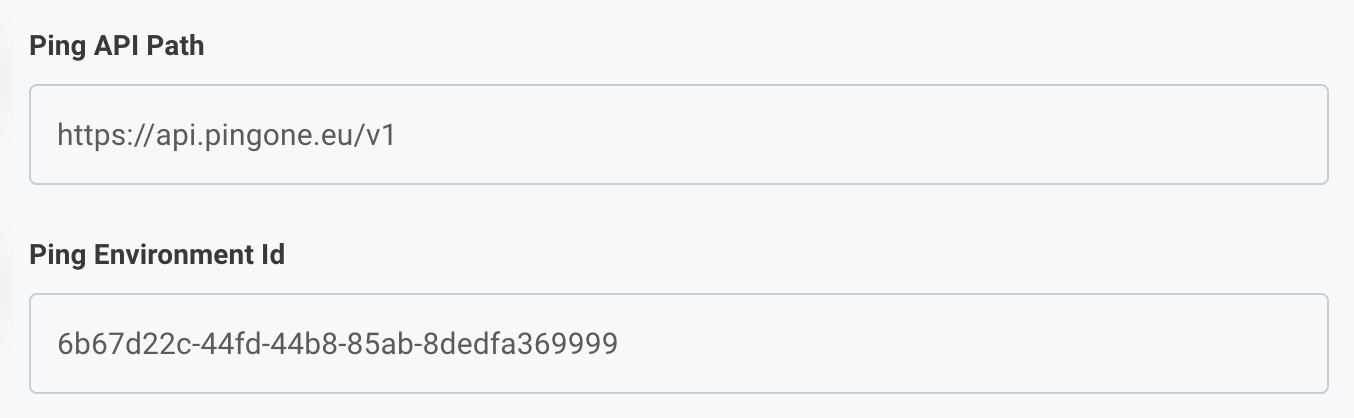
Step 3: Ping Identity
Enter the "Ping API Path" value for your Ping Identity environment, this will probably be https://api.pingone.eu/v1.
Enter the "Ping Environment Id", you can find this value in the "Configuration" tab of your Ping Application.
Click "Next" to go to the next page.
Ping Identity configuration
Step 4: DataGuard CPM
Enter the "Application Id", you can find this value in your welcome email. If you no longer have access to the email, please contact us.
Click "Finish" to complete the setup.

DataGuard CPM configuration
Test the Integration
To make sure the integration is working, test it by creating a user in the Ping Identity UI. Find the id of the user and check that it has been created in DataGuard CPM. To check it has been created in DataGuard CPM, navigate to "Permissions" at the top of the page, and search for the user using it's it's Ping Identity id.
Updated 4 months ago