Content Templates
DataGuard's Content Template interface empowers businesses to collect consents and preferences seamlessly. By utilising our configurable blocks, you can swiftly create customised content templates in a matter of minutes. These templates can be seamlessly integrated into your workflow, allowing you to effortlessly gather consent and preferences from your users.
To access the Content Templates feature on the platform, follow these simple steps:
- Login to the DataGuard consent & preference management platform
- Go to the "SET UP" section-> Click on "Content Templates."
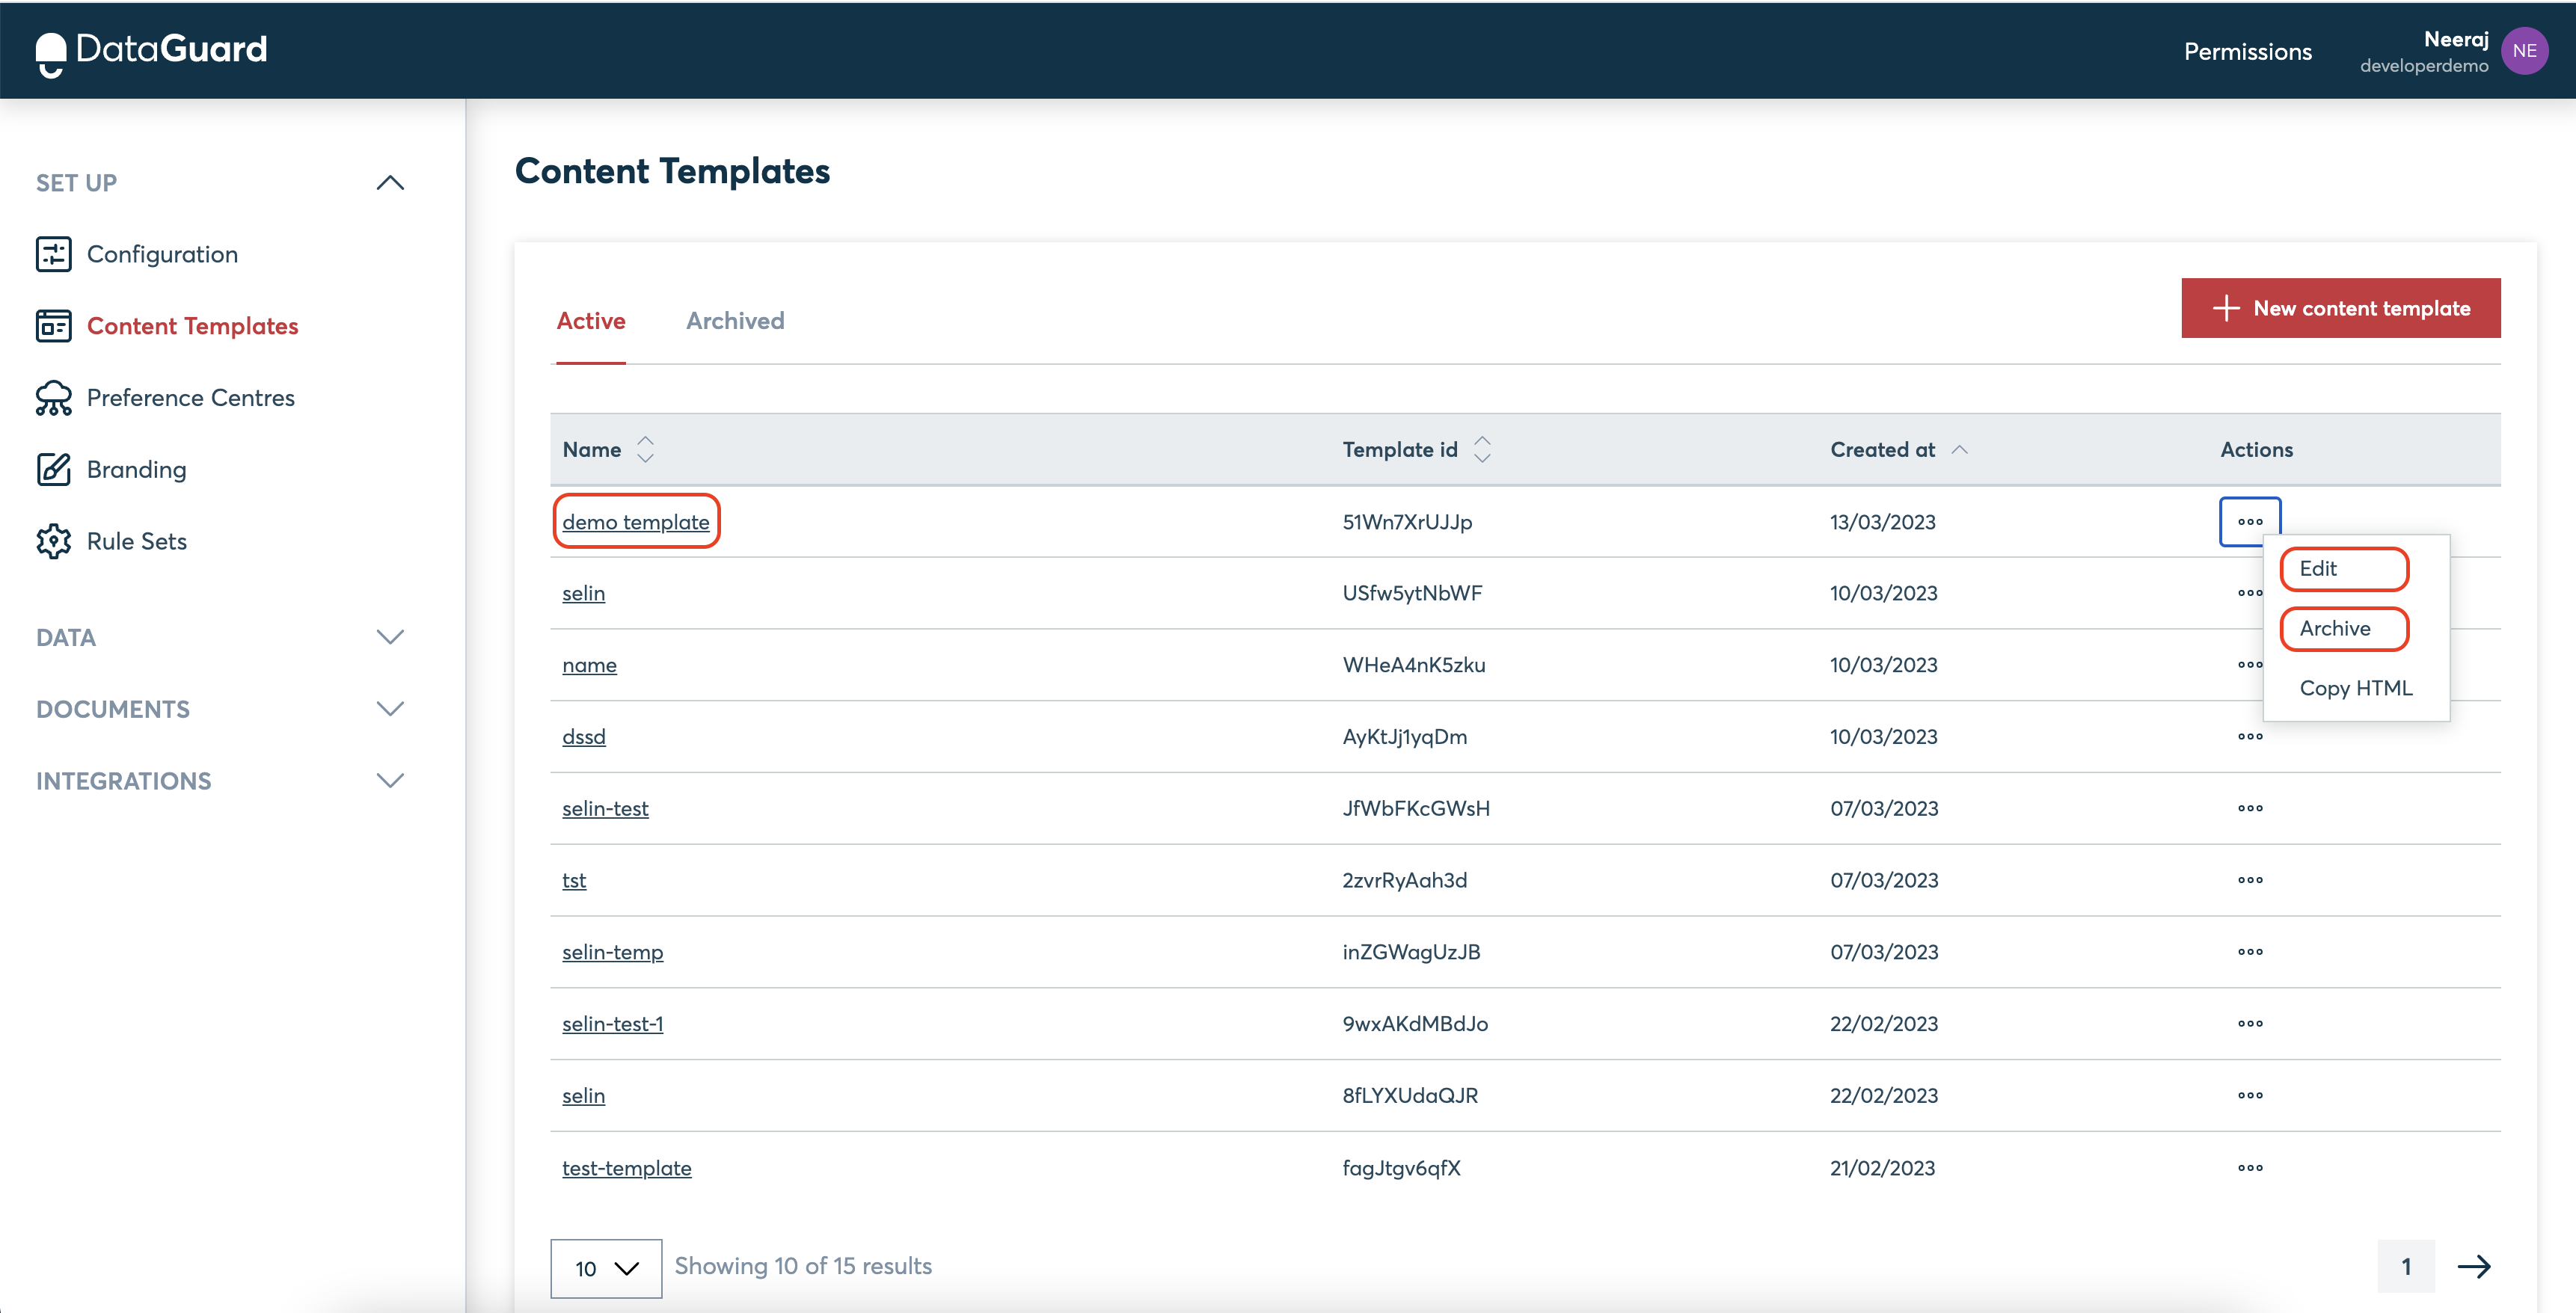
- You will land on the page for creating new templates. There, you'll find a table with existing templates categorised as "Active" and "Archived." To sort the table, click on any column header.
- To perform Edit, Archive, etc. actions on a template, click on the three dots (...) in the "Actions" column.
- You can click on a template's name to edit it directly.
You can easily create new templates, view existing templates, sort the table, and access additional actions and editing functionalities.
Creating a content template
To create a new content template, click on the New content template button on the top right of the table.
Upon clicking the button, the page navigates to a page showing all steps for creating the content template.
Following are the details for each of the step
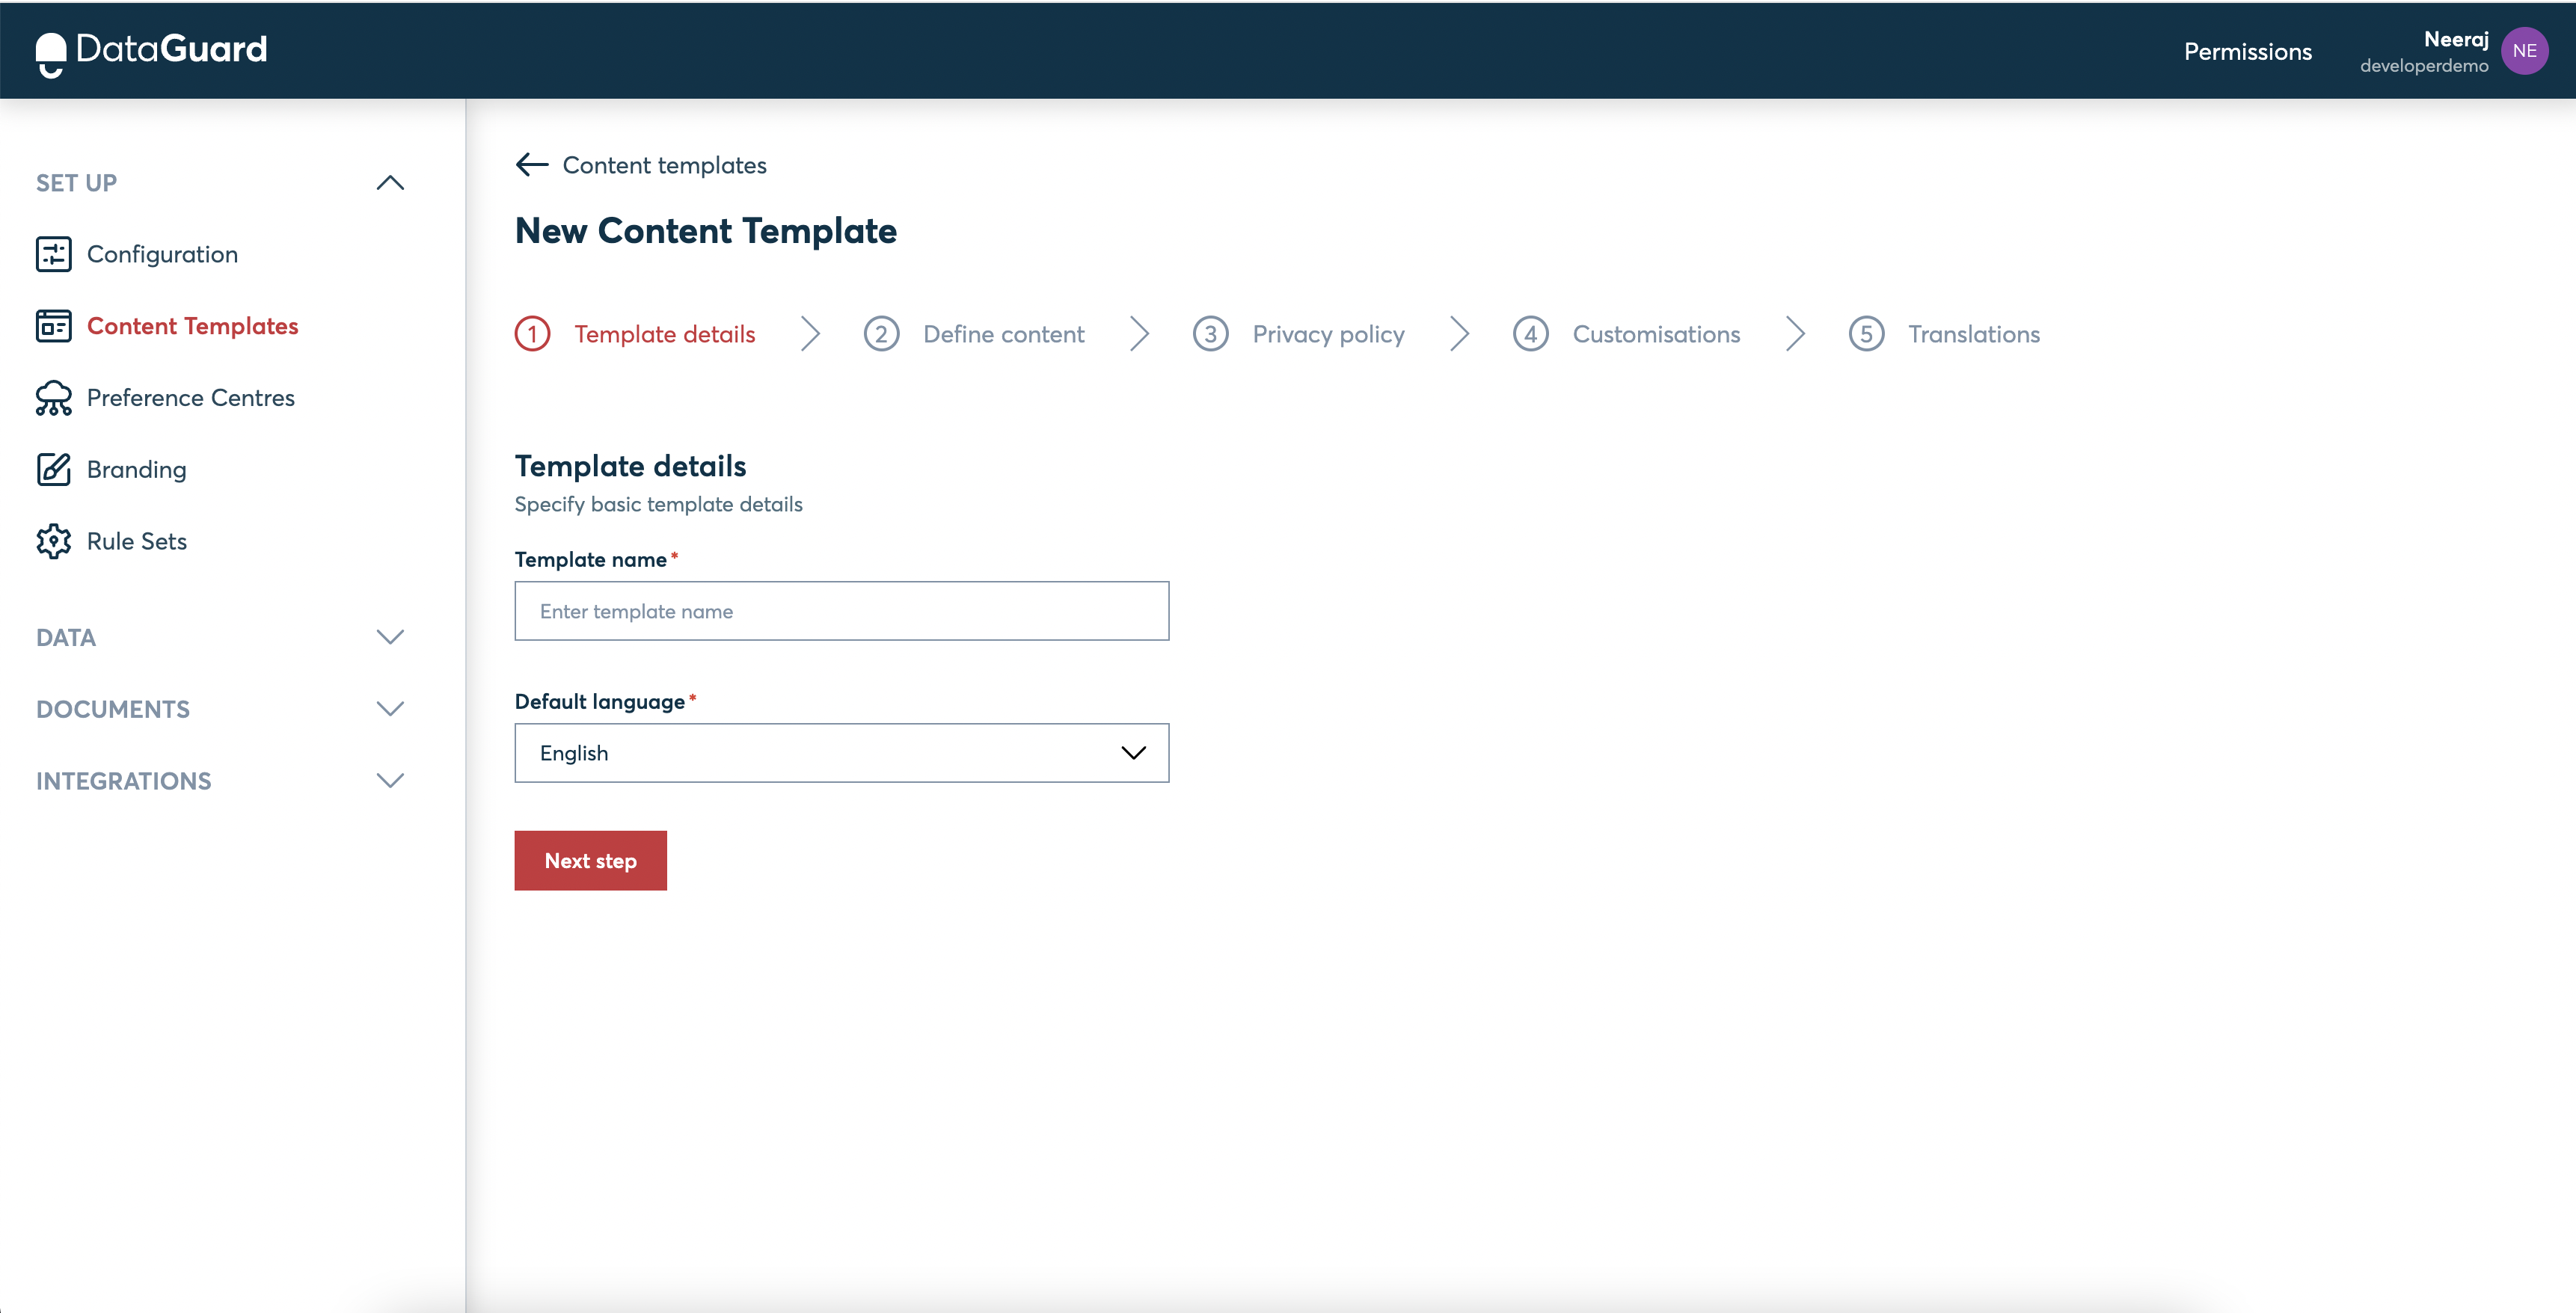
Step 1: Basic details
The first step consists of getting the basic details required for a template such as the name and default language of the template.
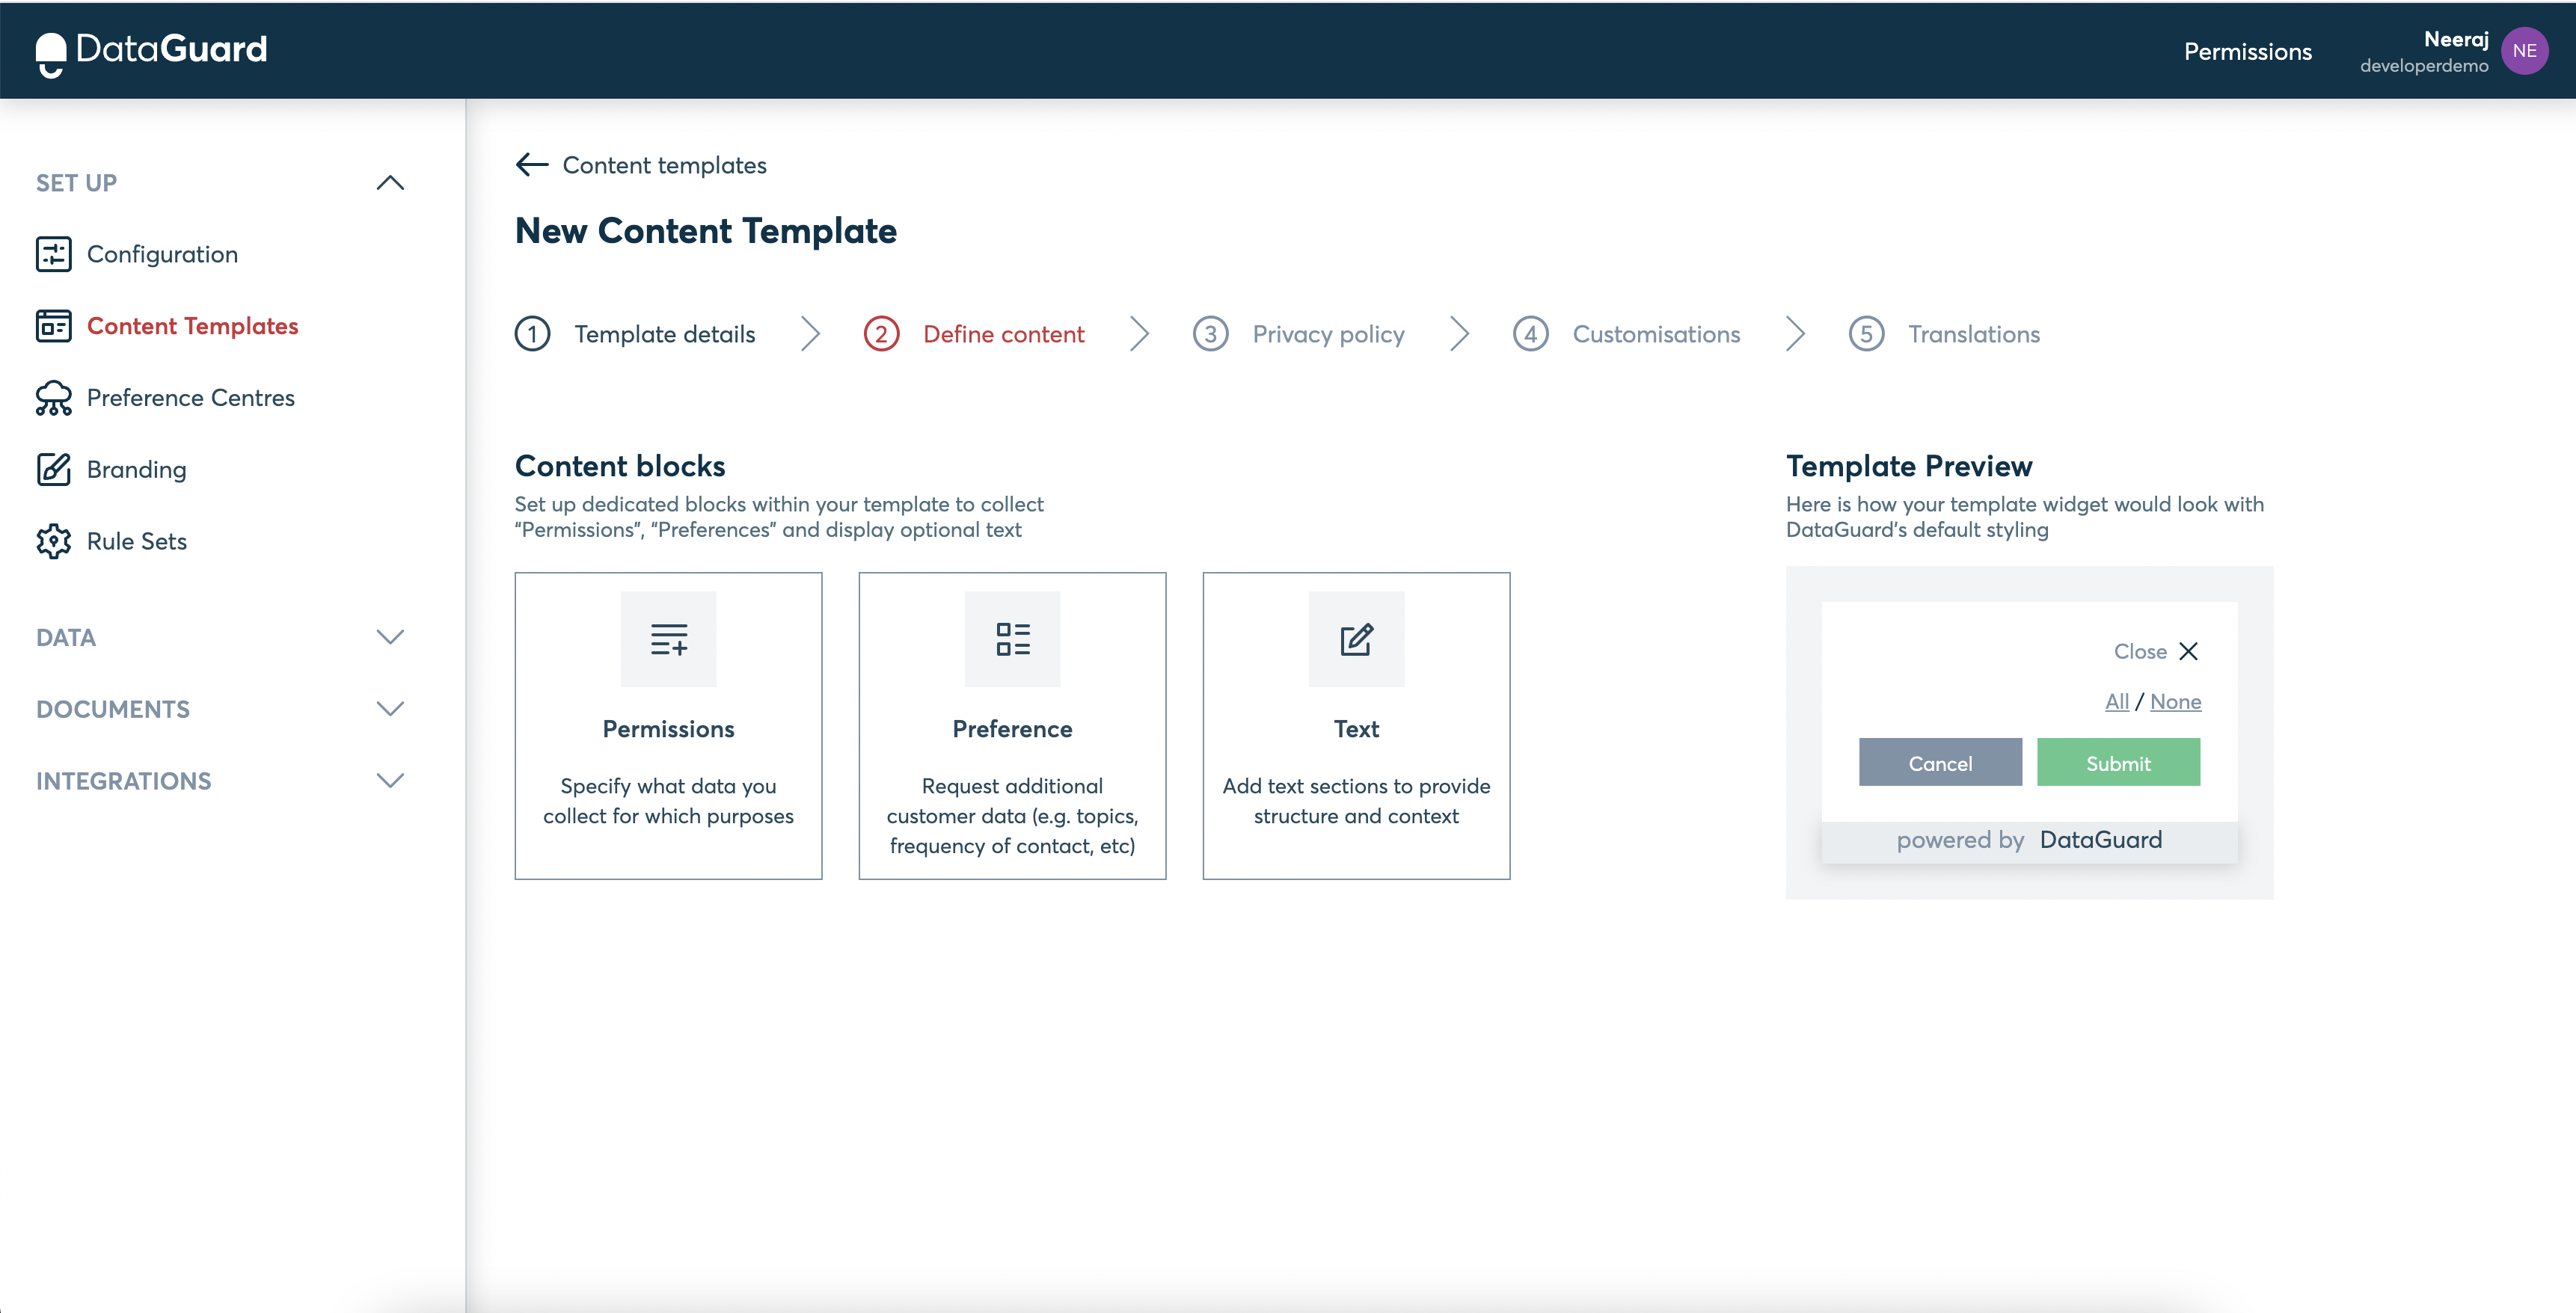
Step 2: Define the content
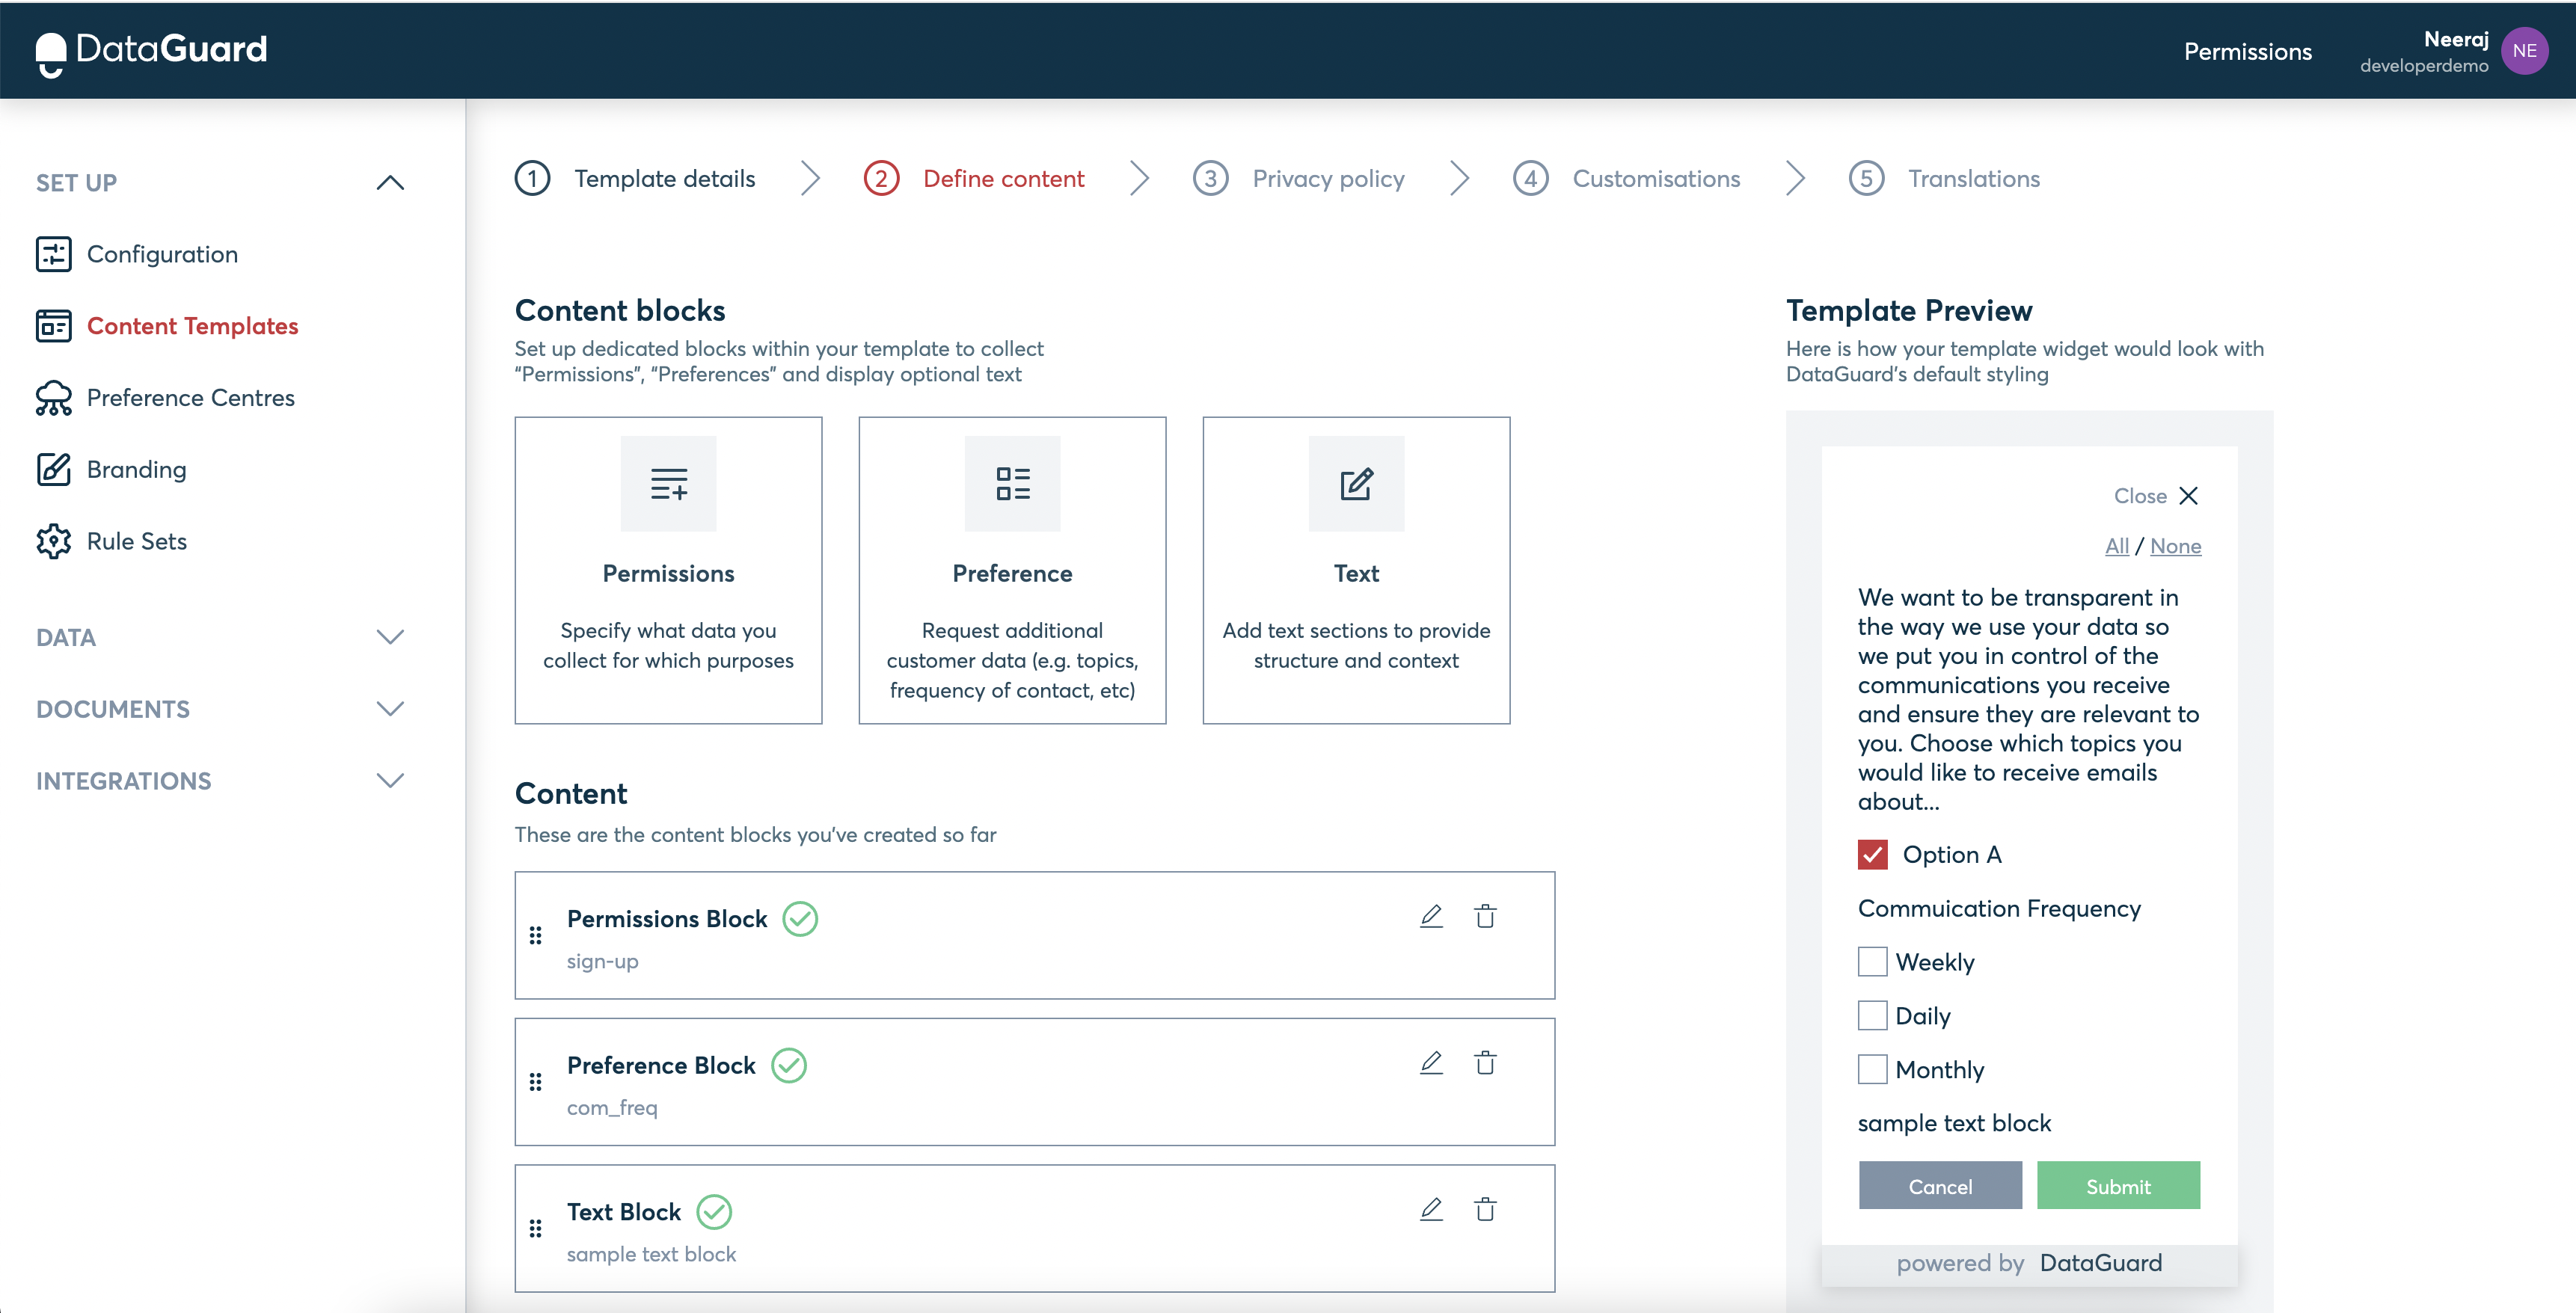
The second step involves defining the content for the template. There are three types of content blocks that can be added to the template.
- Permissions /consent purposes block
- Preference block
- Text block
It is required to have at least one block for Content Purposes or Preferences.
To create a content template, it is essential to have at least one block for Consent Purposes or Preference.
Clicking on each tile on the page will redirect you to the corresponding block creation page. Each of these pages provides helpful instructions to assist you in easily filling in the necessary details.
The required fields are marked with an asterisk ( * )
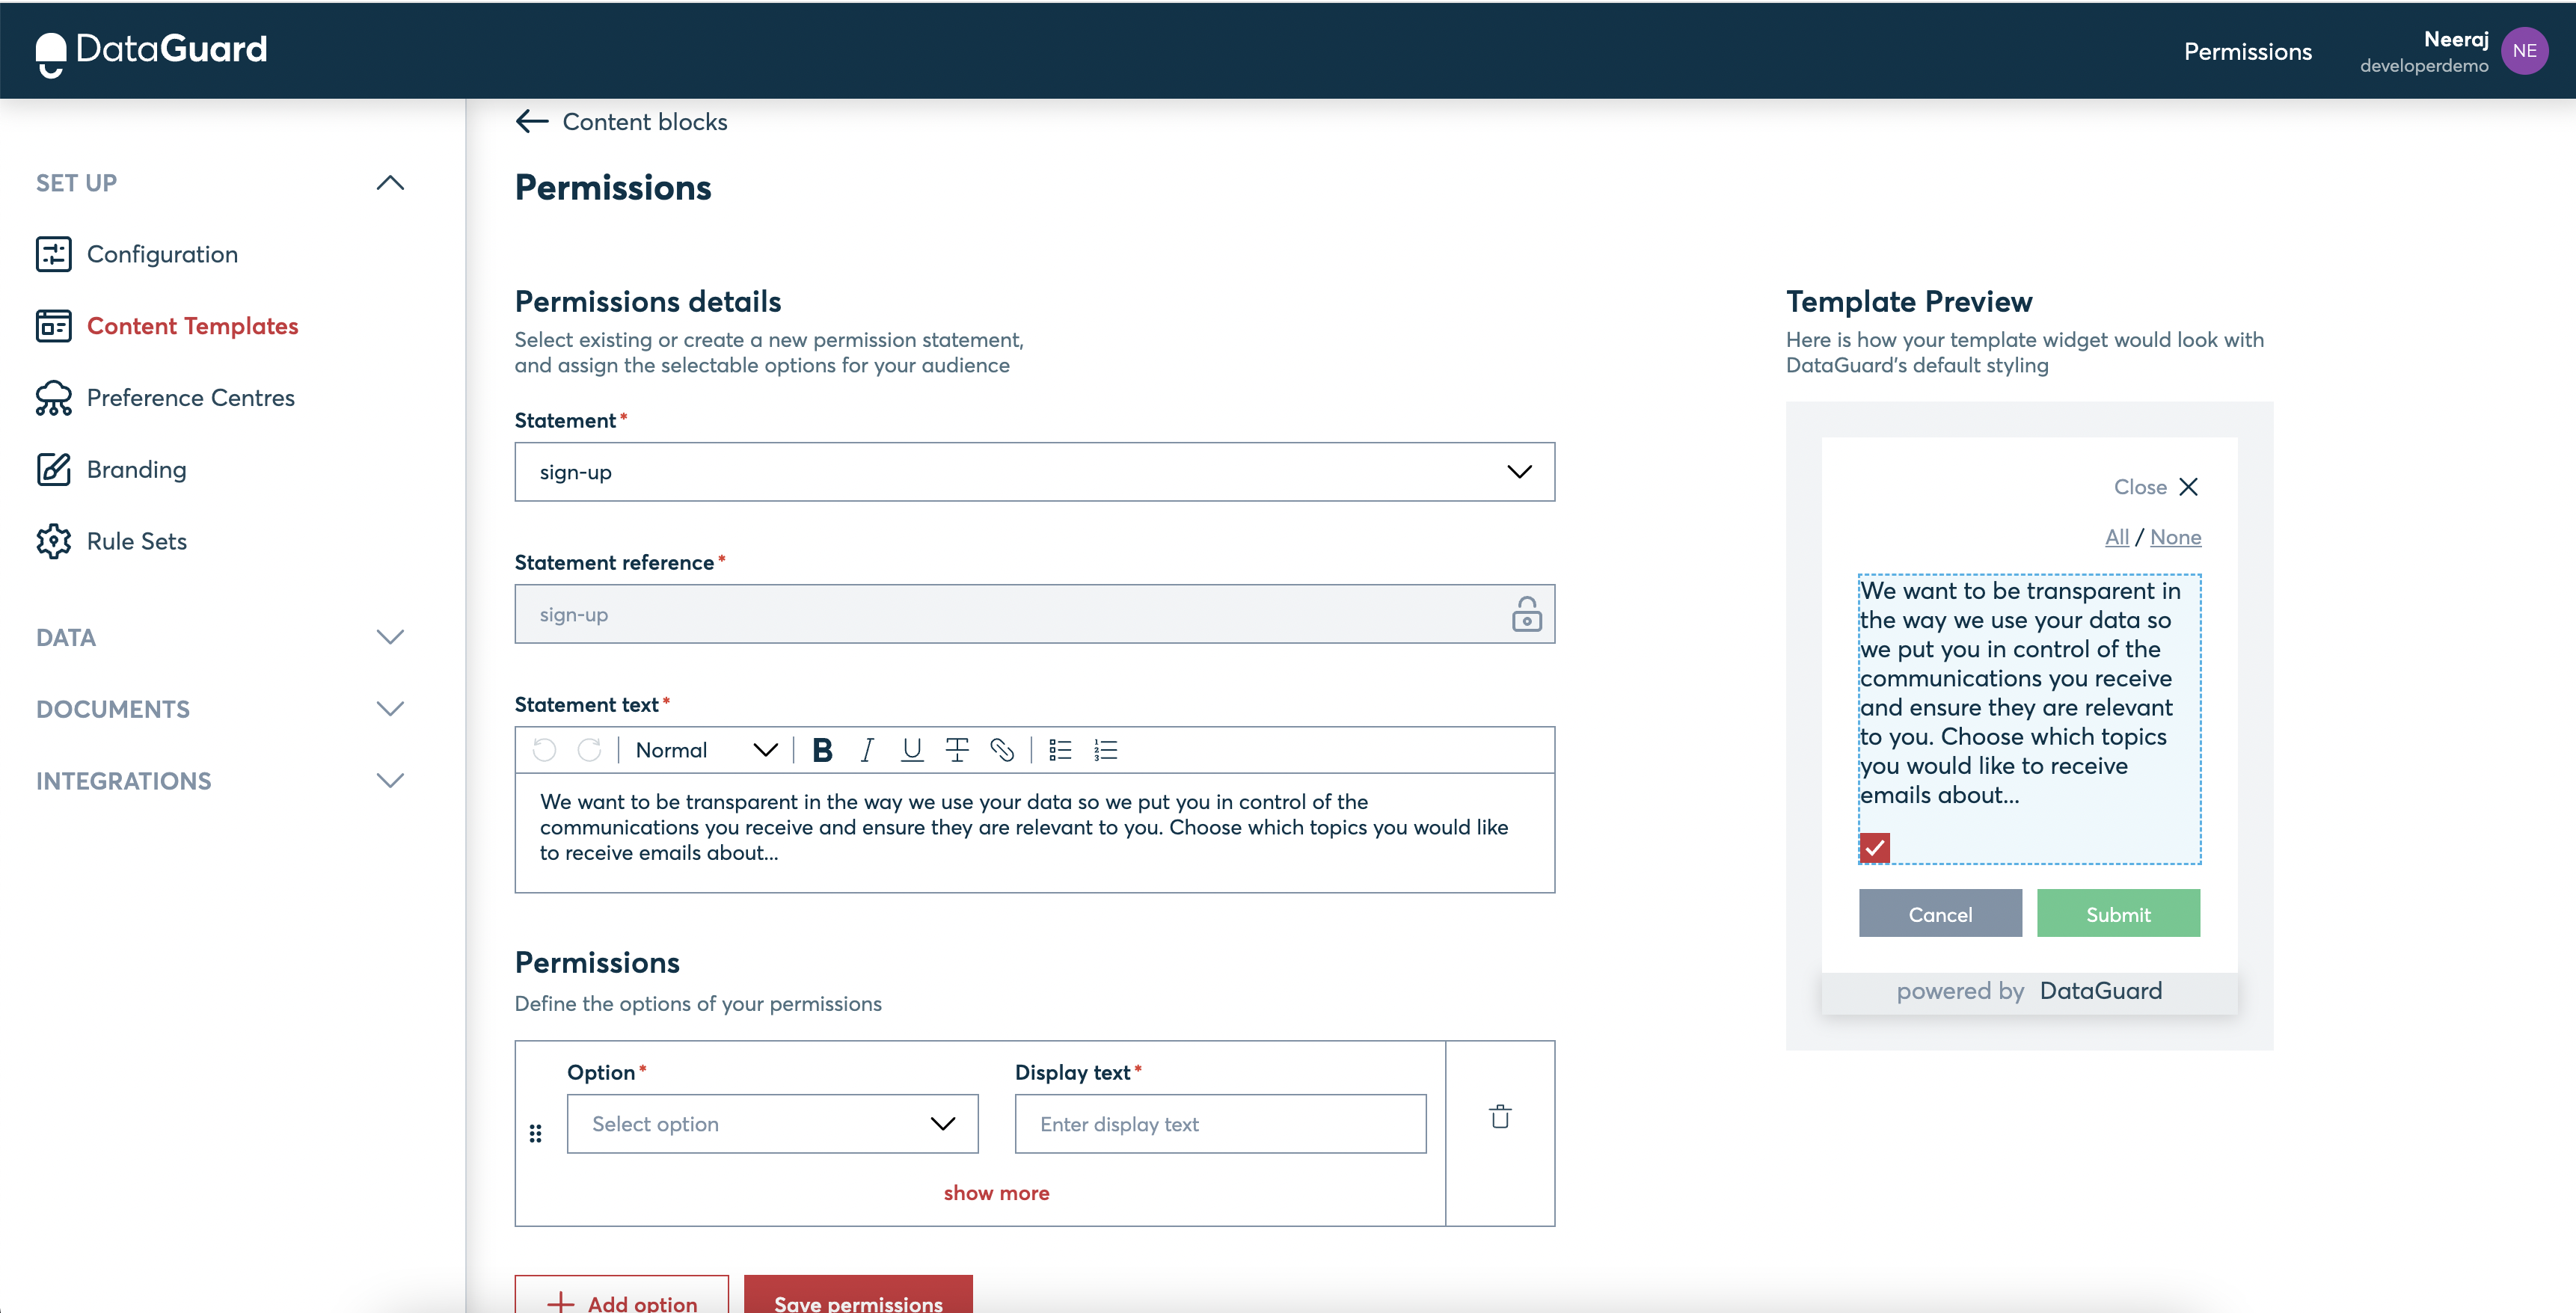
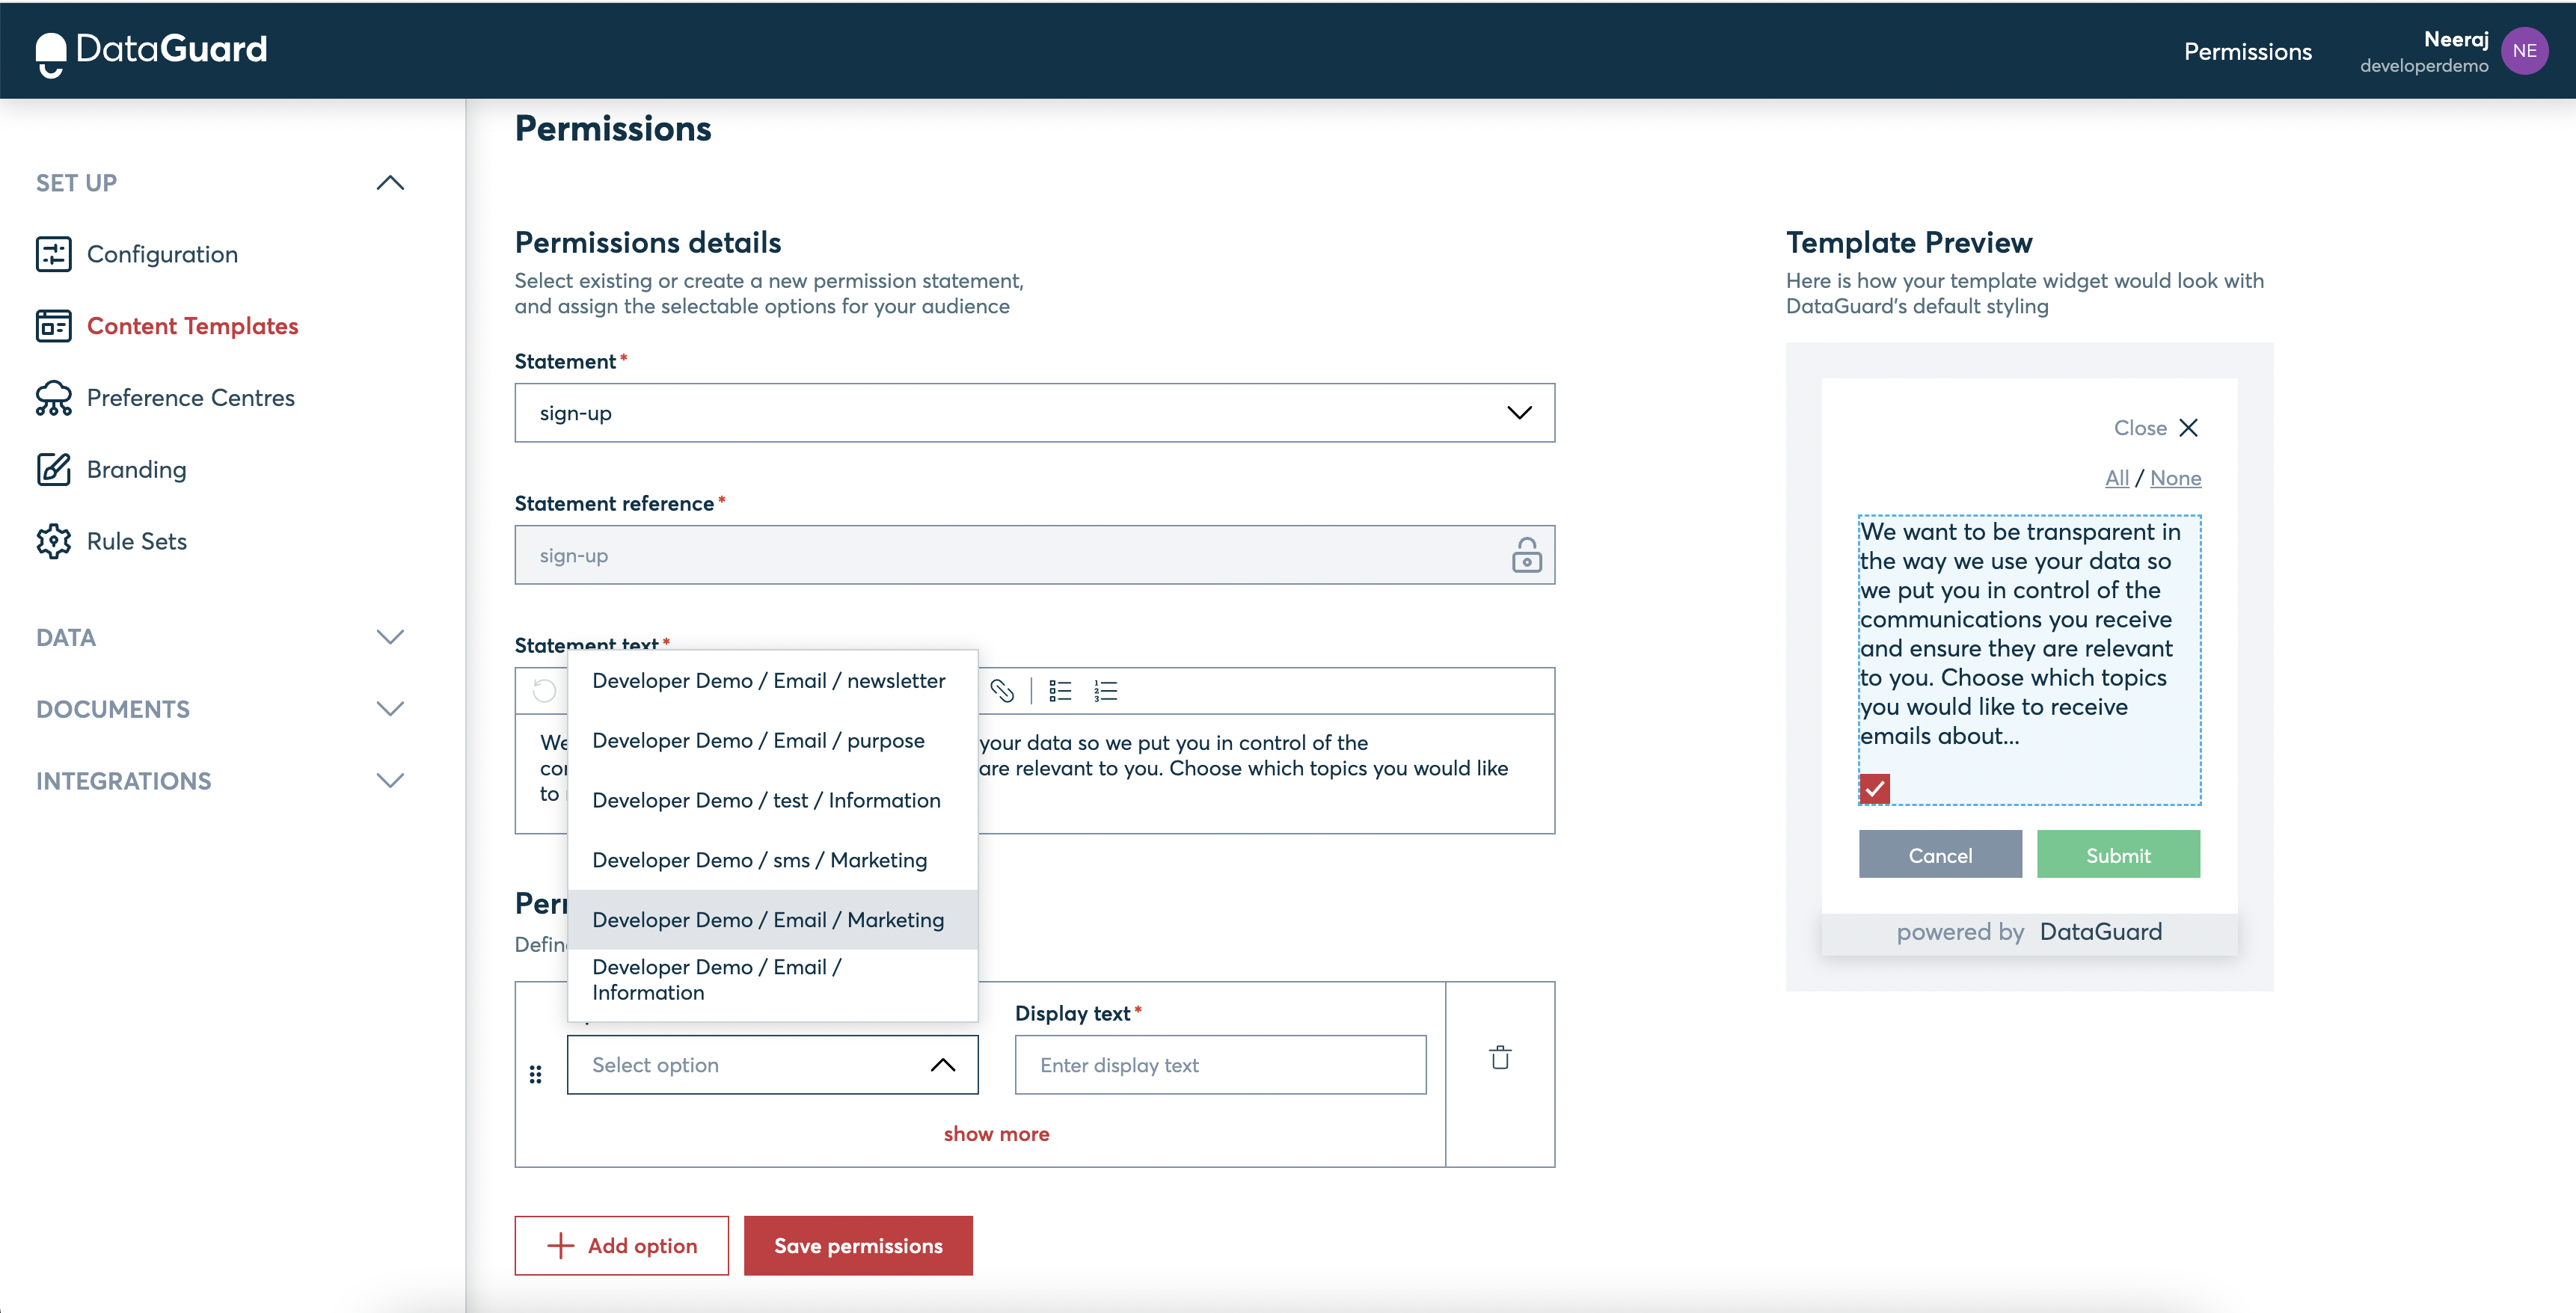
Permissions block
The page requires you to either select an existing permission statement or create a new one. A permission statement is a text that accompanies a set of consent purpose options. The statement will have a required reference attached to it. The field will be disabled if an existing statement is selected otherwise if you are creating a new statement then you can fill in any reference for it. The text for the statement is needed to be provided via a rich text editor which you can use to add any formatting to the text for the statement. You can see a template preview of the added block on the right side of the page.

The permissions block also requires at least one permission option.
For each option, the required fields include selecting the type of option from a drop-down that depicts the data, party, and purpose of the option and also provides a display text that will be visible for the option.
Preference block
The preference block requires you to select an existing preference or create a new one along with providing the choices for the template.
If you are creating a new preference, you will need to provide a preference reference and a preference label. These will be displayed for the preference that the user selects while using the template that is built.
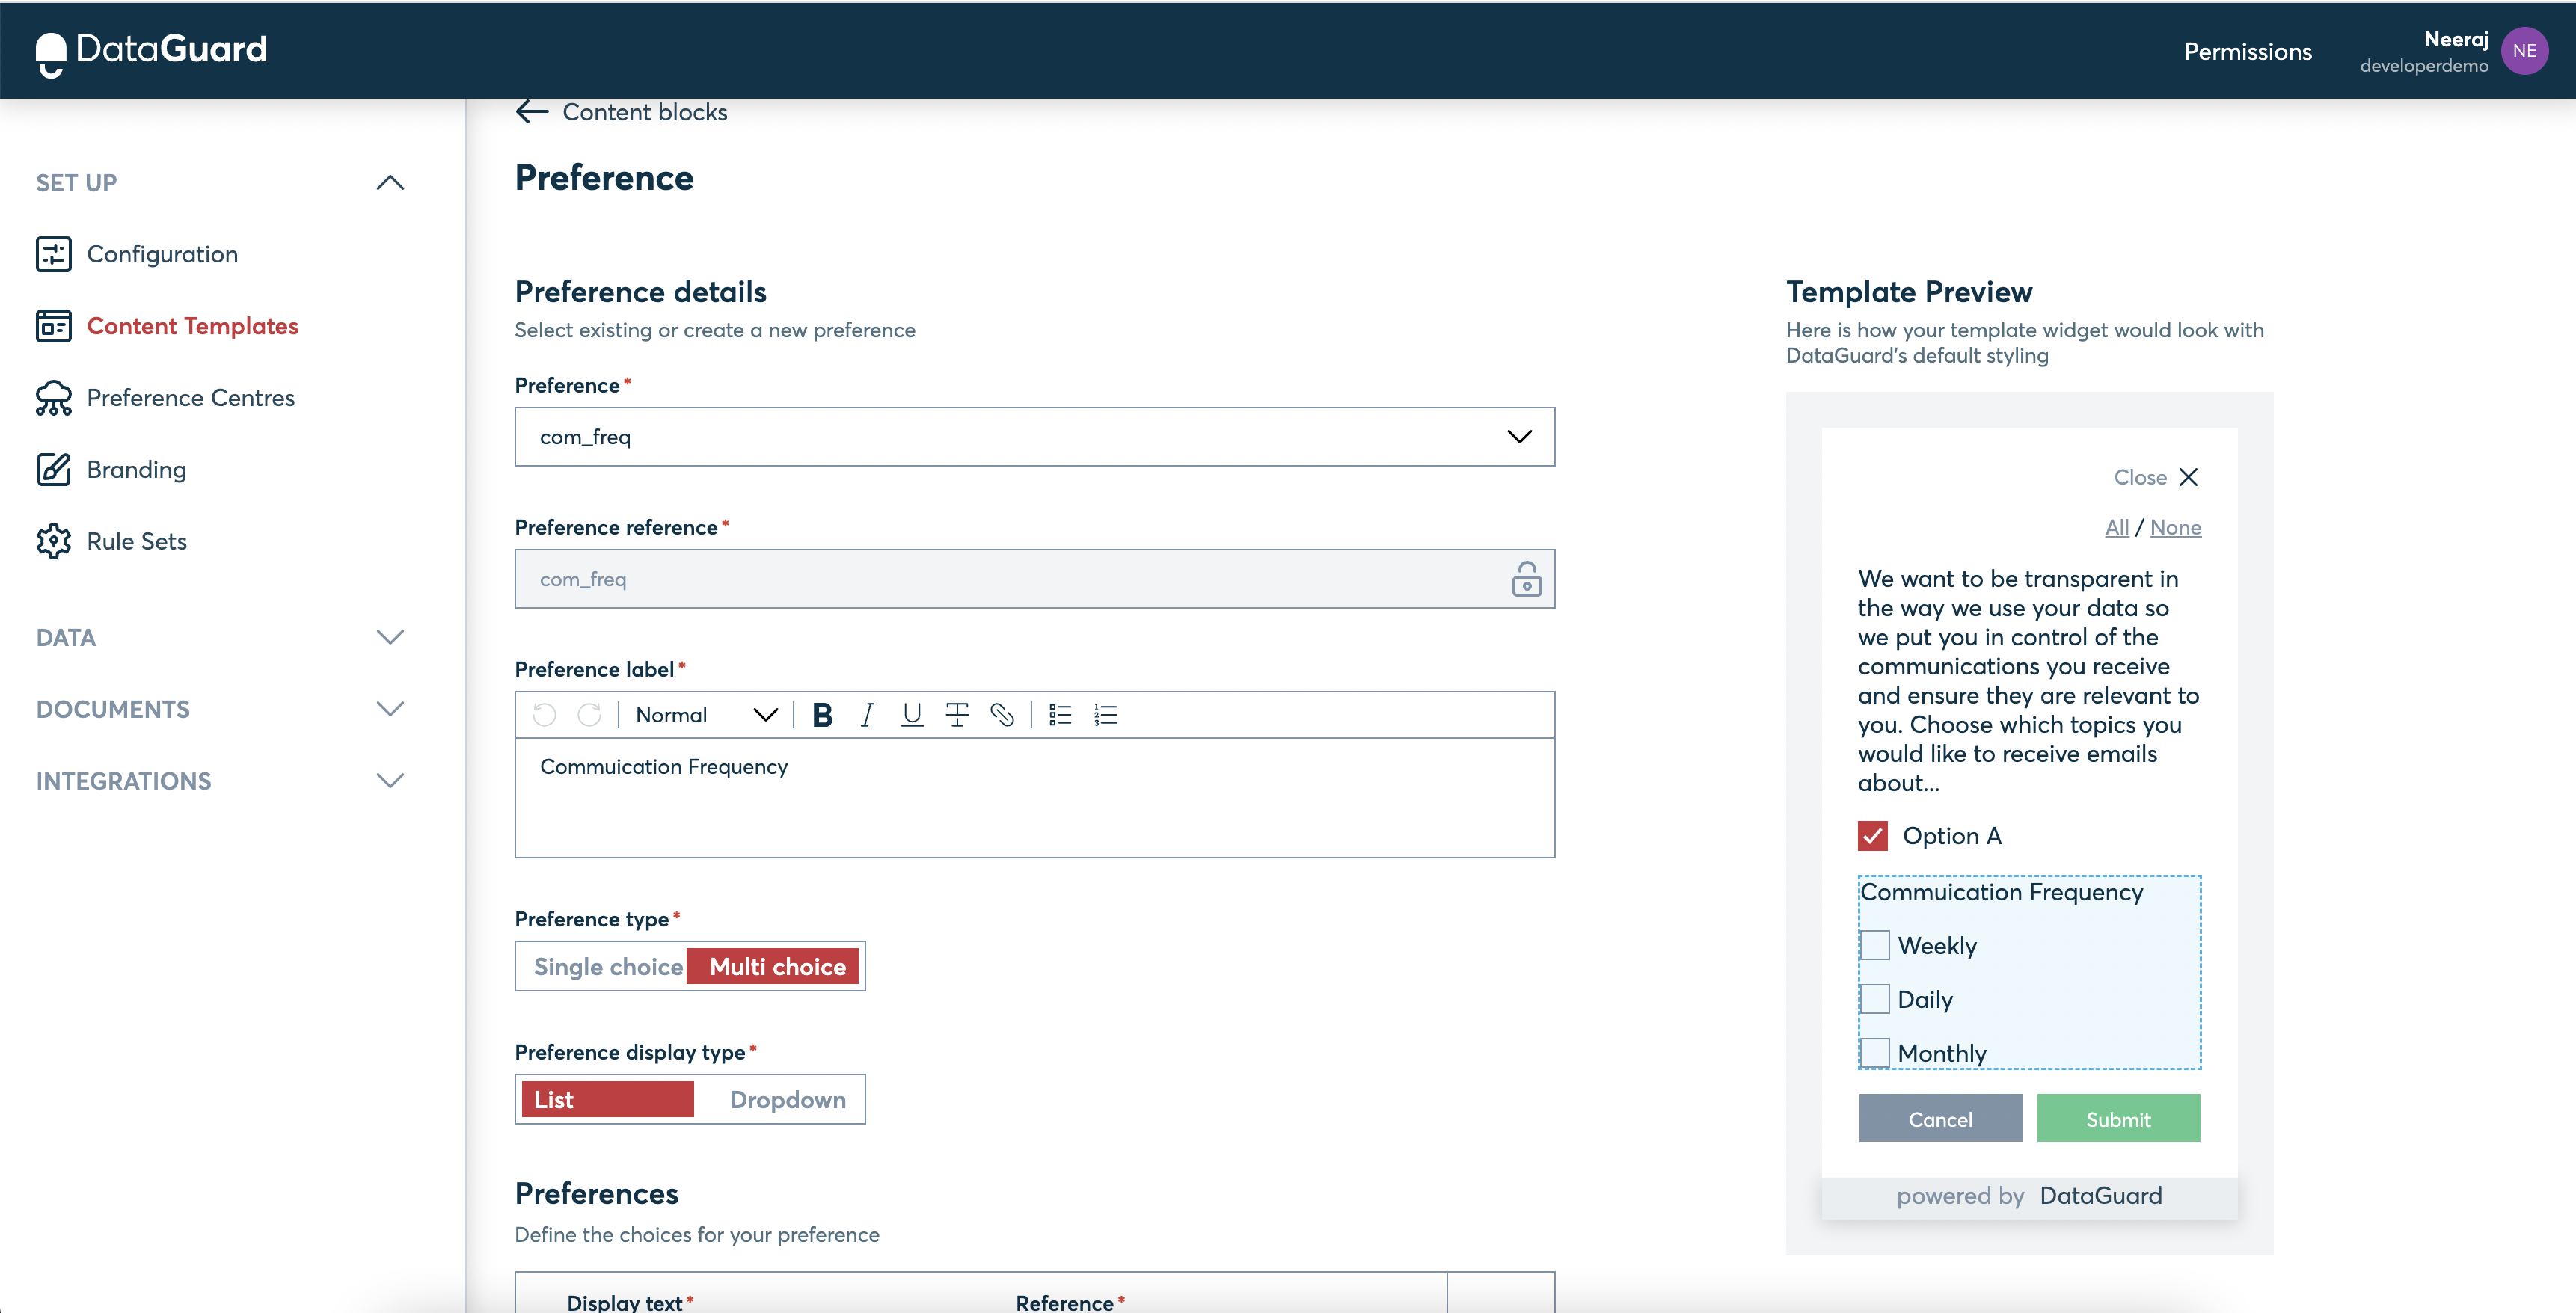
You need to select whether the preference allows a single, or multiple choices. For each choice, it is needed to provide a display text and reference.

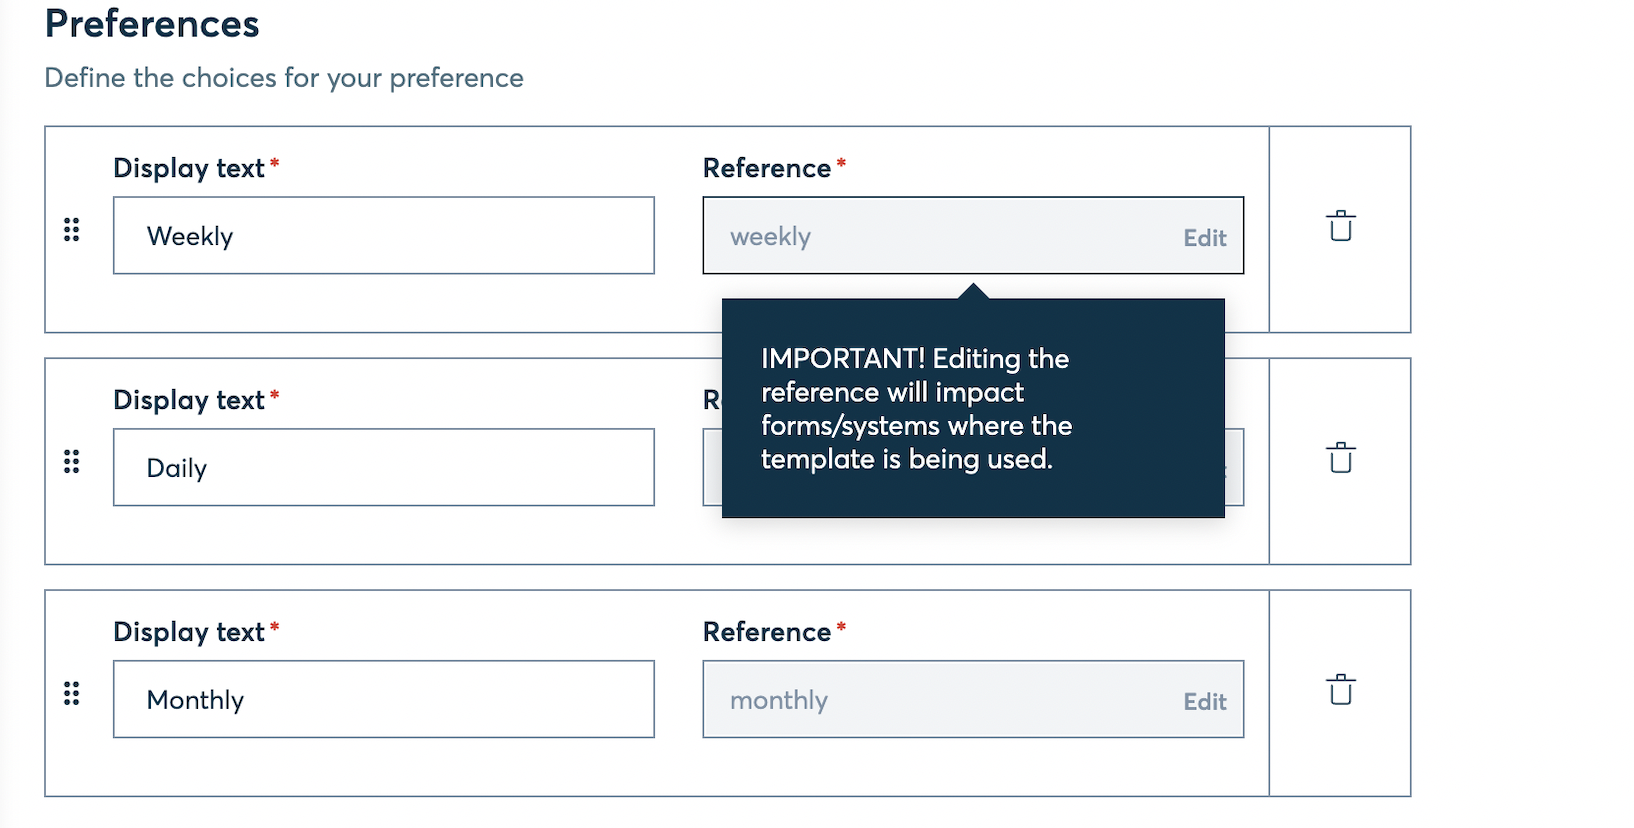
If you have selected an existing preference , then by default the reference of the choices will be disabled as it is discouraged to edit these references. But if you still wish to edit the choice reference you can click on the Edit text in the disabled input and edit it.
Text block
The text block requires a text to be provided via a rich text editor for the template.
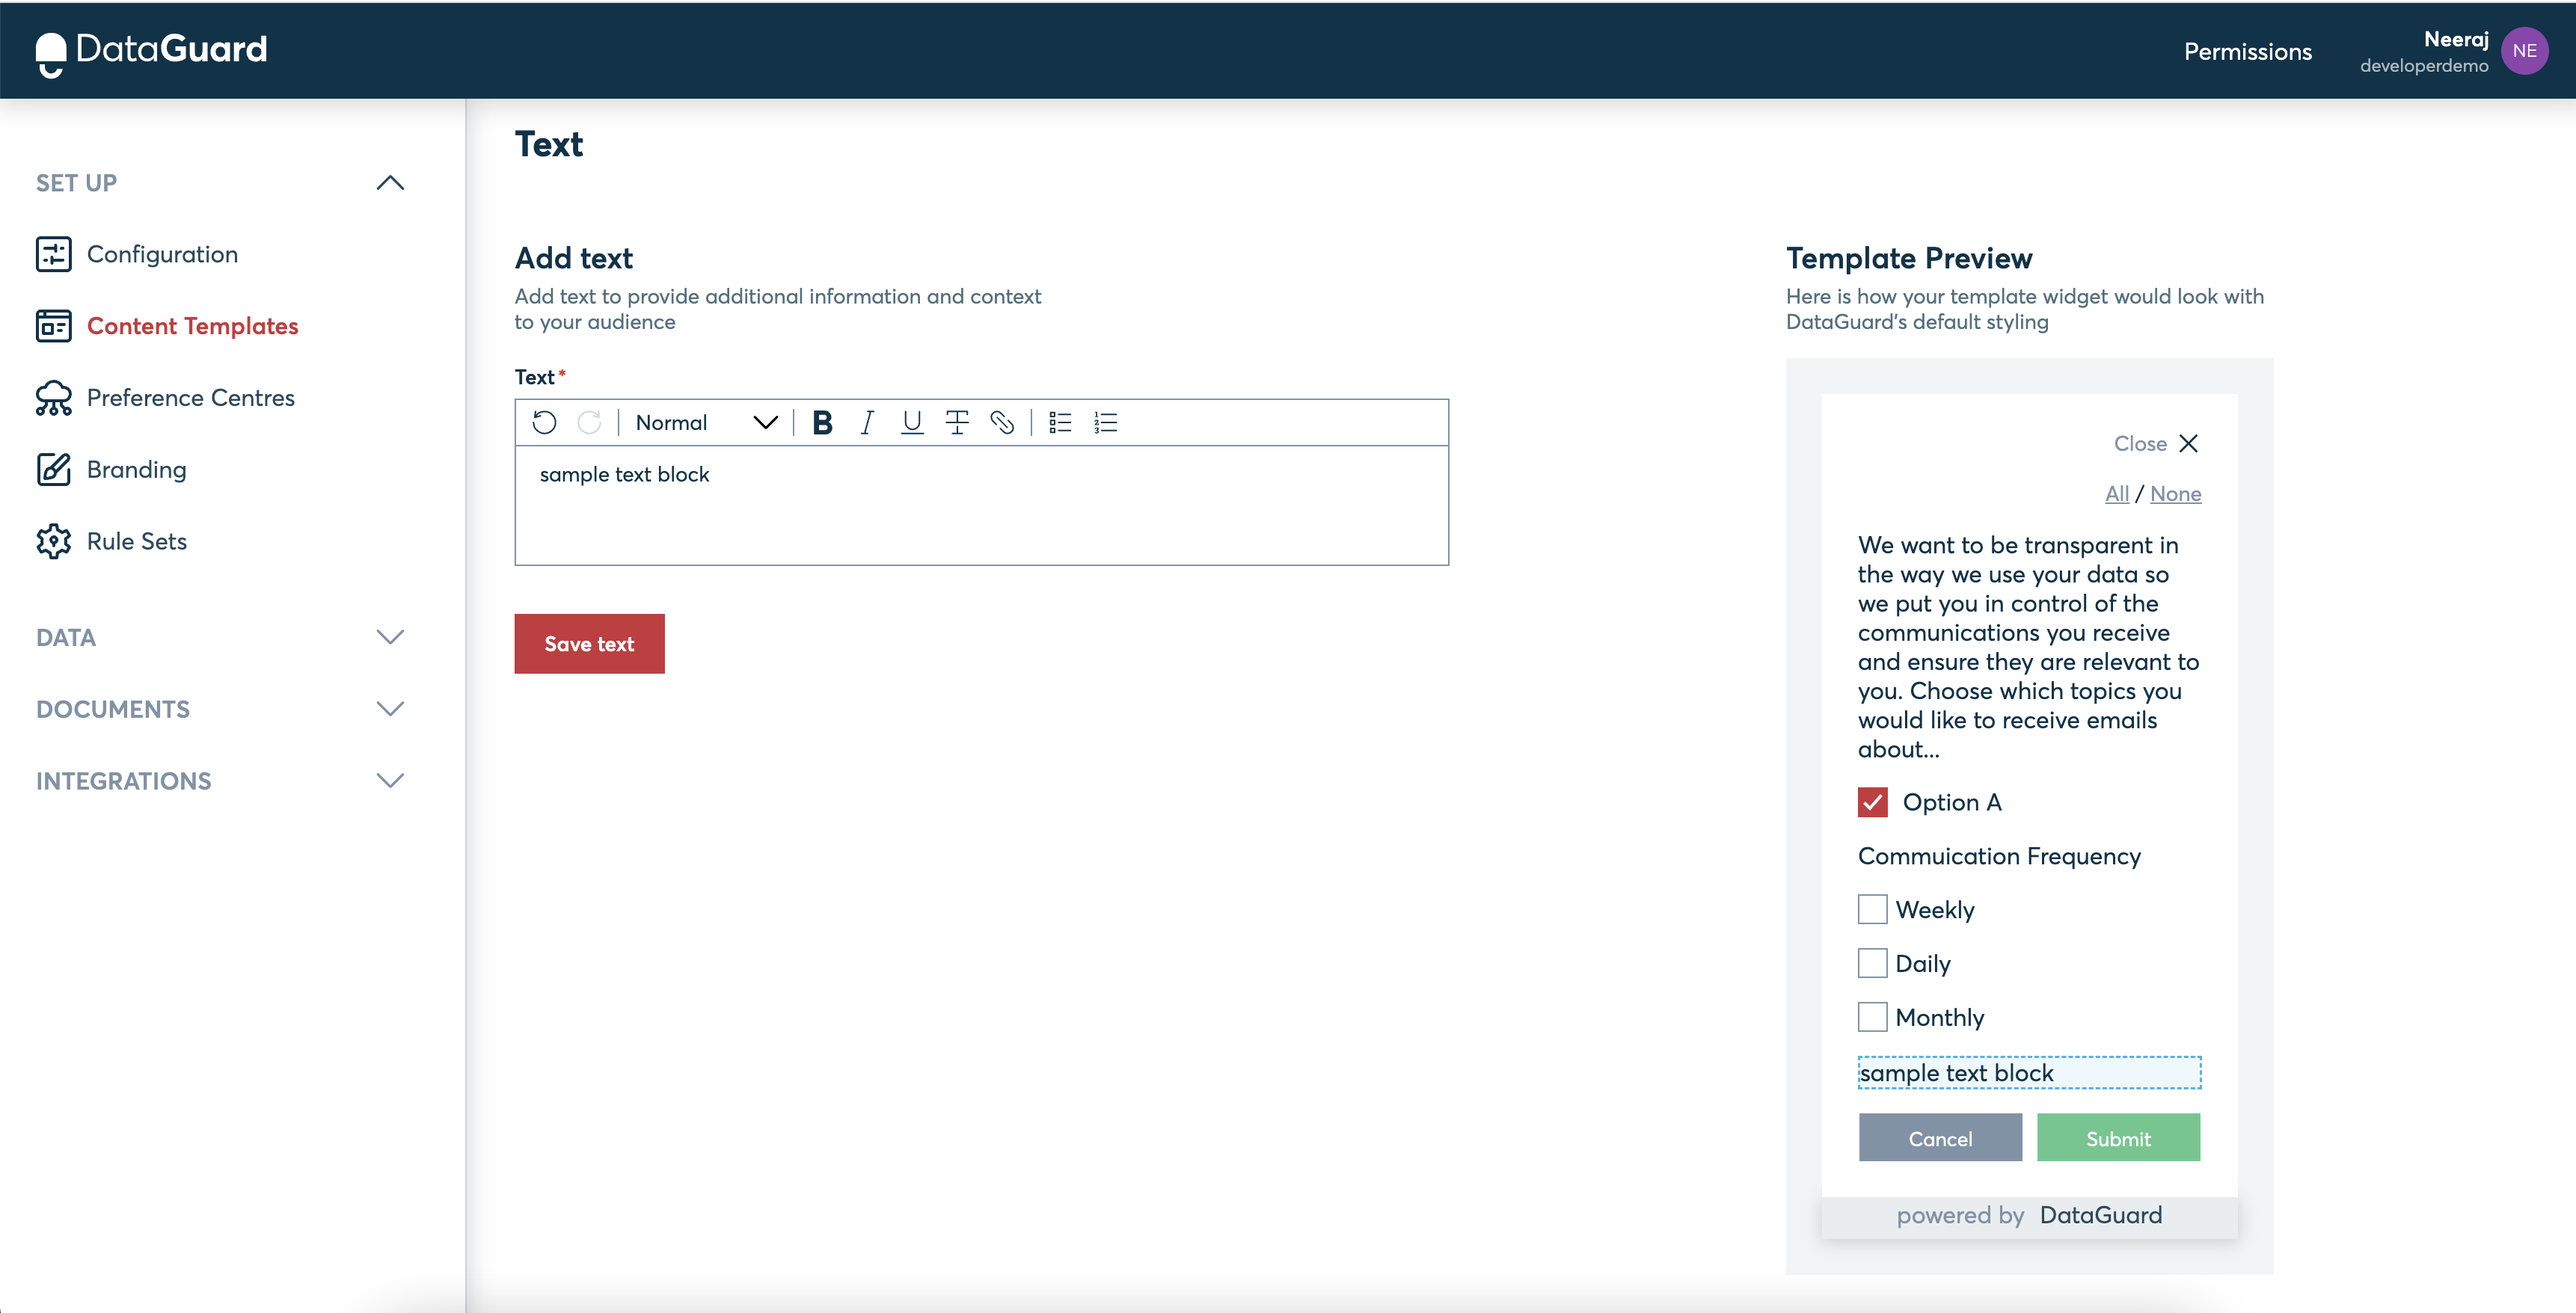
You can add multiple blocks of each type as required. The added blocks will be displayed in the order of the creation. You can rearrange the order of the blocks and can also edit or delete any block.
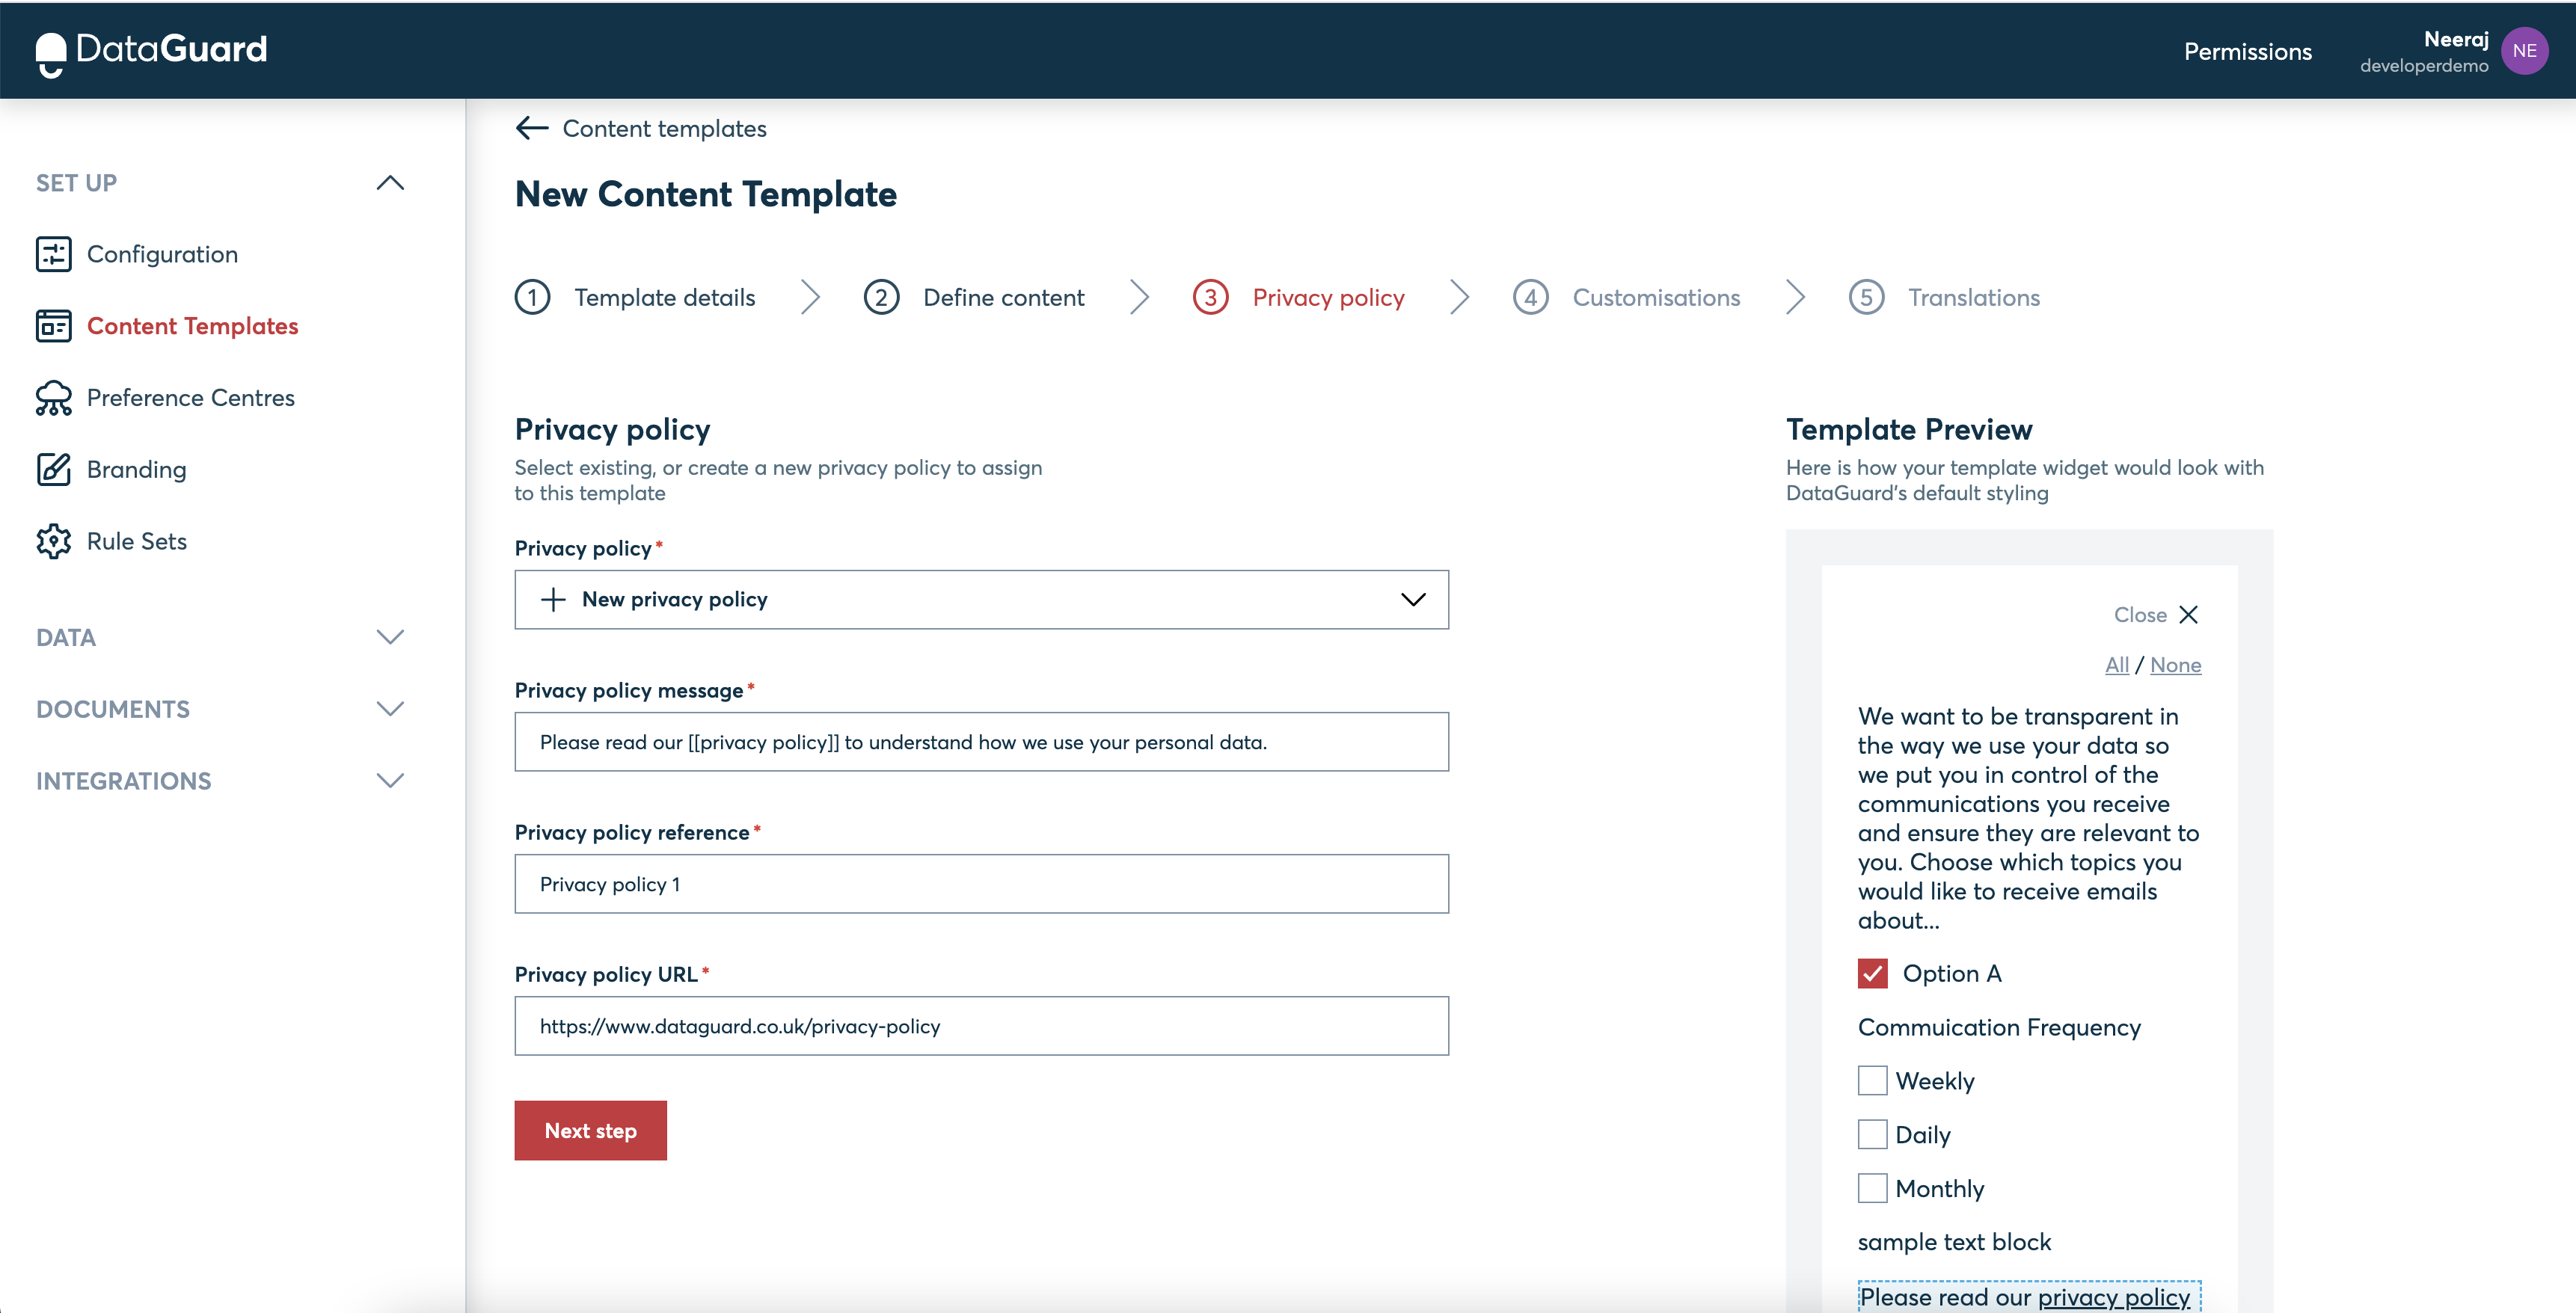
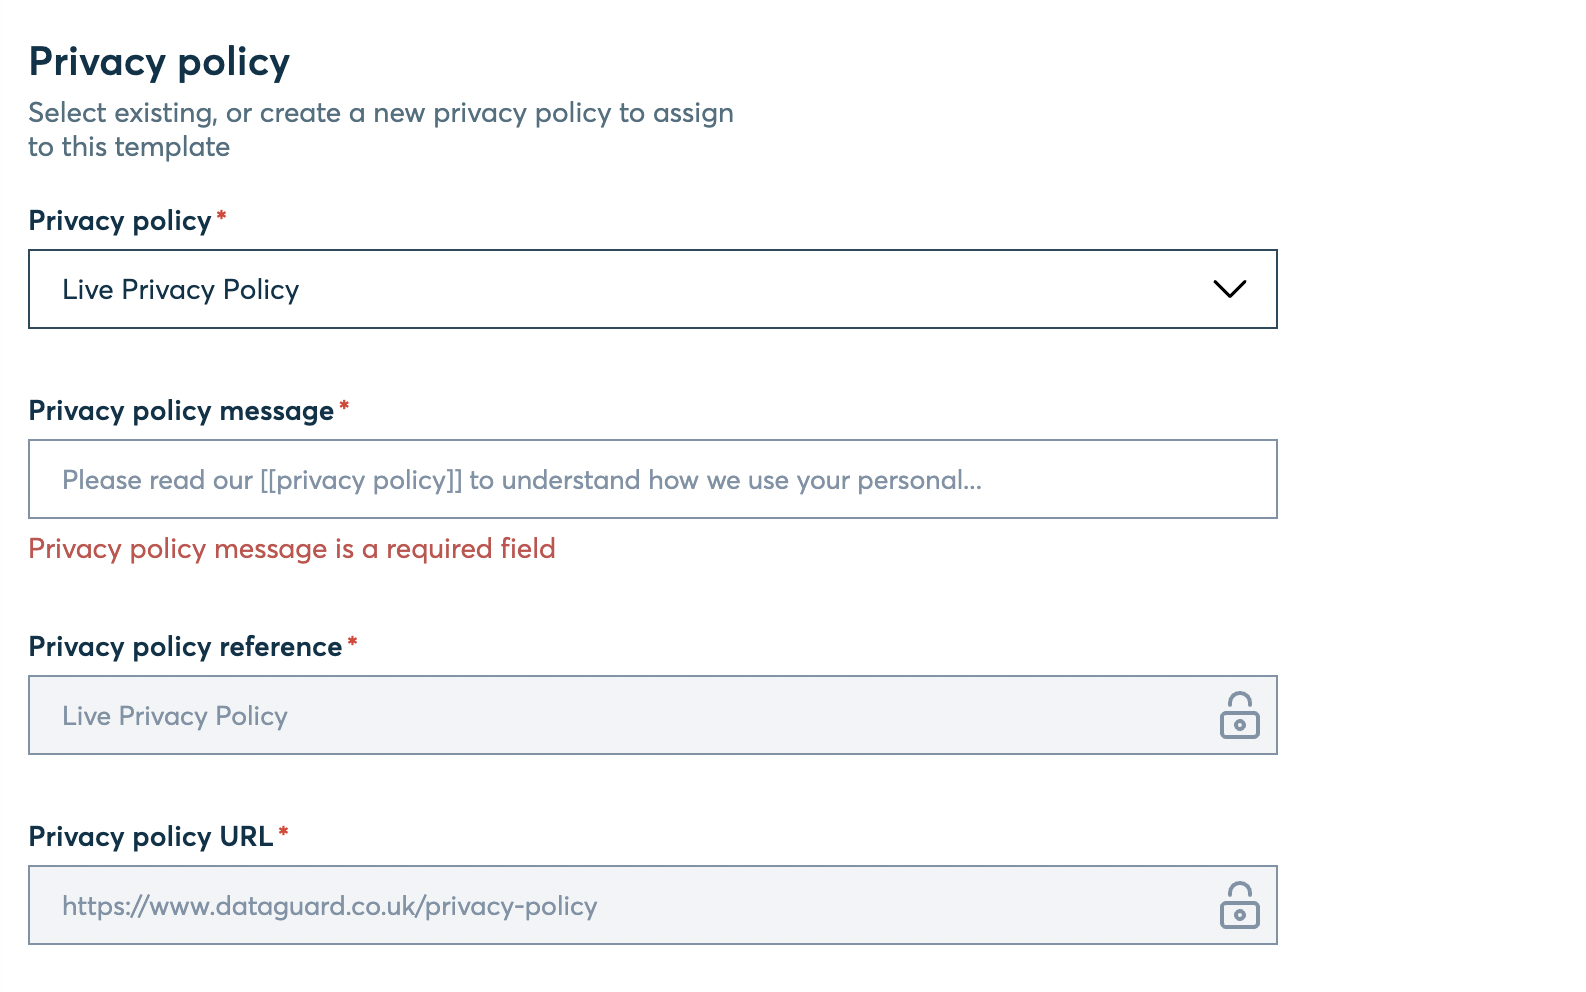
Step 3: Privacy policy
The third step consists of filling in the details related to the privacy policy. You can either select an existing privacy policy or create a new one. The policy message requires the inclusion of the text [[privacy policy]]. When rendered, it will then be replaced by the URL of the selected privacy policy.
The following is an example if you are creating a new privacy policy
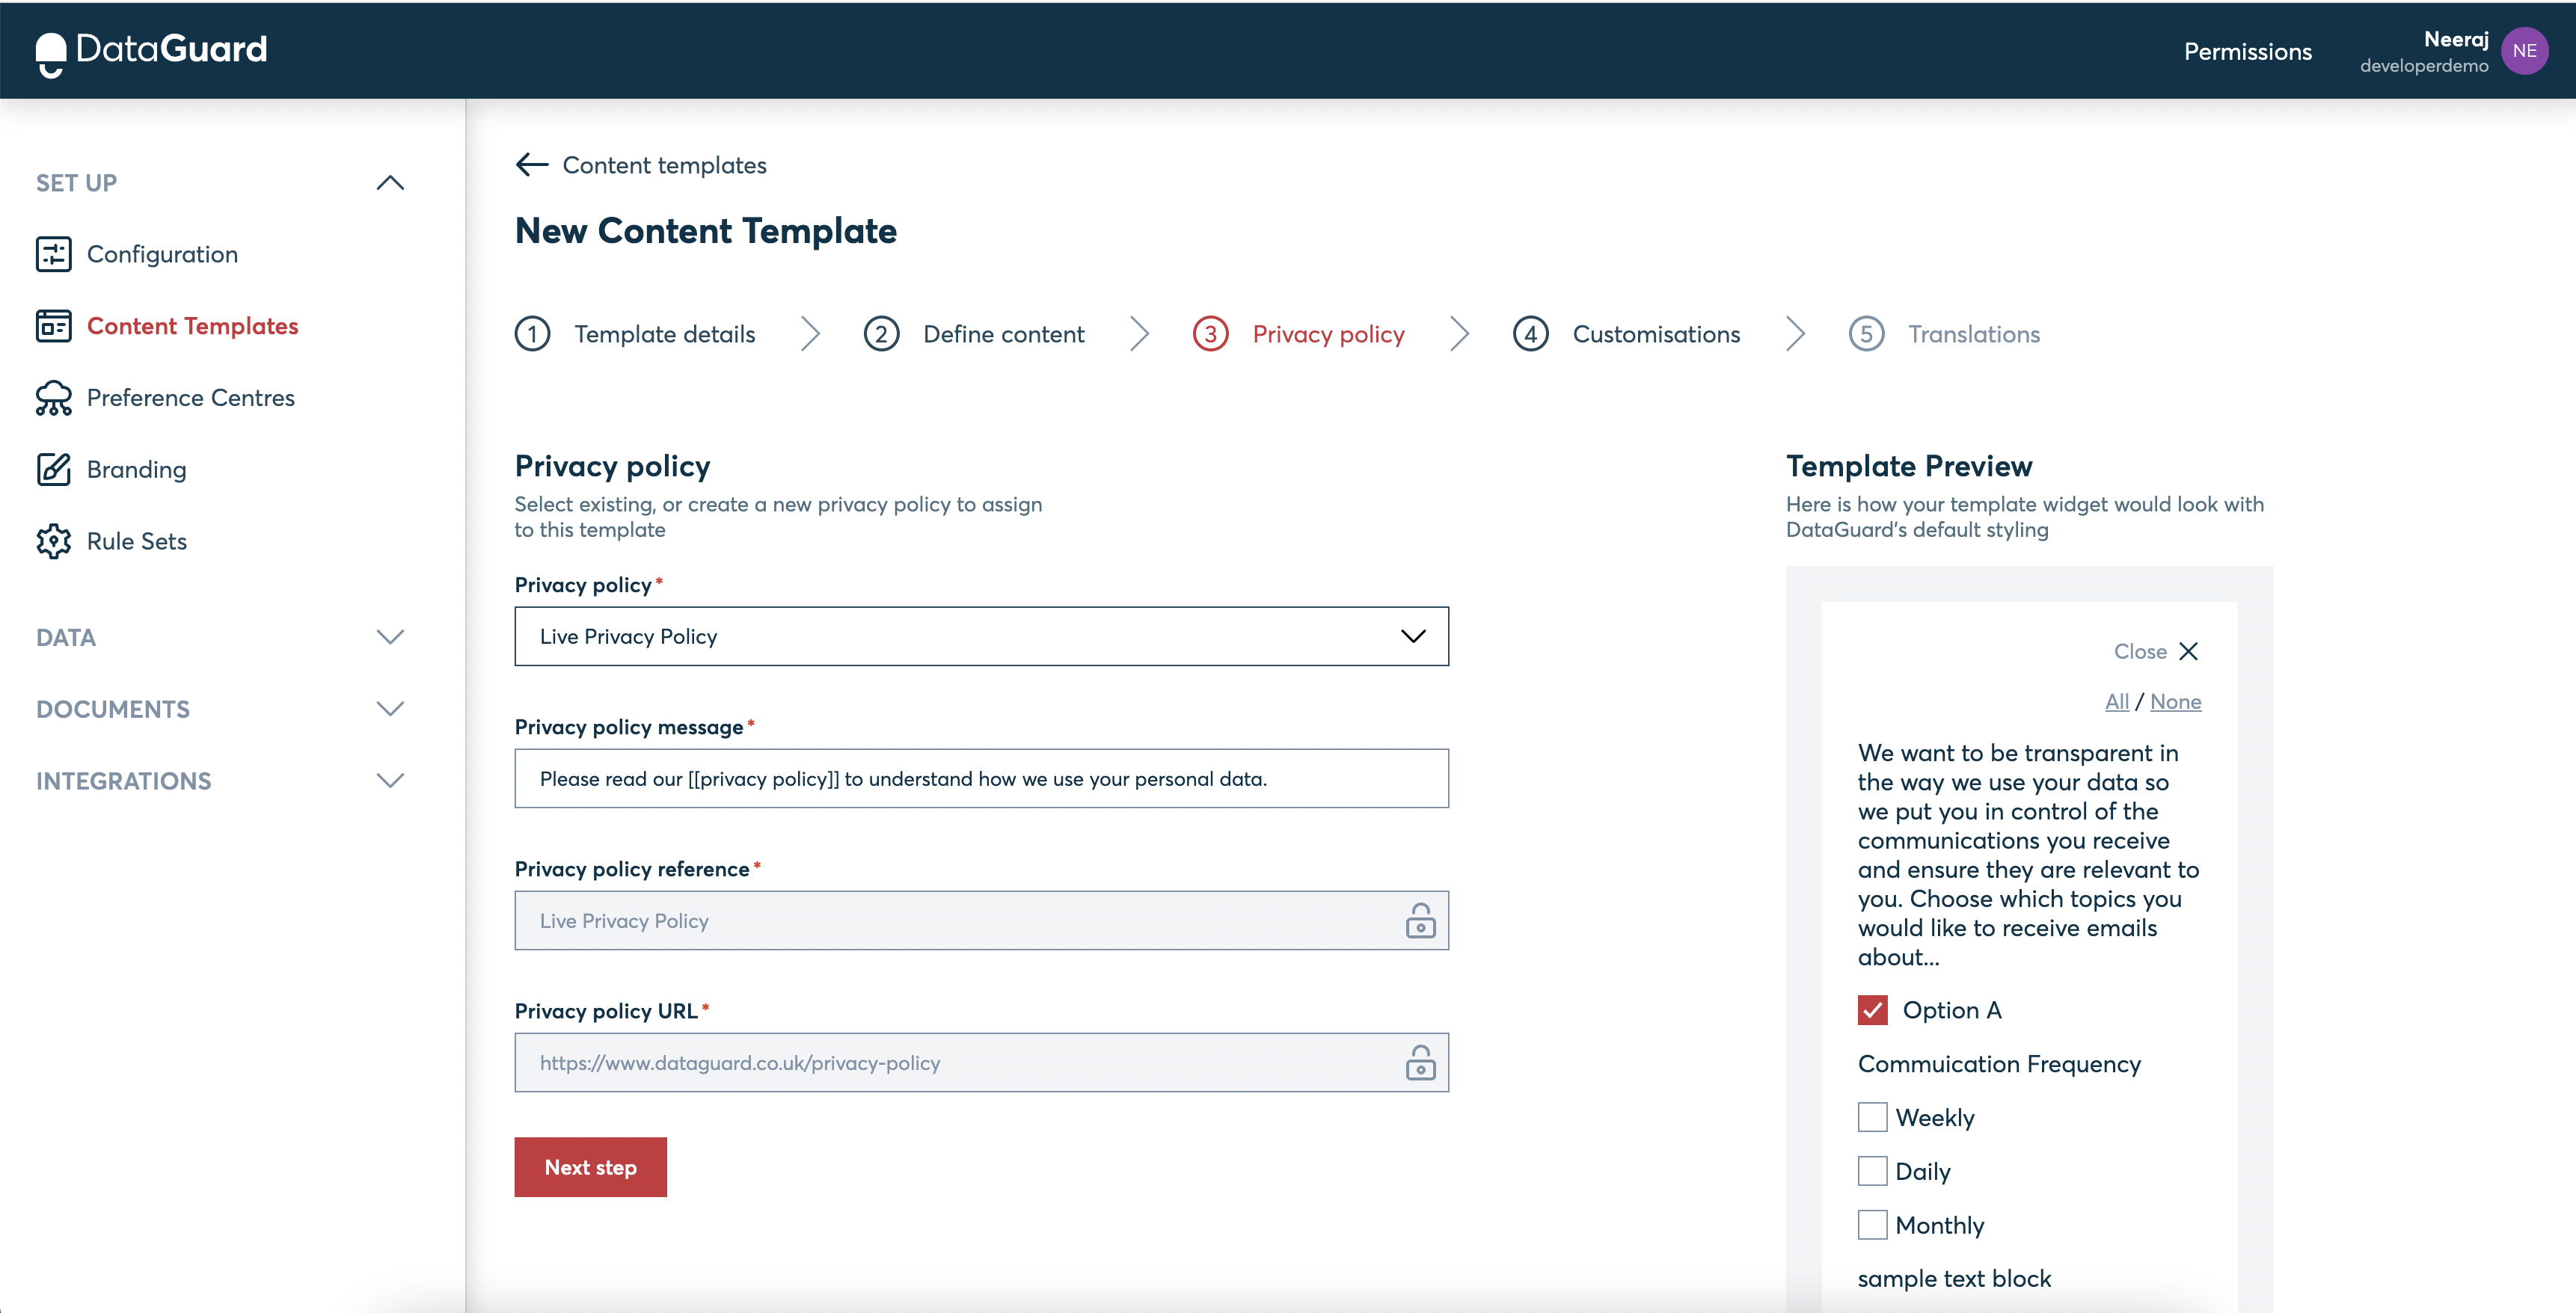
The following is an example if you have selected an existing privacy policy
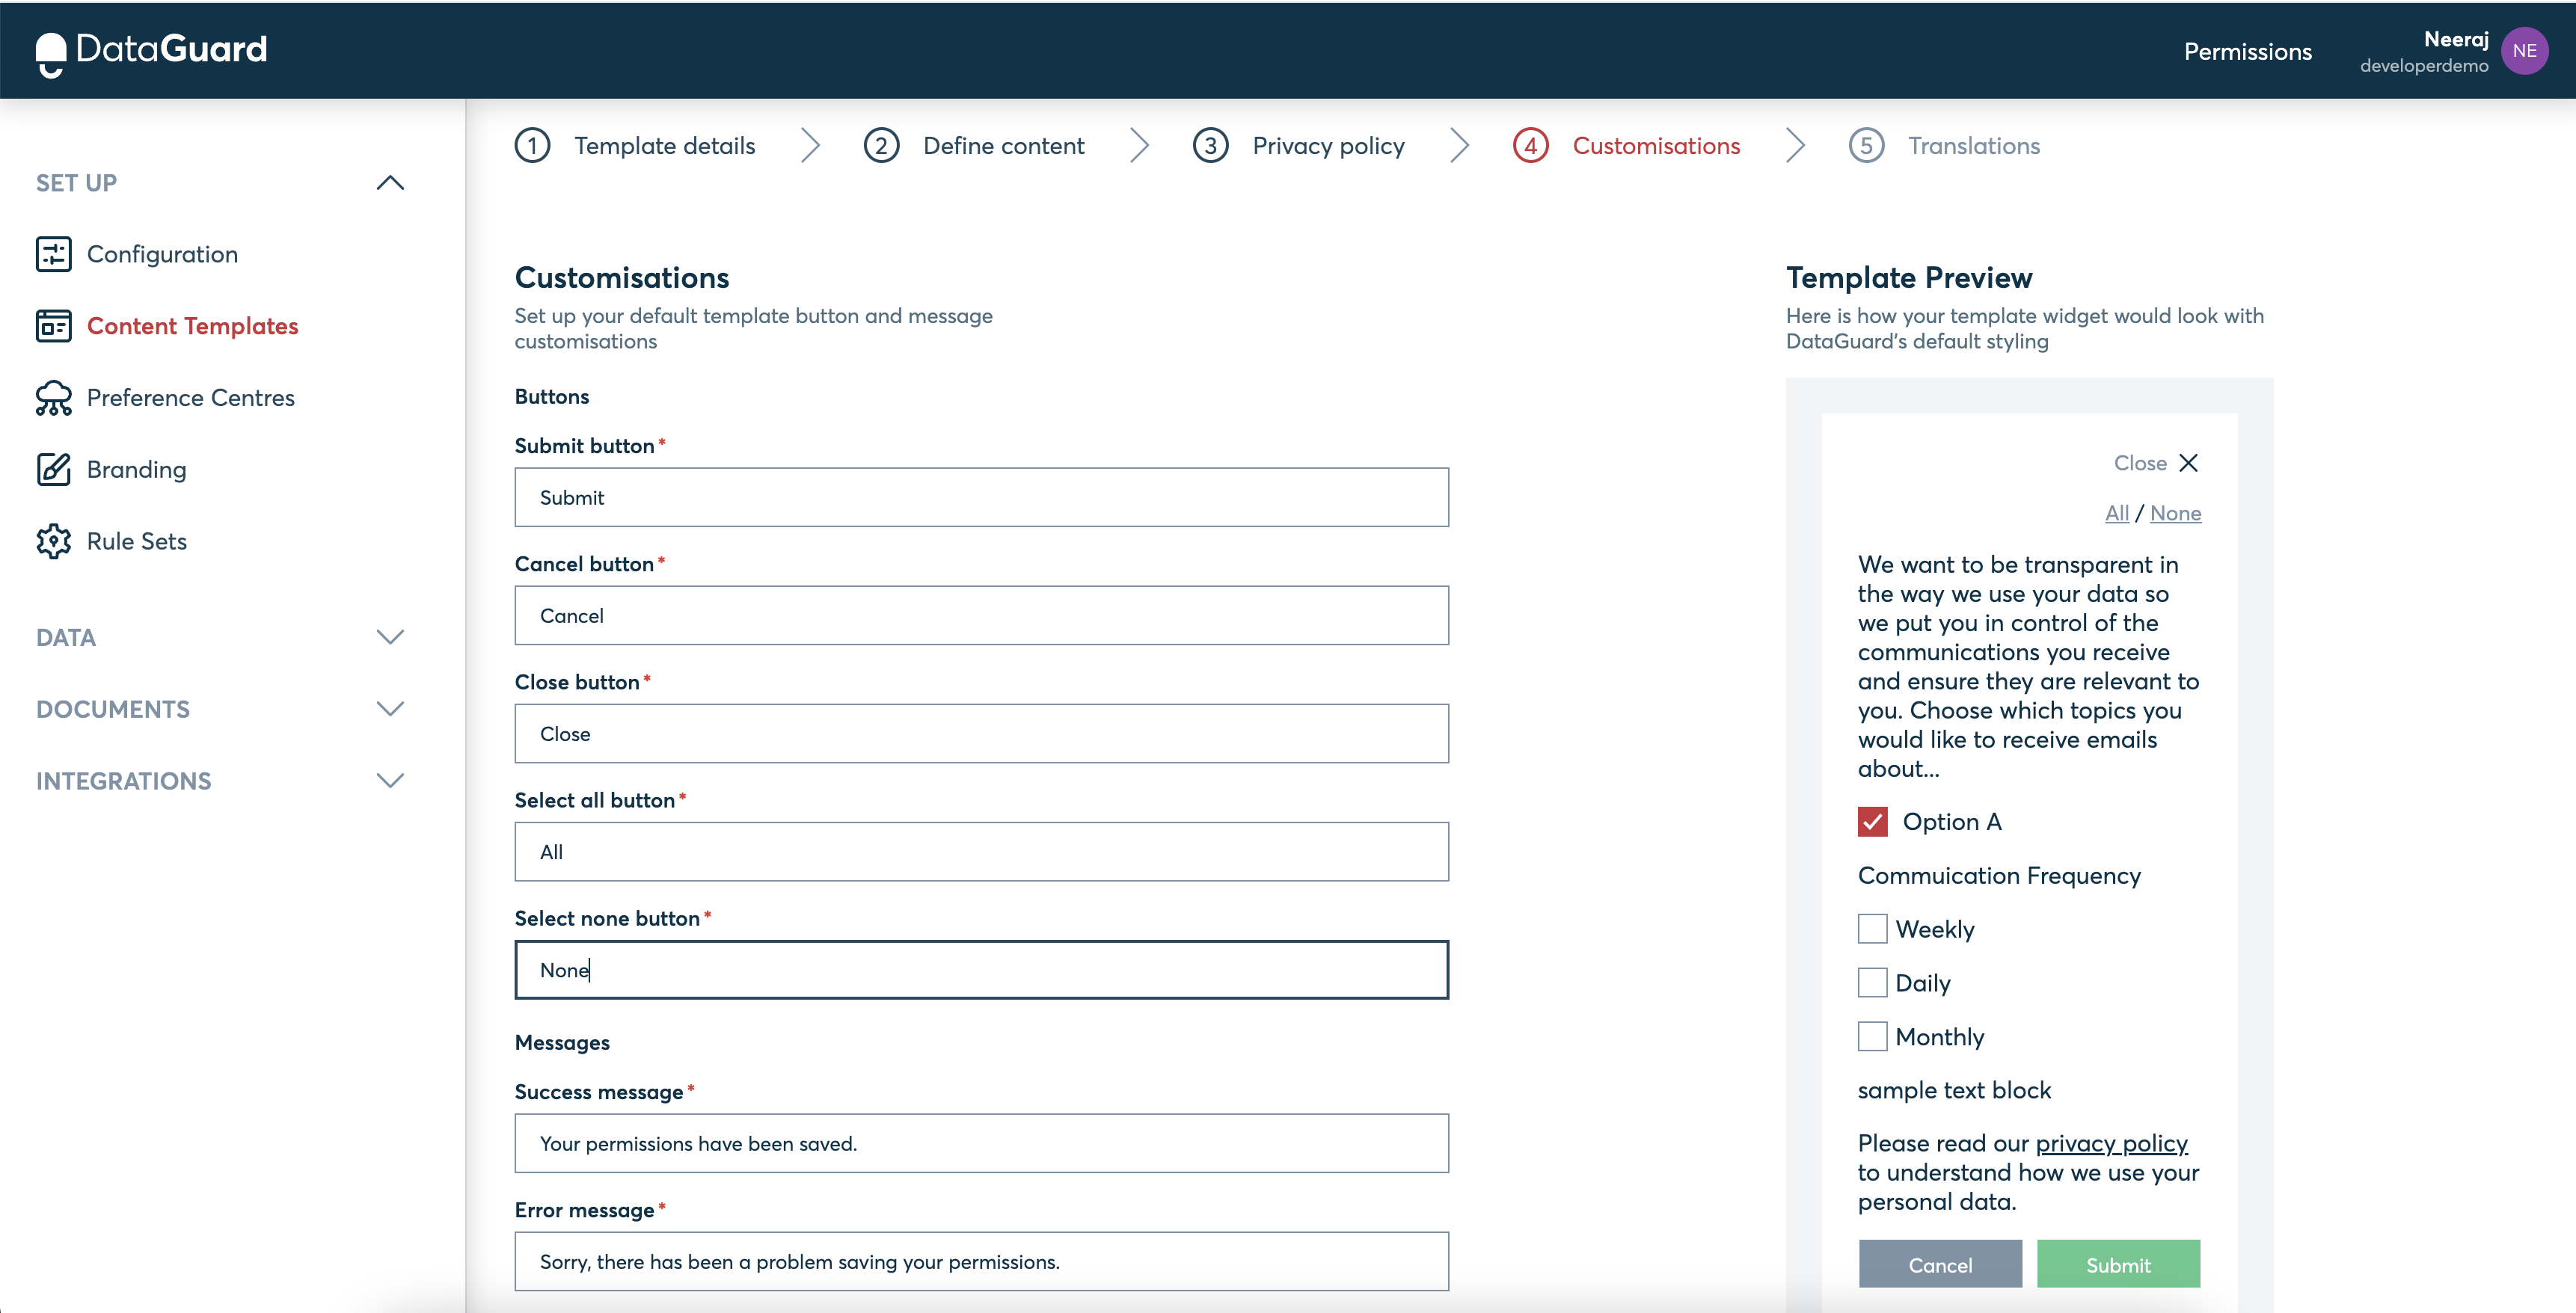
Step 4: Customisations
This page takes in any custom texts that you want to provide to the template buttons, success or error messages, etc.
Step 5: Translations
The translations page allows you to add language translations for your template if there is a requirement.
If your template doesn't require any additional language then you can directly click on "Finish content template" and complete the template creation.

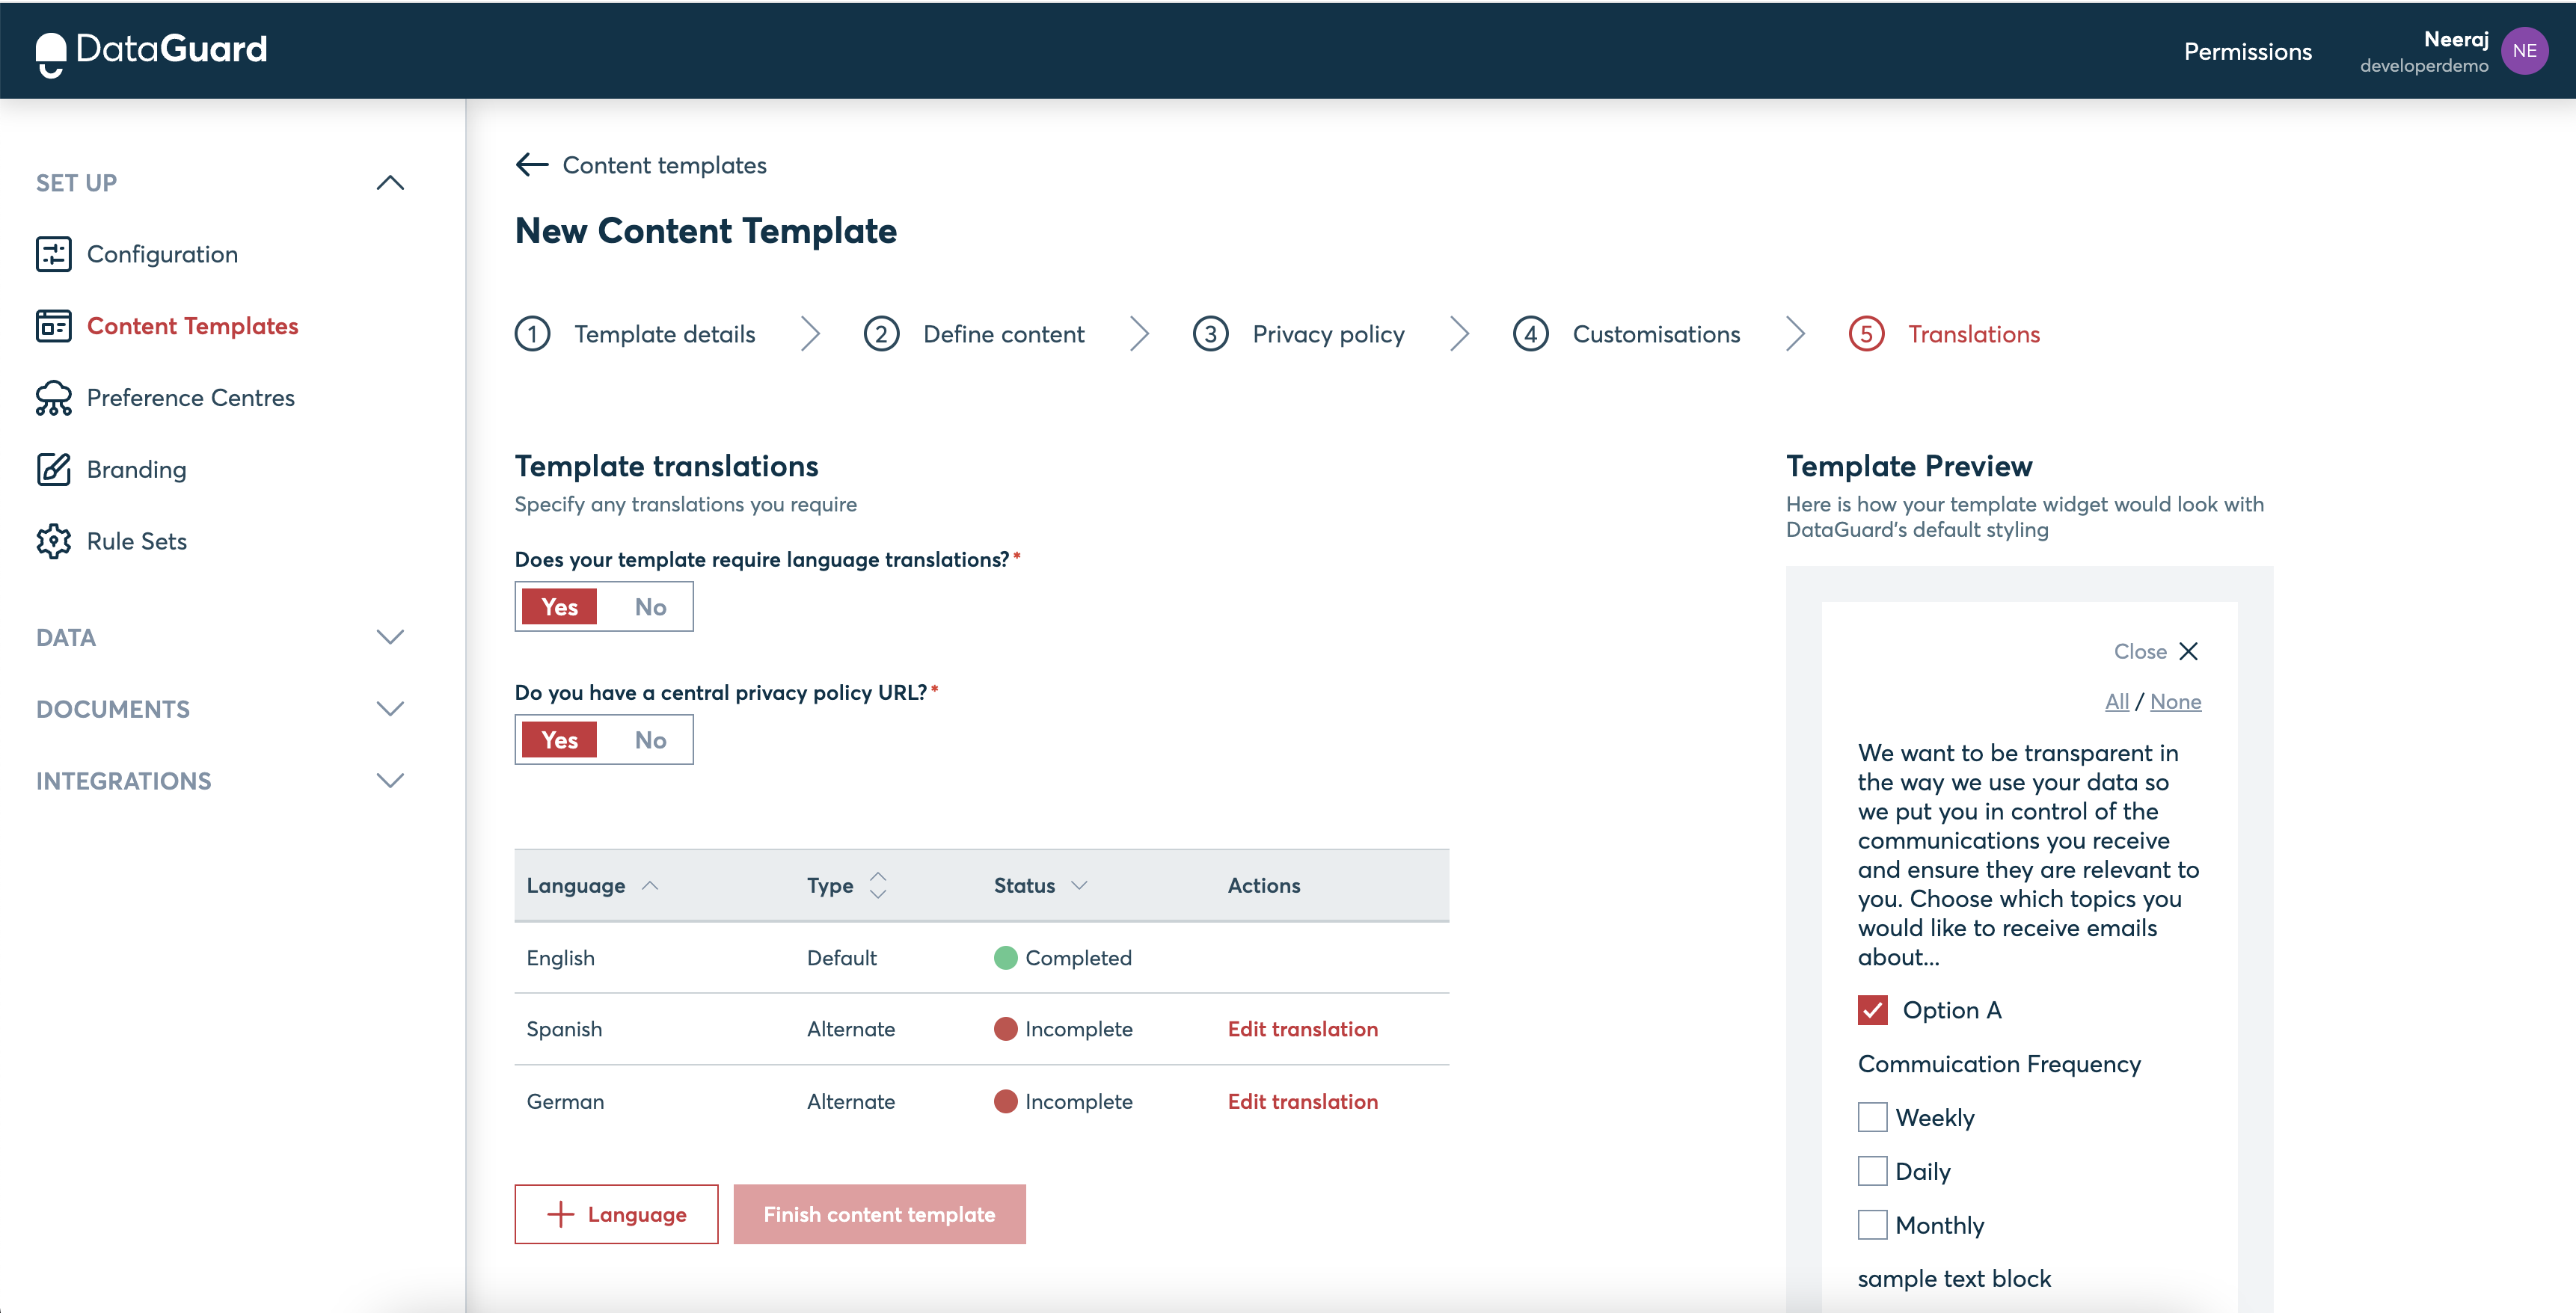
If your template requires language translations, you can select the Yes option for the question and you will be presented with additional inputs for providing the required details.
If you wish to use a single privacy policy for each language that you want to add then you can select Yes for the question and the same policy URL will be used for each of the translations for the template, otherwise you will be asked individual privacy policy details for each translation language
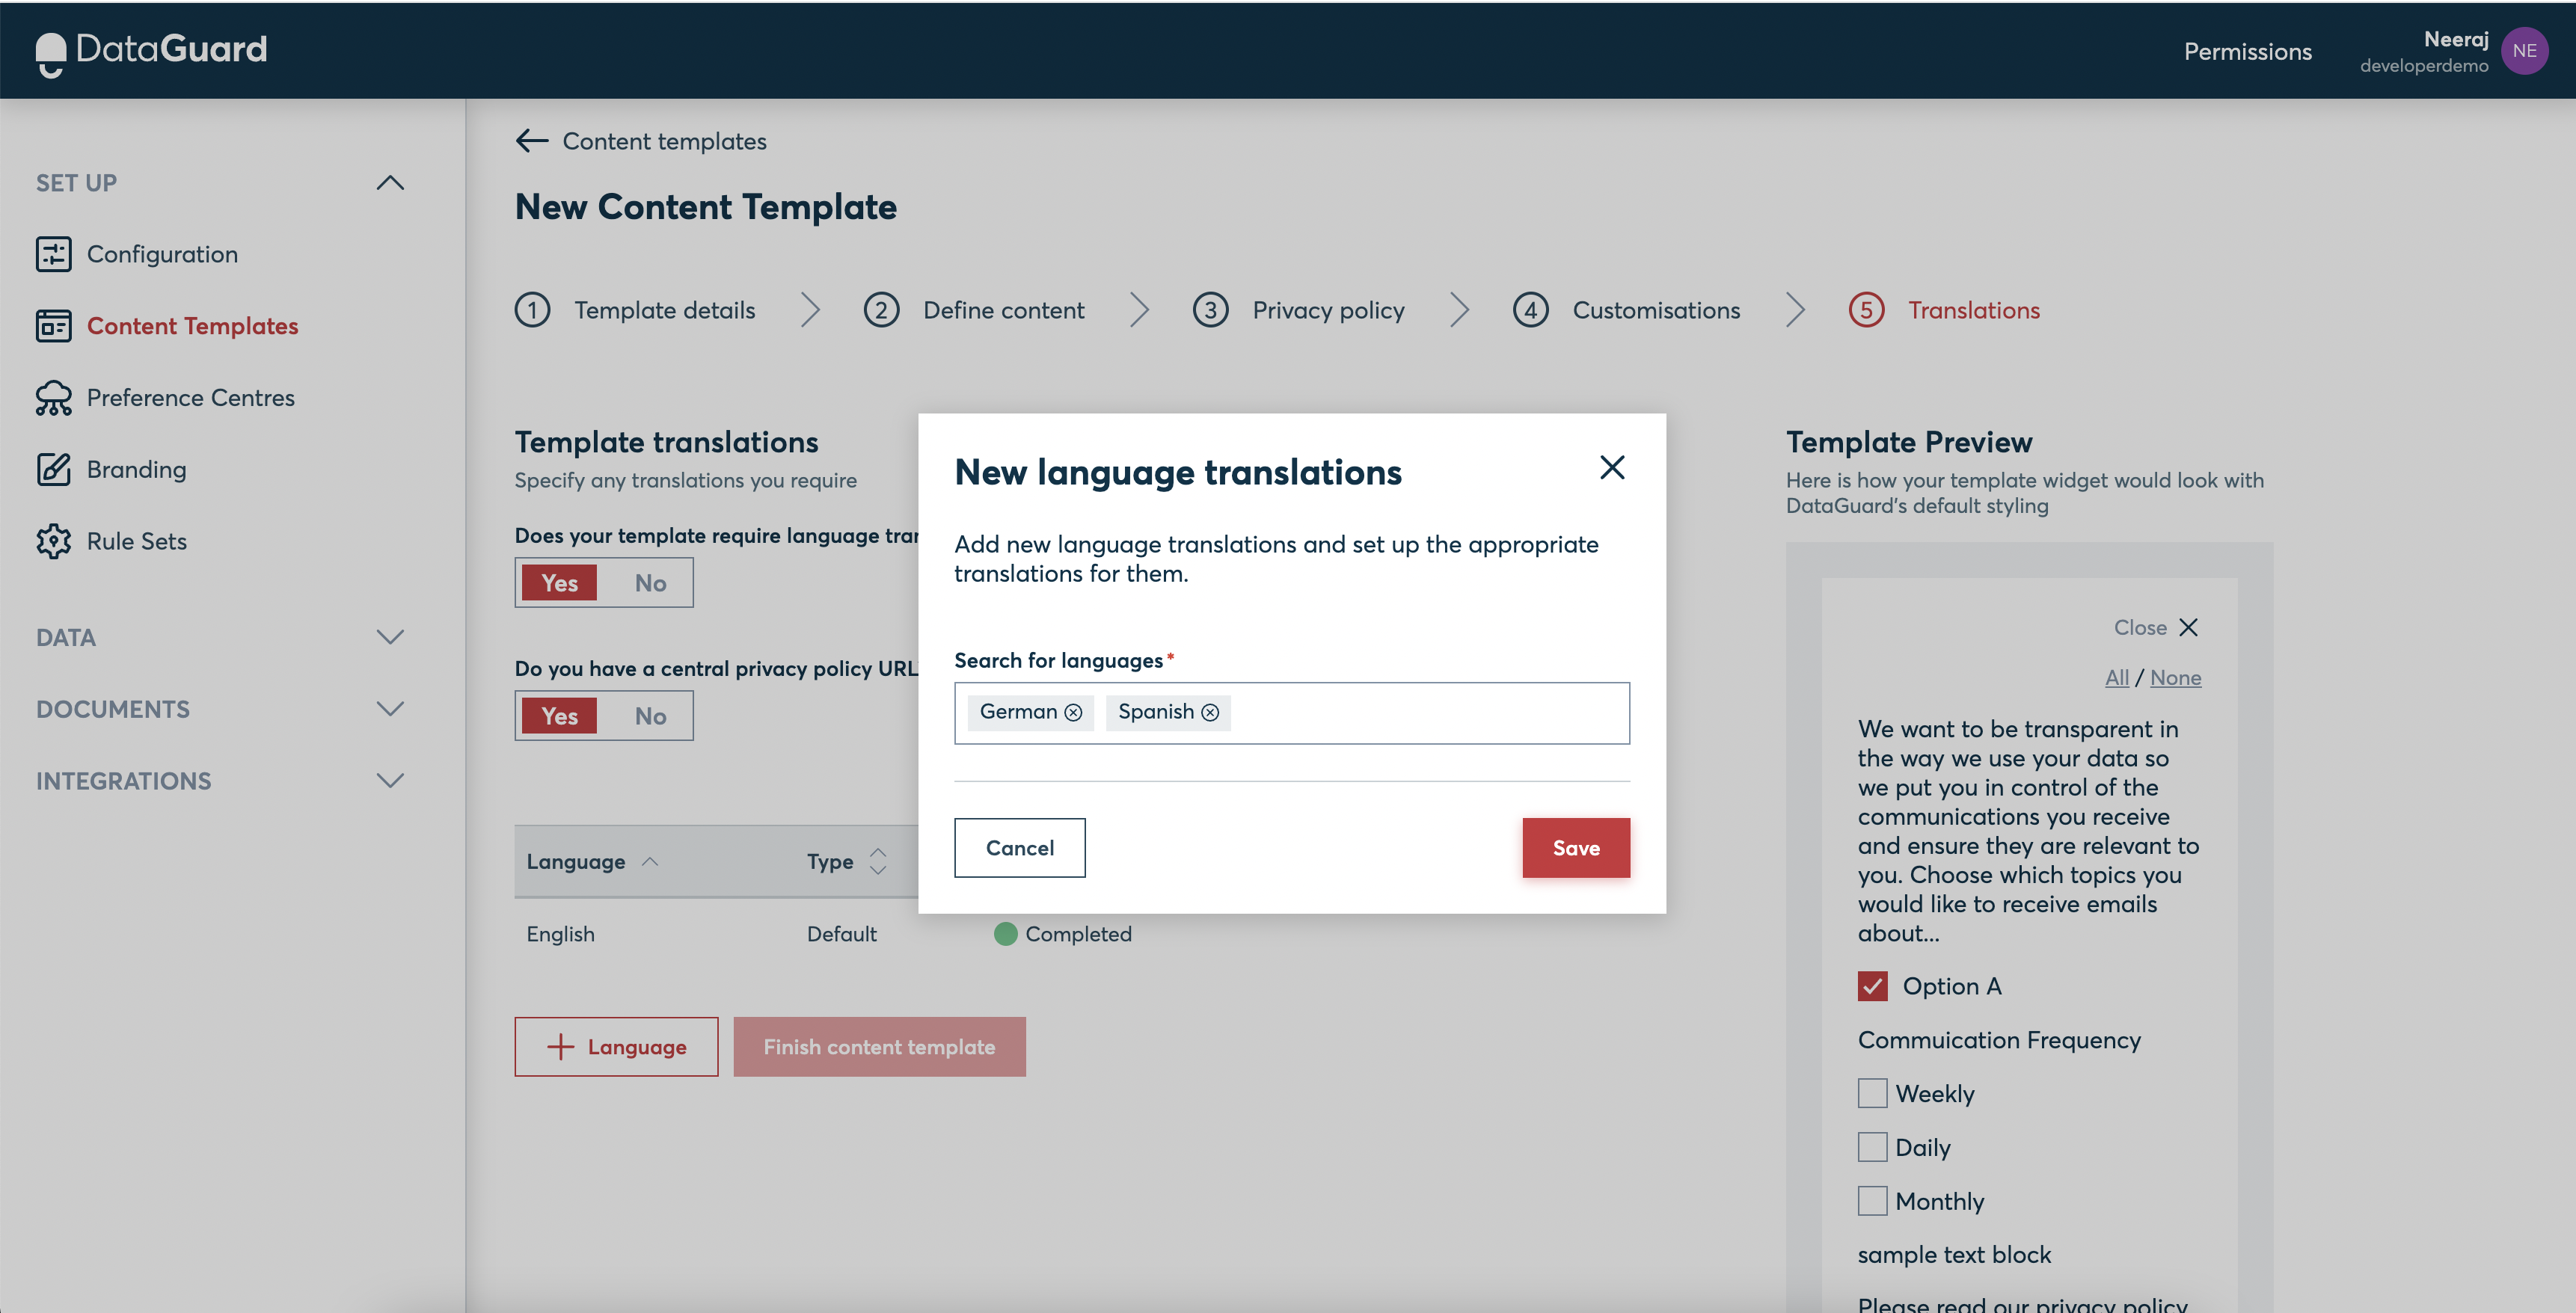
The page shows a table containing the list of added translation languages for the template. To add a new language you can click on the "+Language" button and a popup will be shown to select the languages, you can select as many languages you wish to add translations for. To remove any language, you can open the same popup again and deselect it.
The row for each language will show the status as Incomplete if there are any details missing for the translation.
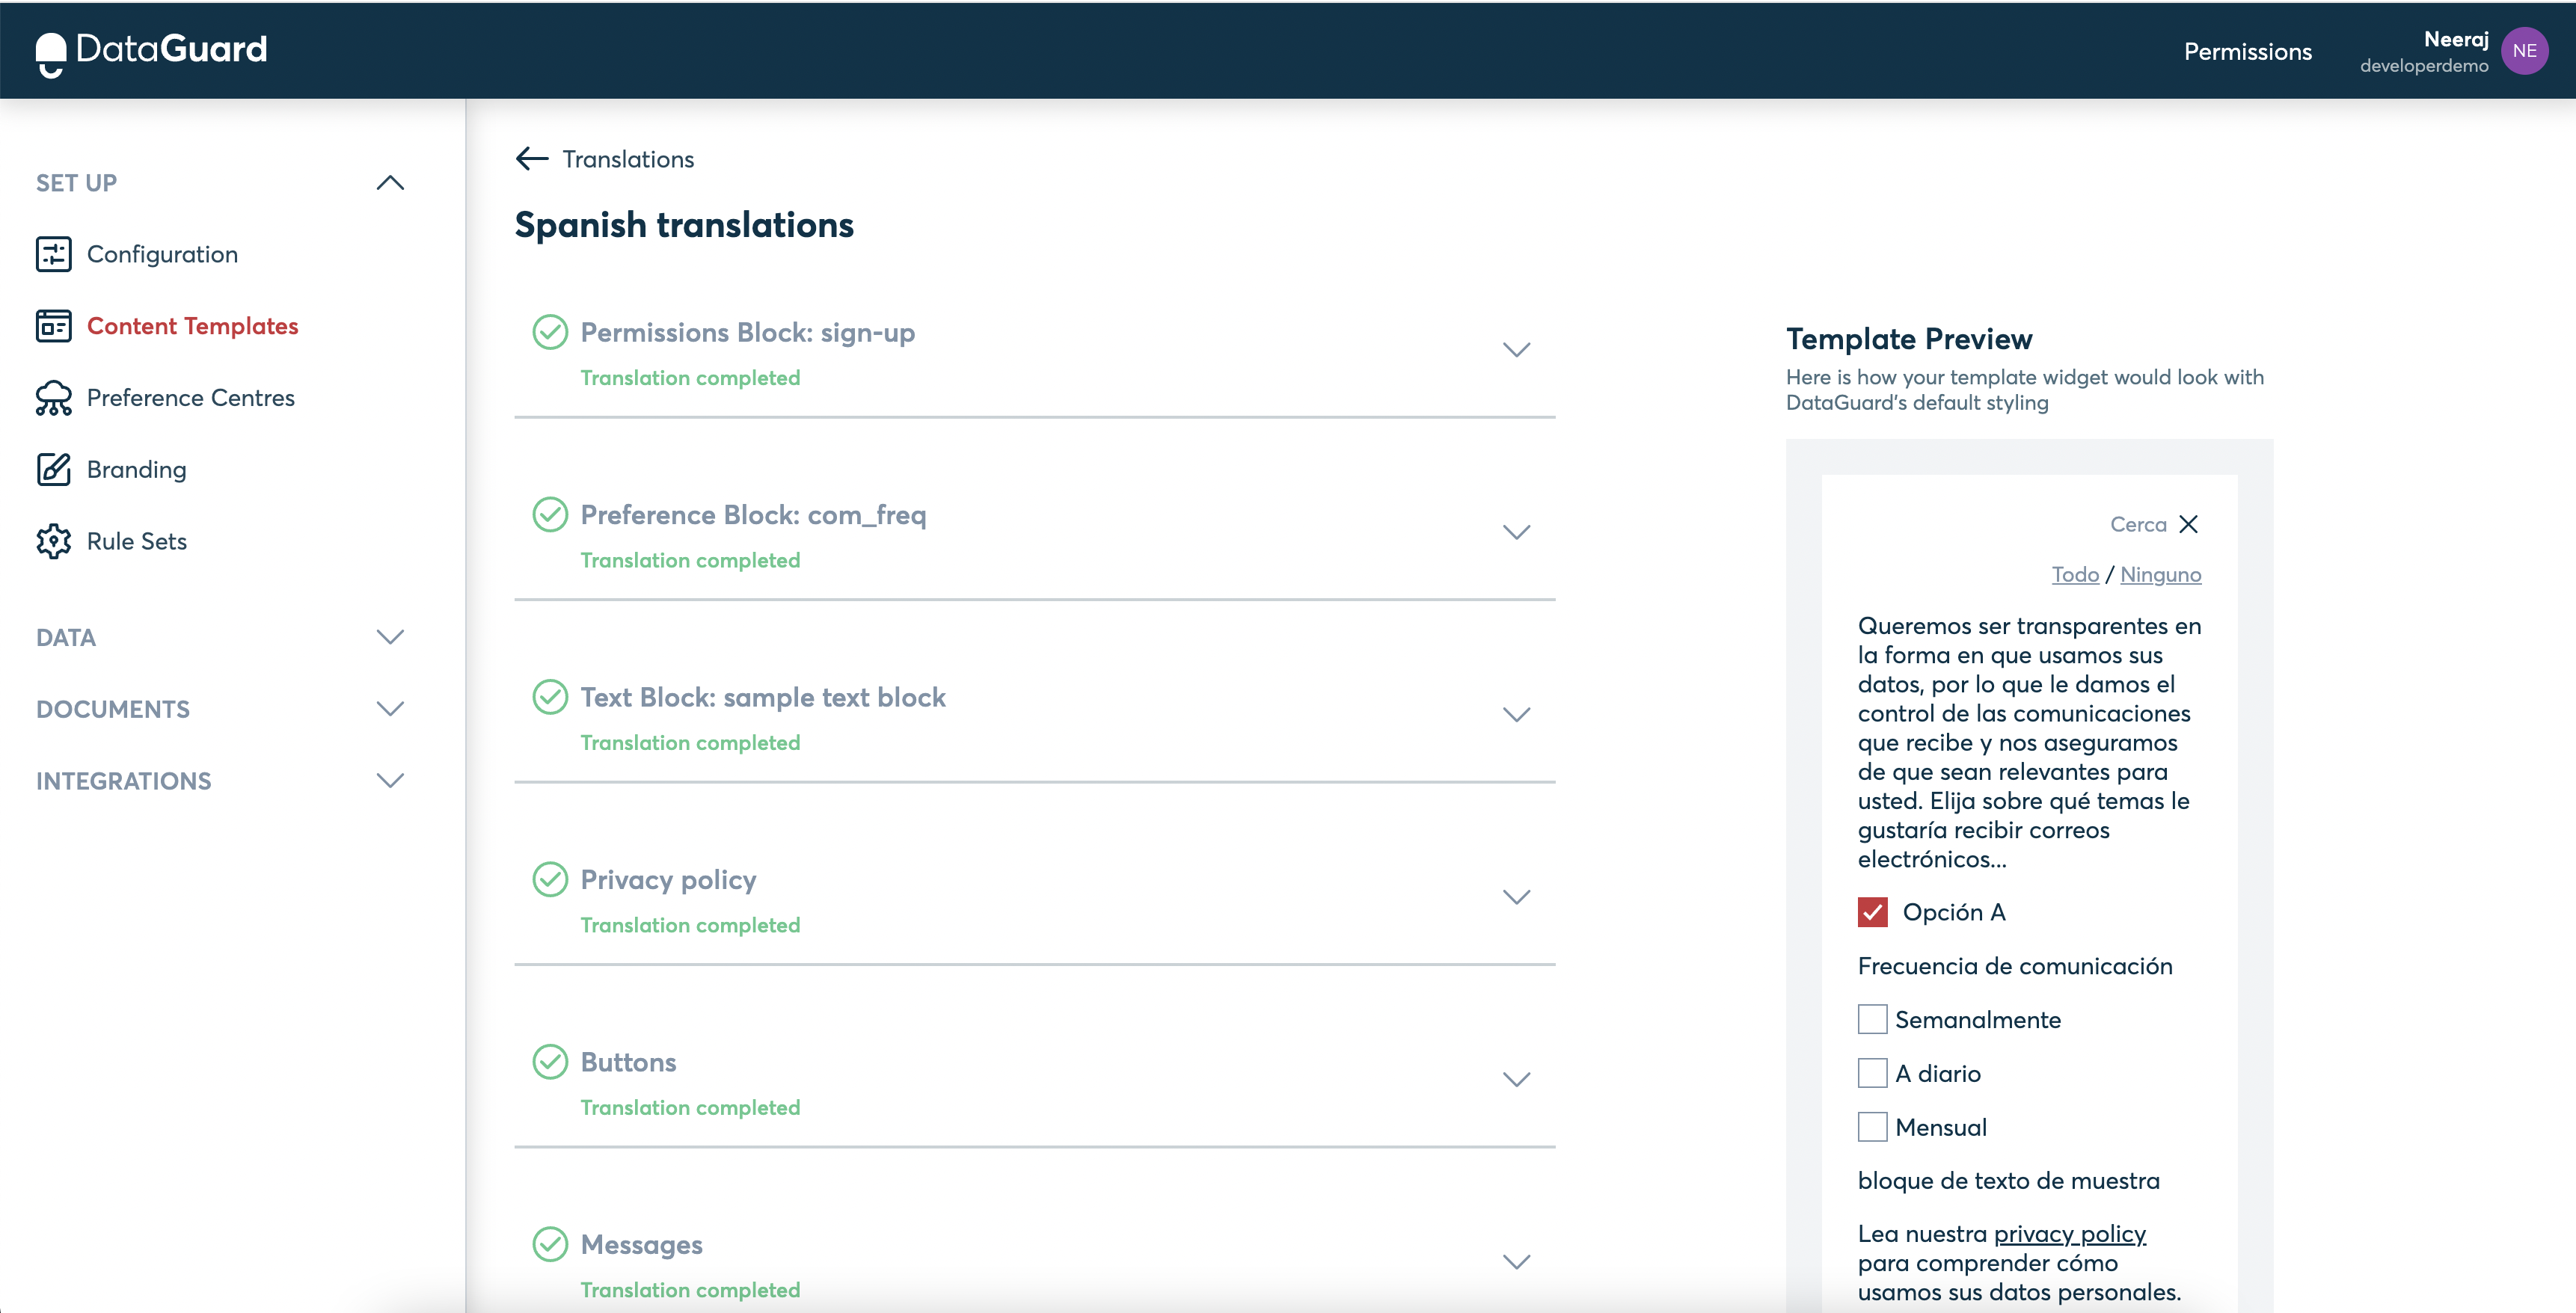
Adding Translations
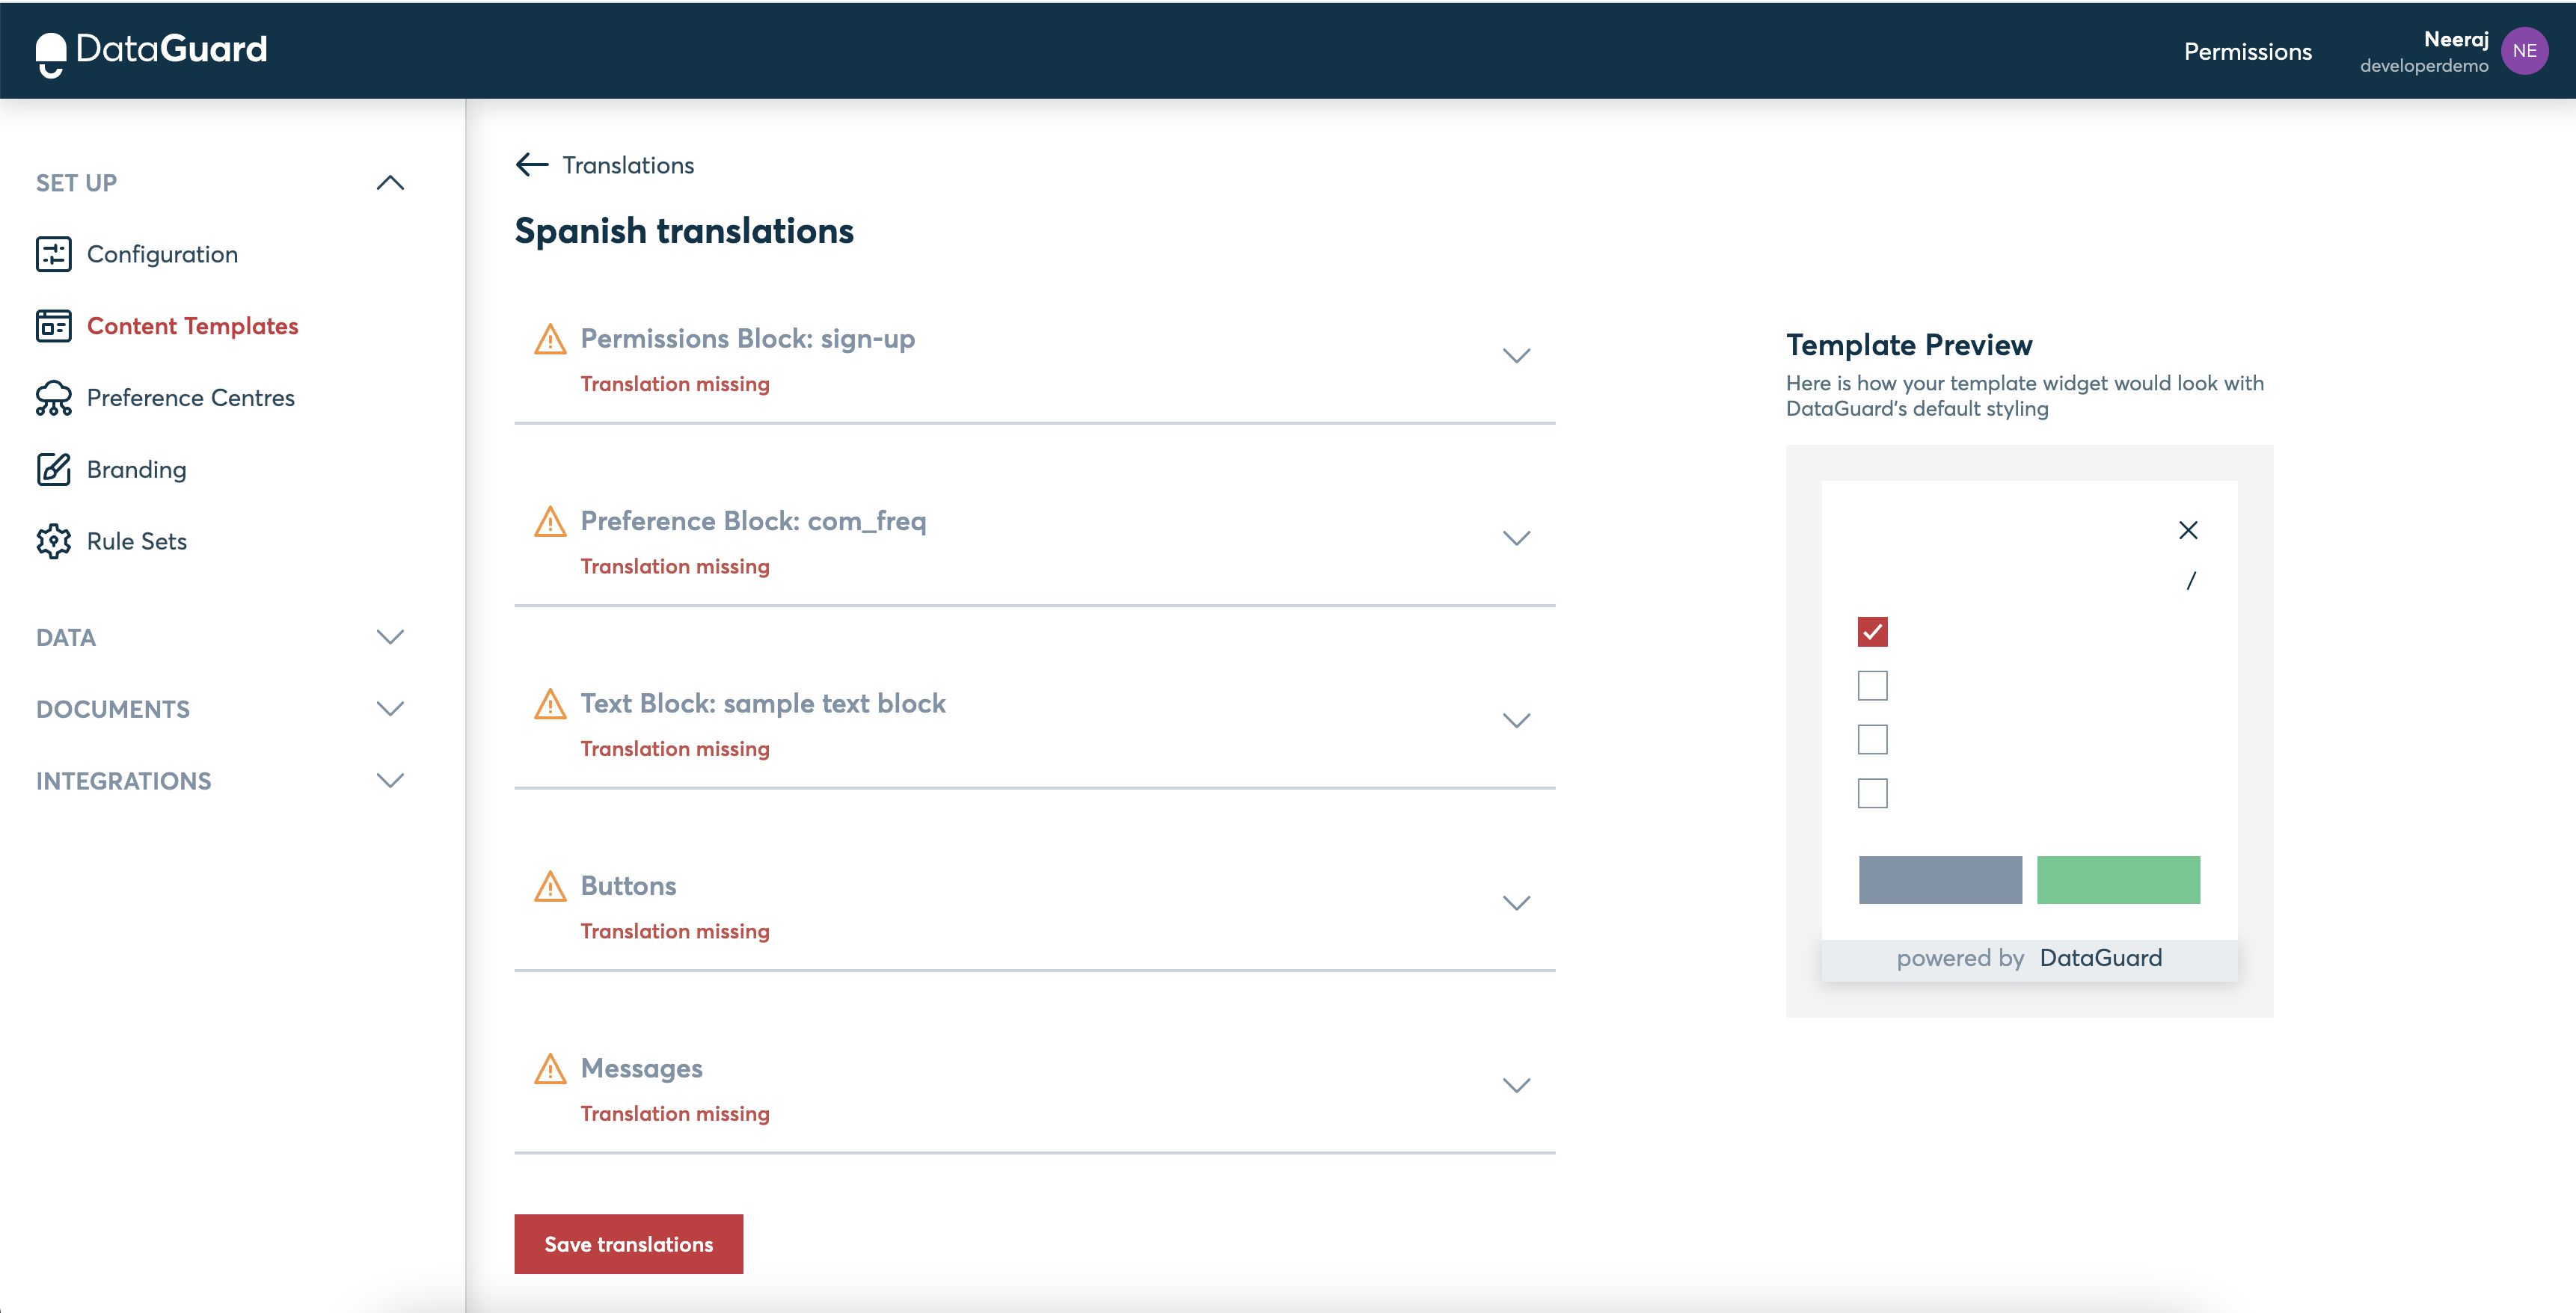
To add/ complete the details for the translations, you need to click on the "Edit translations" link in the "Actions" column. This will navigate you to the page for that language where you can fill in the details. The status of the sections will show Translation missing if any of the sections contain errors or have missing information.
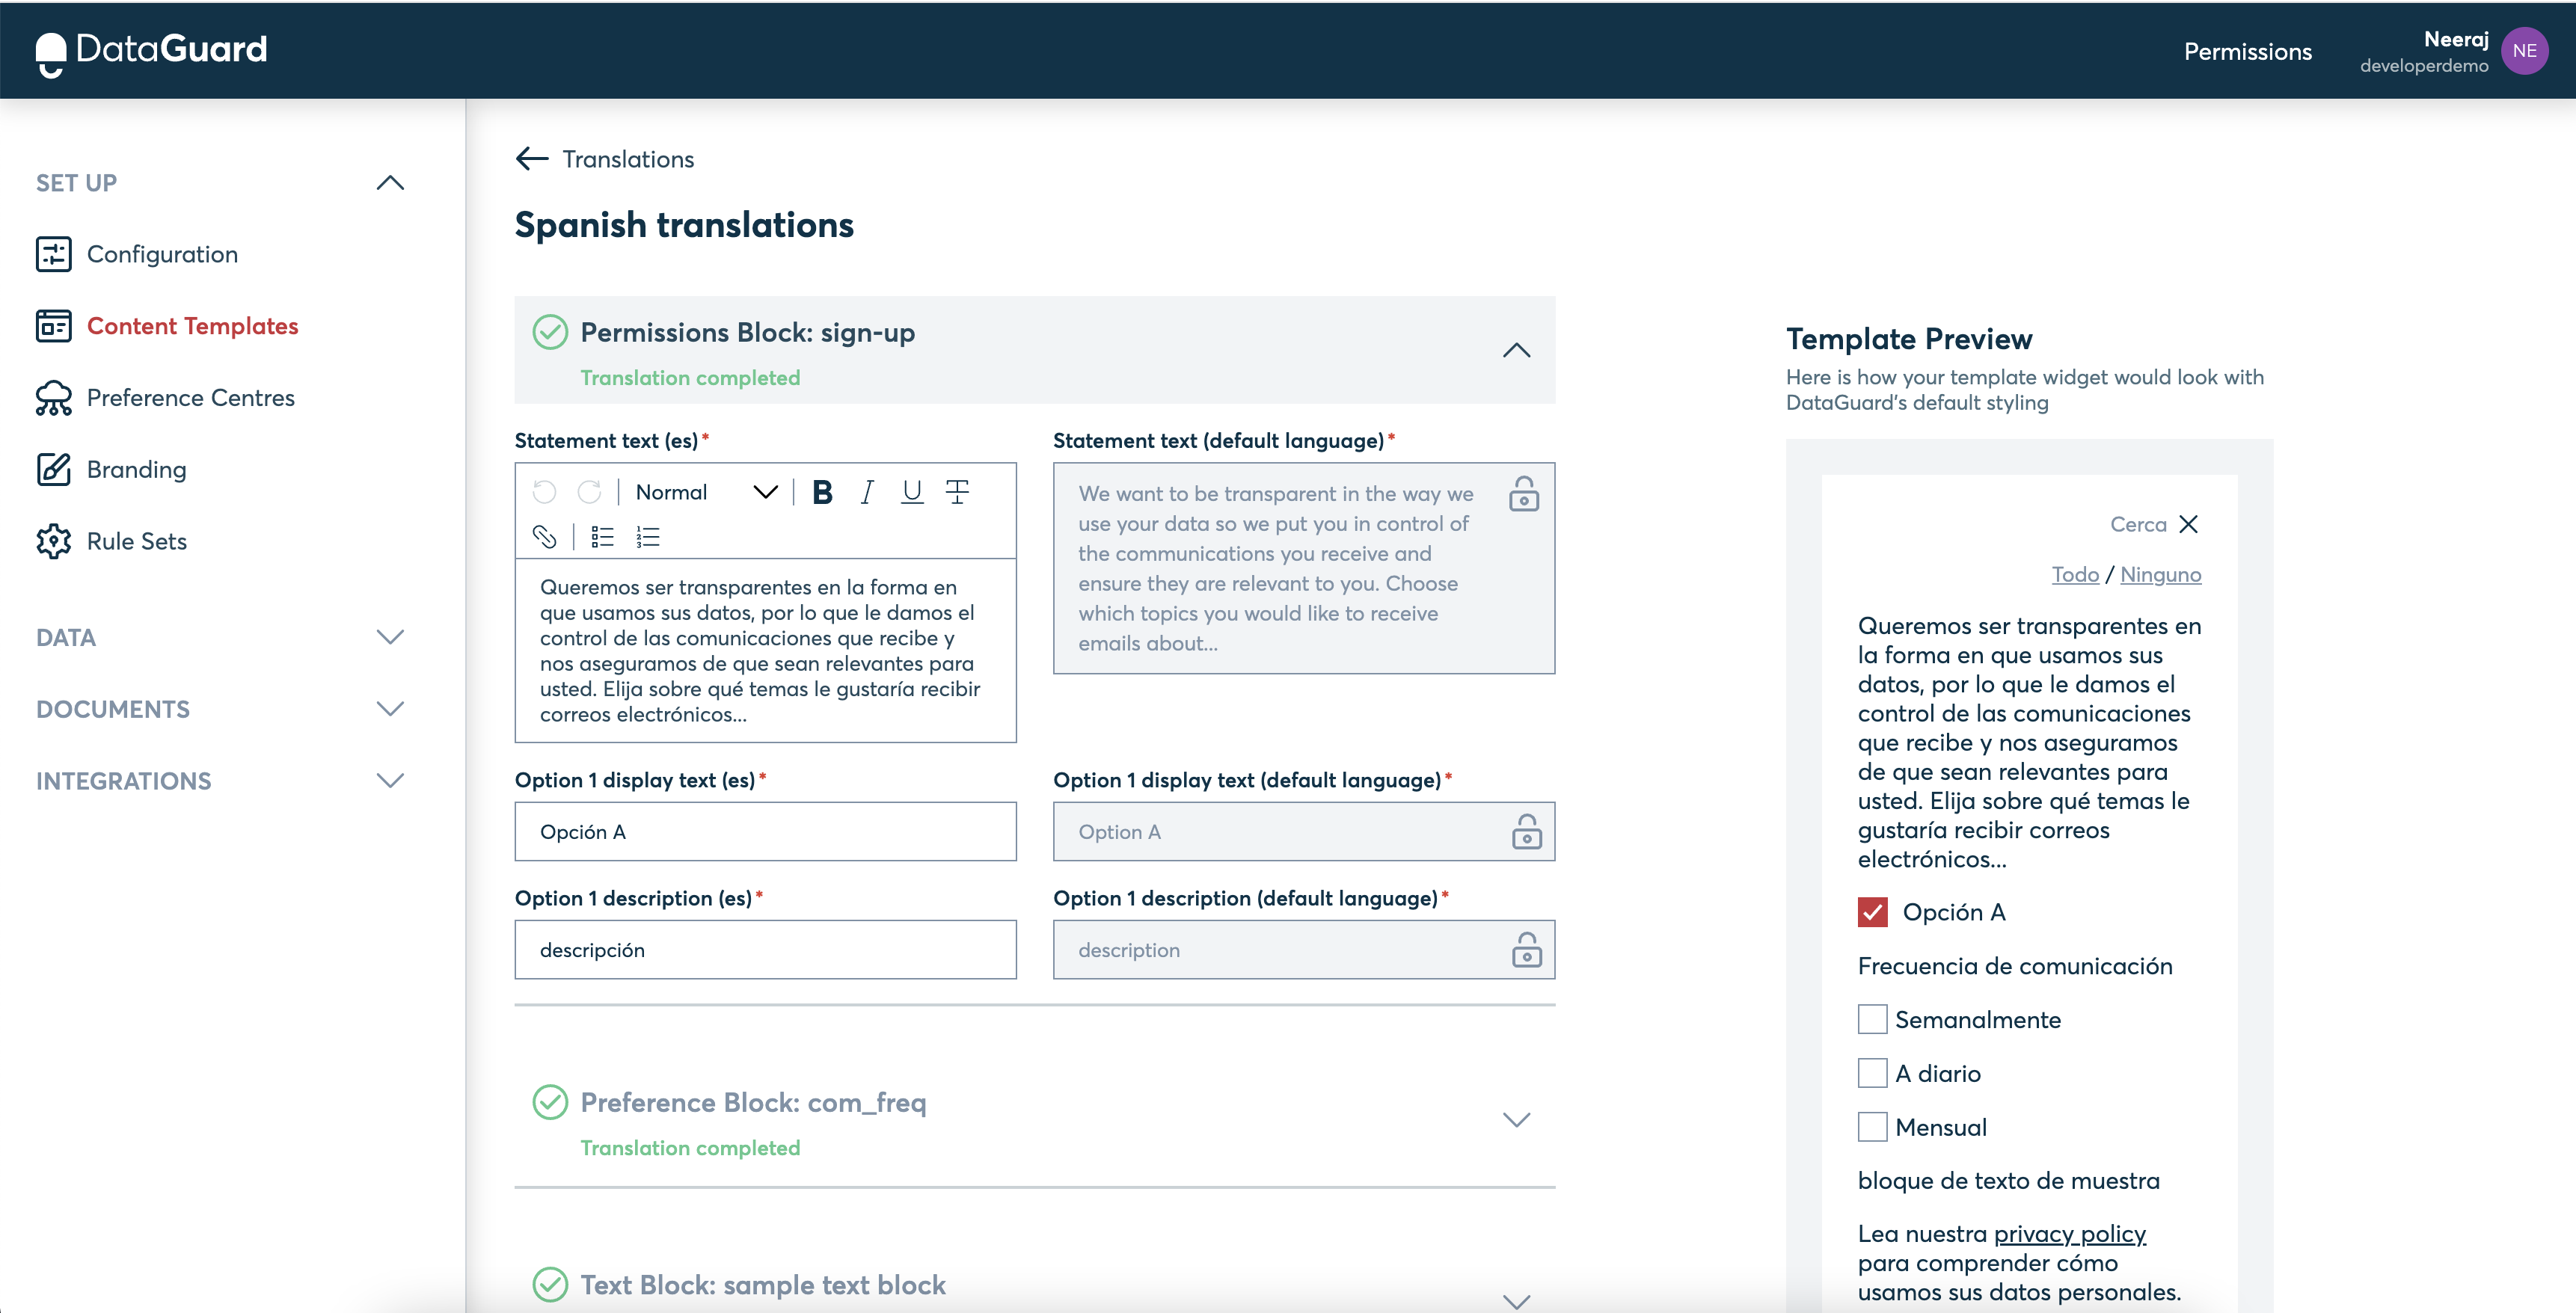
After you have successfully filled in translations for each section, the status of each section should show Translation completed status. Then you can click on the "Save translation" button which will lead you back to the Translations home page with the final status as completed for the given language row.
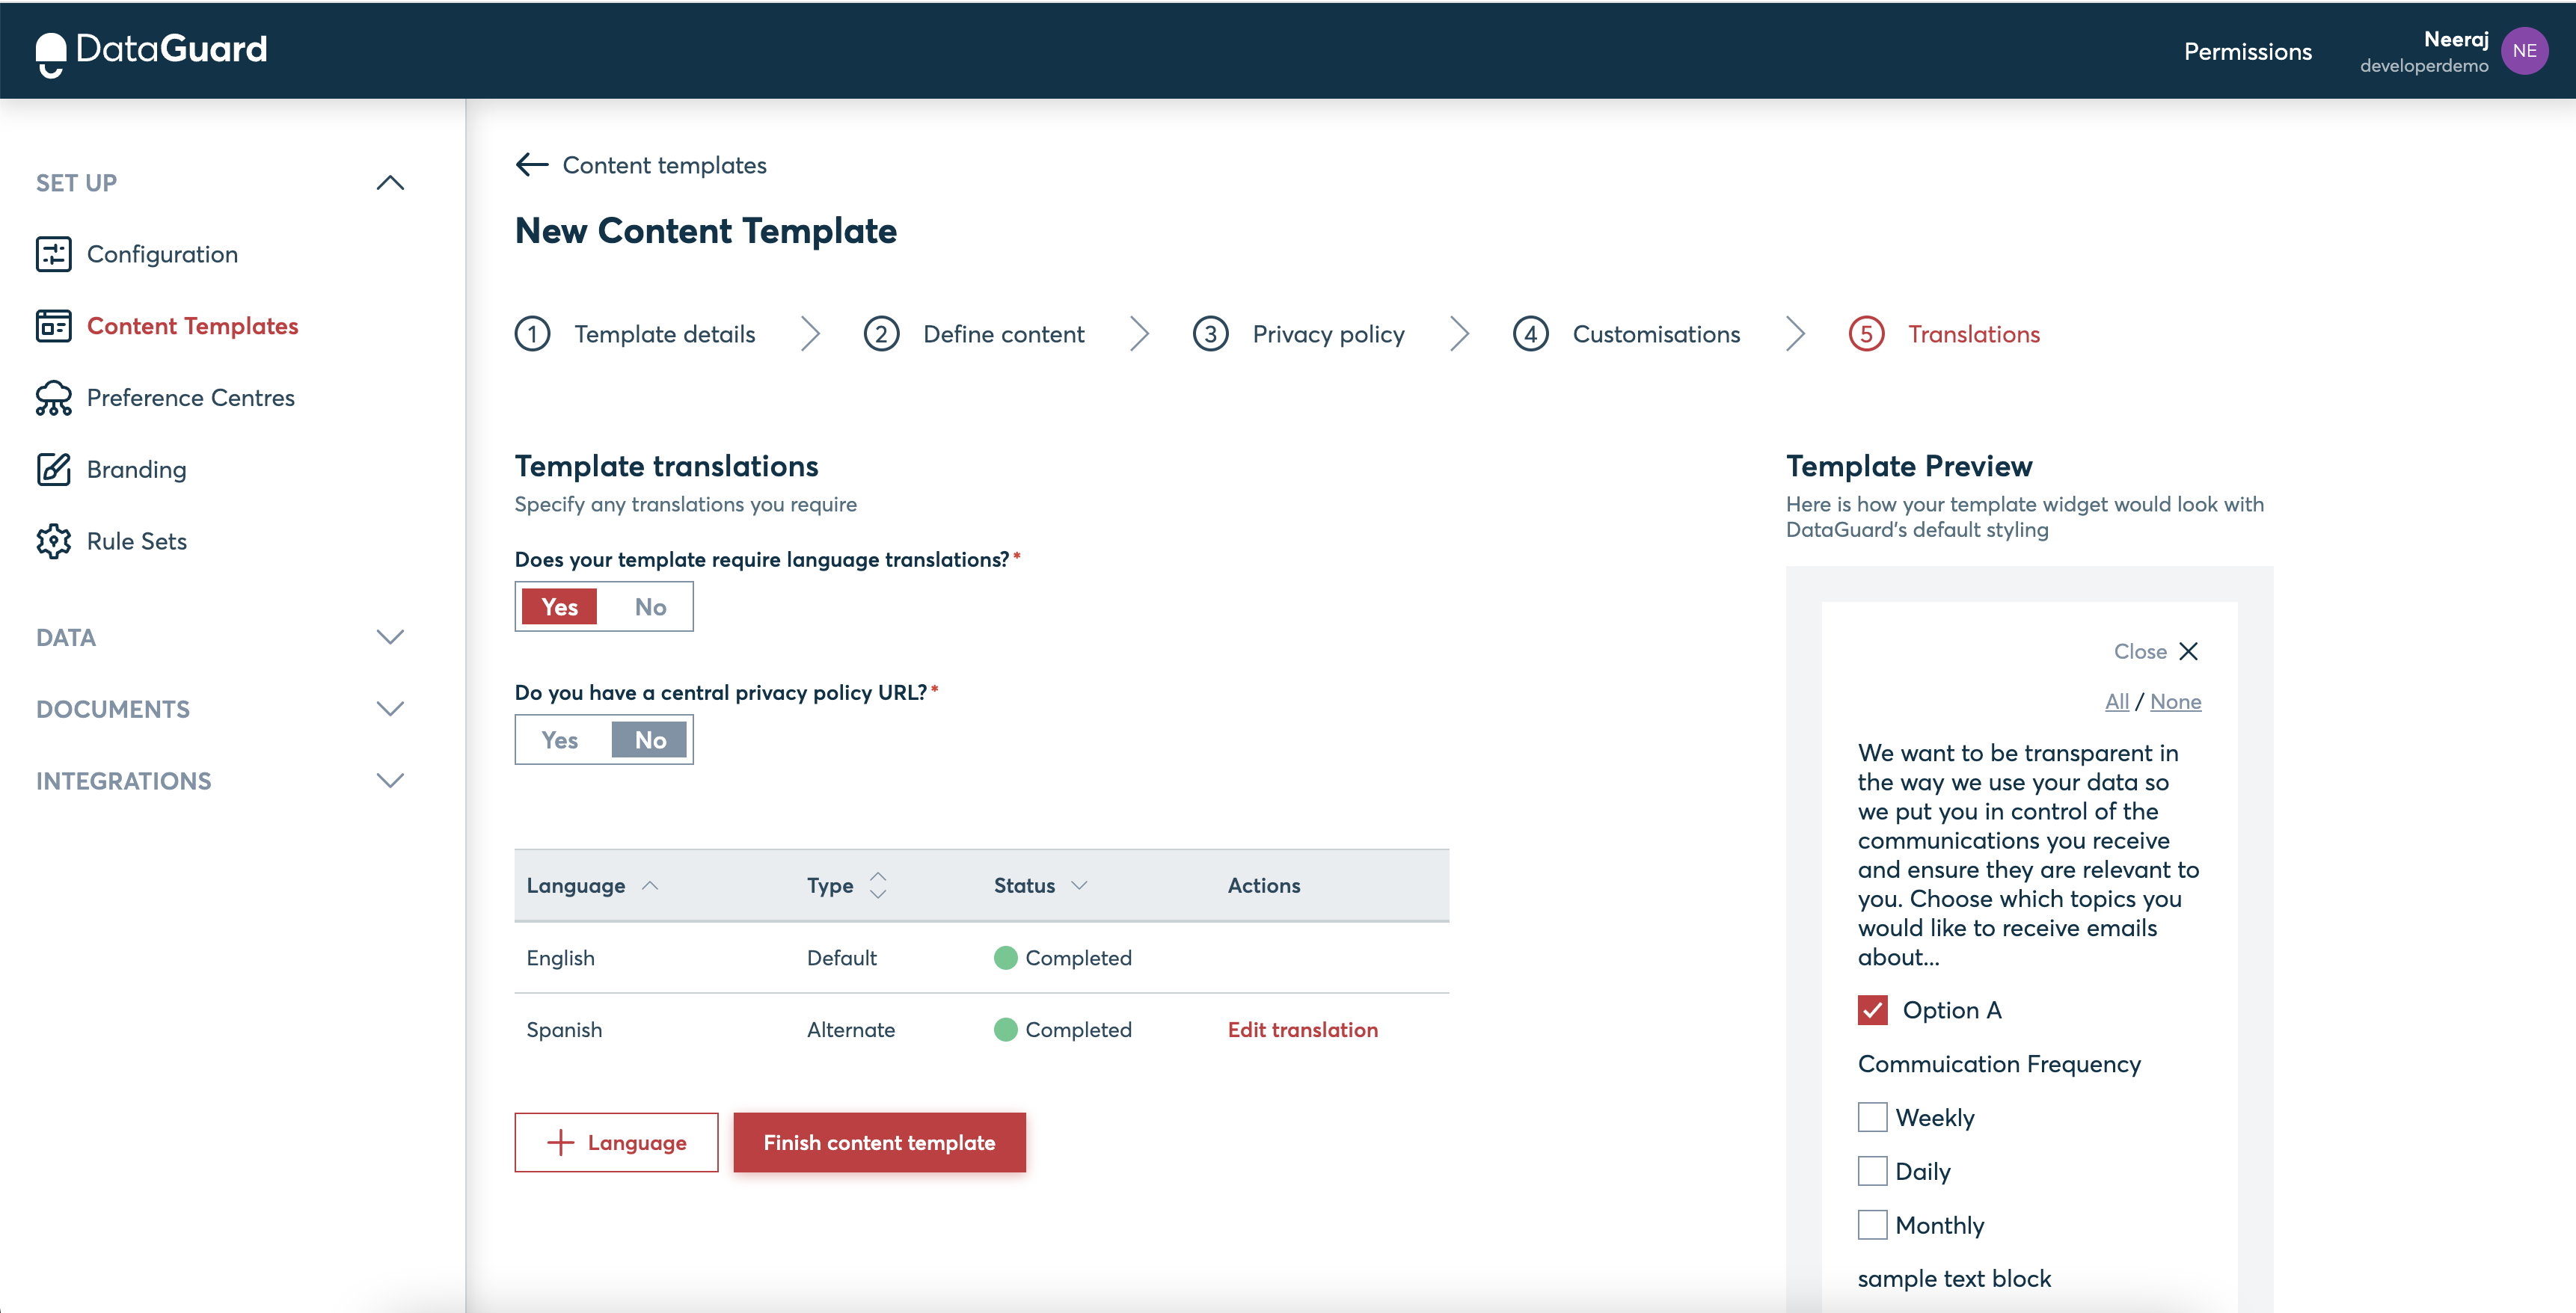
Once you have added the translations successfully, and the template doesn't have any errors the Finish content template button will be enabled. You can click on the button and complete the template creation.
If the template is created successfully you will be shown a toast with a success message and redirected to the home page containing the table of existing content templates, which will have the newly created template in it. If any error occurs during the creation, then a toast with an error message will be shown.
FAQs
Does my progress gets saved while creating the content template if I navigate away from the content creation steps in between for some reason?
Yes, the progress of the content template is saved in your browser's local storage. When you return to the first step of the content creation page after navigating away to any other page, a pop-up is shown asking for you to retrieve that saved data or to start afresh.

How do I know if there are any errors in the template I am creating?
To create a new template successfully, resolve any errors in each step before moving forward. Errors will be shown under the input fields or at the end of the form. If changes in the current step cause a previous step to have errors or while editing an existing template, and errors persist across any of the steps, the "Finish Content Template" button on the "Translations" page will be disabled. Look for a red dot to identify the problematic step and view the associated errors by navigating to that step.
The following image shows an error in the Privacy Policy step while the user is are the translations step.
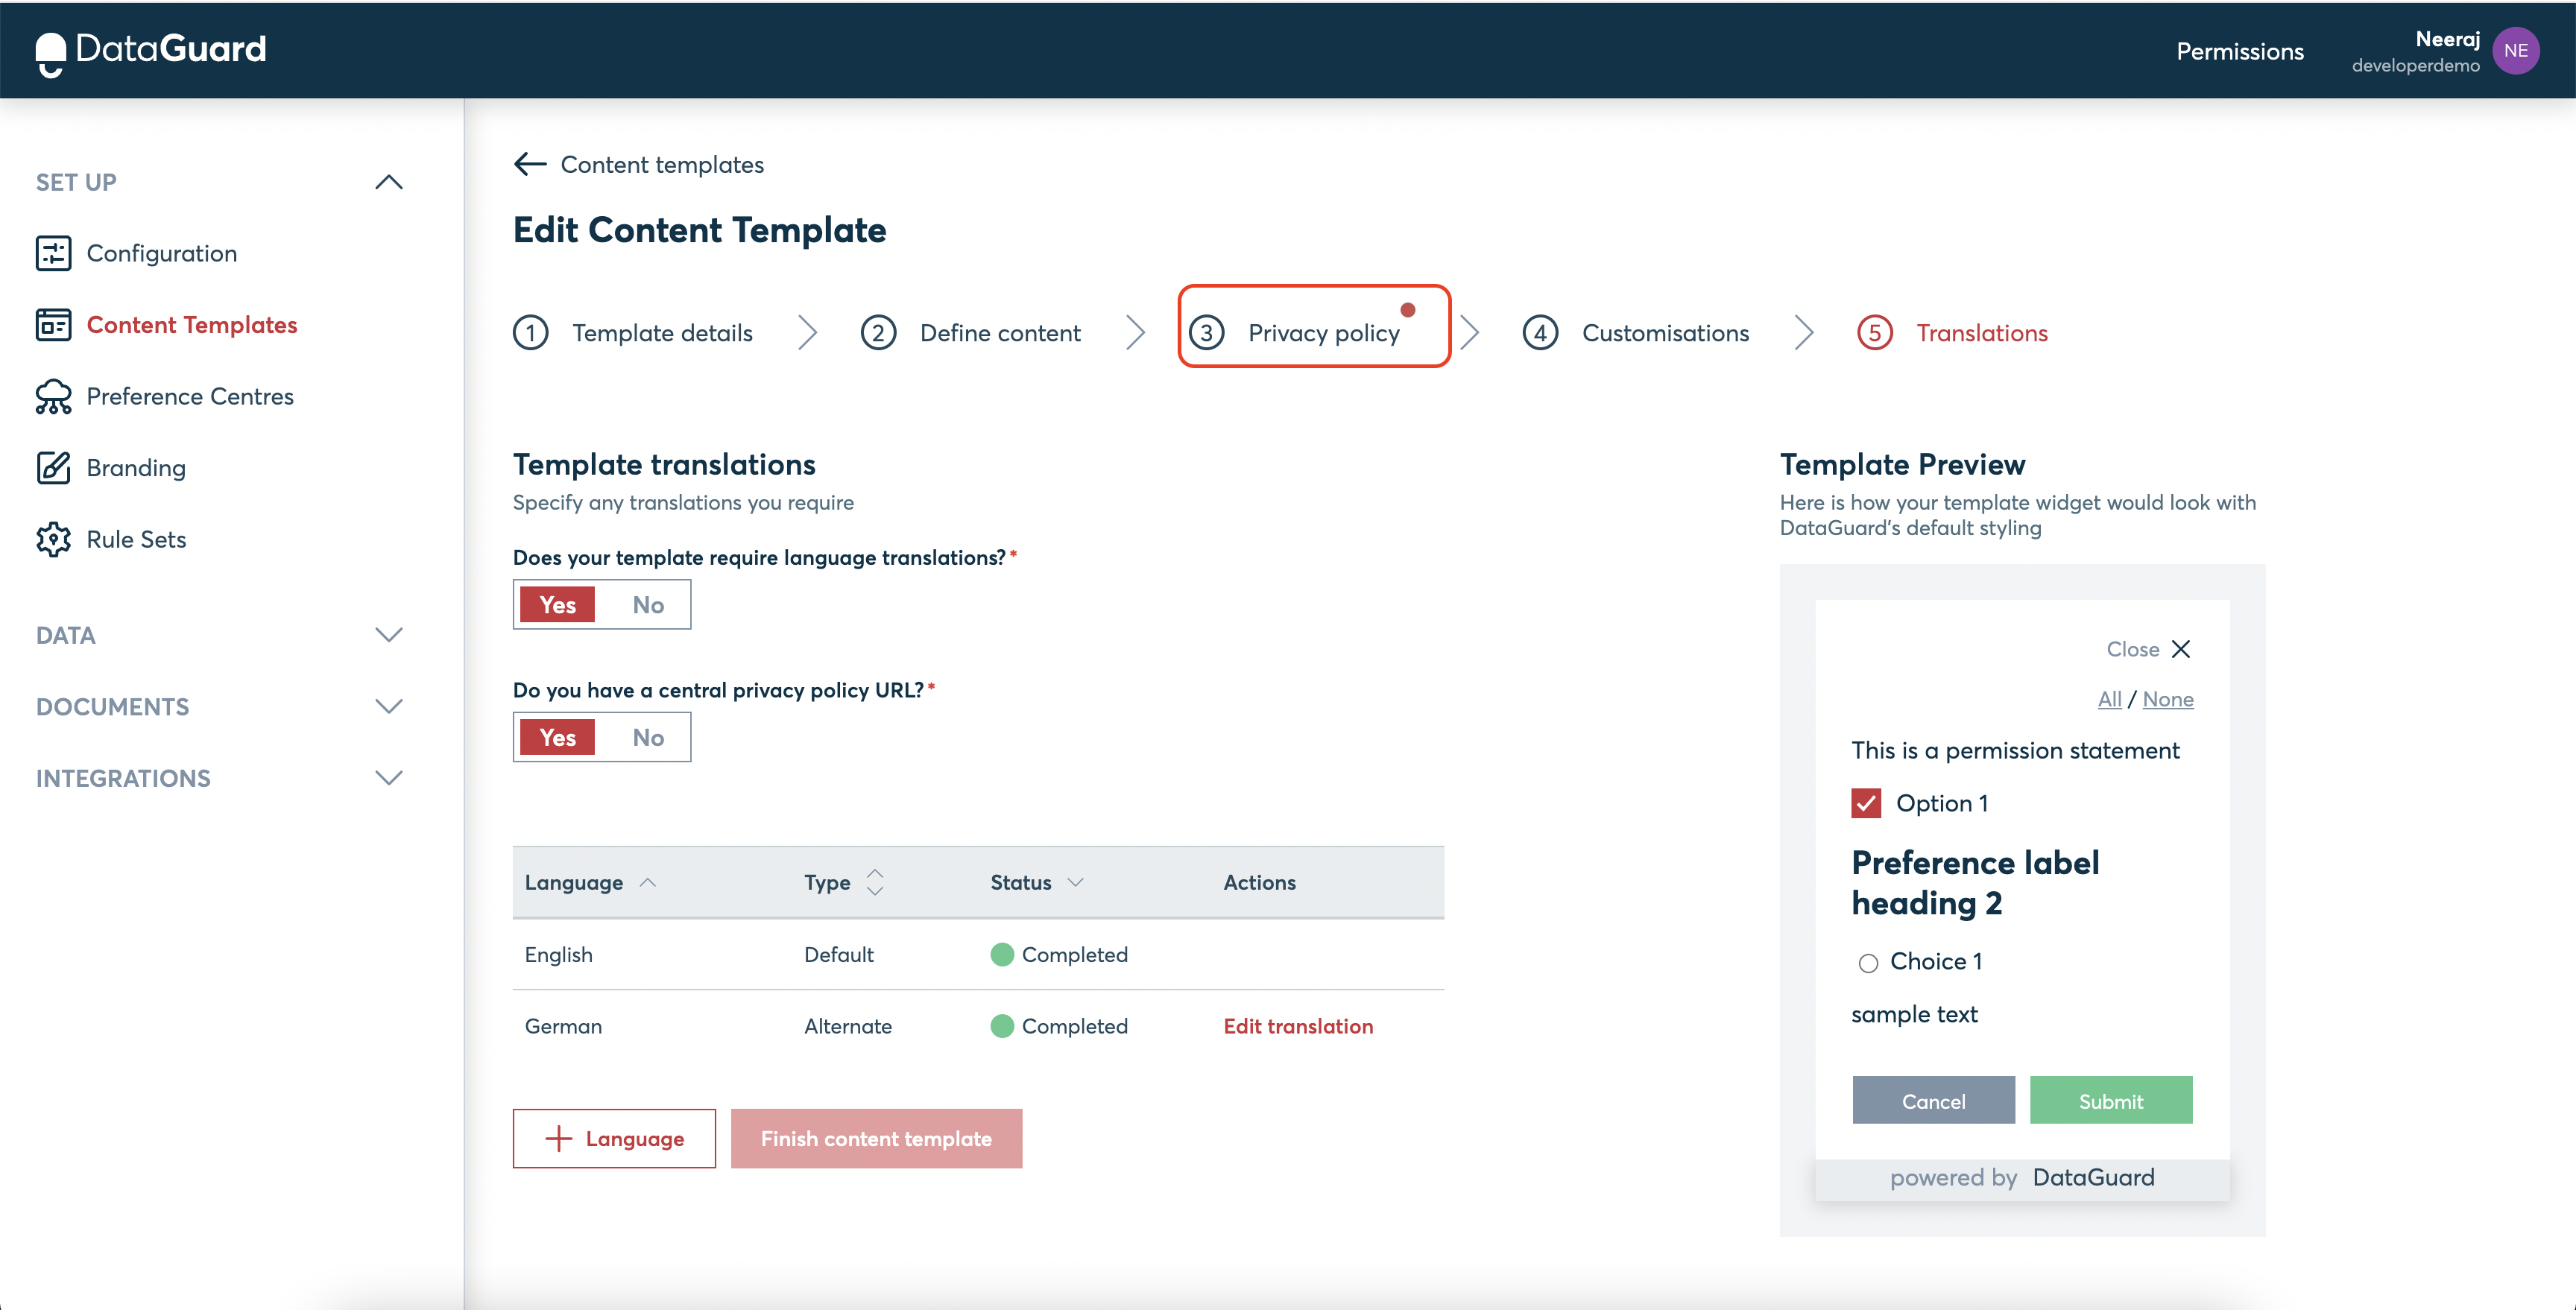
The actual error will be visible when the user clicks on the privacy policy step and navigates to the privacy policy page.
Updated 9 months ago
Embed a widget on your choice of collection point or use DataGuard's Hosted Preference centre to collect consents