Snowflake
What this integration can do
The Snowflake integration can operate in two modes depending on the configuration:
- Data Export only
- Data Export and Access Management
Both modes will create a new table in your schema to save the current state of a data subject in. One row will contain the fields:
- Reference: External Reference for that Data Subject
- Option ID: Internal ID that identifies the consent purpose
- Option Label: The label for the consent purpose (In the form Party / Data / Purpose)
- Last Updated: The timestamp of the last update received from CPM
- State: Boolean value representing a given/revoked consent
An update of a consent in DataGuard CPM will trigger an update/insert of the corresponding row into this table.
If access management is active there's also a table containing the configured mapping between the id of the consent purpose and a Snowflake row-name. This is used in a row access policy on one configured target table to provide access to rows based on the consents given by the data subject.
Pre-requisites
Before starting the configuration of the integration in the DataGuard Consent & Preference Management Platform make sure the following steps are all completed and you got the necessary information at hand:
- Create a new OAuth 2.0 Connection in Snowflake
- Create a Snowflake user and grant the necessary permissions
- Have table(s) housing customer-related data in Snowflake
- (Optional) Create Snowflake roles used in the access management feature
1. Create a new OAuth 2.0 Connection in Snowflake
Snowflake will use OAuth 2.0 for authentication and making API calls on behalf of customers.
Follow these steps to set up an OAuth integration on your snowflake. More information for these steps can be found here.
- Login to Snowflake and create a worksheet to set a new integration
- Create a new security integration by copying the following SQL statement into Snowflake and selecting the
Playbutton at the top right of the screen. Make sure theINTEGRATIONNAMEis something you will remember
CREATE SECURITY INTEGRATION
  INTEGRATIONNAME
  TYPE = OAUTH
  OAUTH_CLIENT = CUSTOM
  OAUTH_REDIRECT_URI = 'https://oauth2.integrations.dataguard.de/callback'
  OAUTH_CLIENT_TYPE = 'PUBLIC';
- Run the following SQL statement to get the
Authorization URL,Token URLandClient ID. ChangeINTEGRATIONNAMEto the name you used in the creation statement in Step 2.
DESCRIBE INTEGRATION INTEGRATIONNAME;
- Run the following SQL statement to get your
Client Secret. All information from Step 3 and 4 are used during the Configuration.
SELECT SYSTEM$SHOW_OAUTH_CLIENT_SECRETS('INTEGRATIONNAME')
- Enable the Integration with the following statement:
ALTER SECURITY INTEGRATION INTEGRATIONNAME SET ENABLED = TRUE>
NOTE: Once attempting to authenticate its important to note that users with the roles of ACCOUNTADMIN, SECURITYADMIN, and ORGADMIN will receive an “invalid consent request error” message as snowflake blocks these roles by default. We suggest authenticating with a different user without these roles assigned.## Configuration
2. Create a Snowflake user and grant the necessary permissions
The user that is used by the integration should have sufficient permissions on the database, schema and warehouse that will be configured during the setup of the integration. The following will be executed during the lifetime of the integration (depending on the configuration):
- CREATE TABLE
- INSERT/UPDATE on the dg_consents table
- Can USE the warehouse, database and schema selected
- (Optional) Needs SELECT on the table with customer data (for initial import)
- (Optional) CREATE ROW ACCESS POLICY
- (Optional) ALTER on the target table to APPLY or DROP a row access policy
- (Optional) INSERT on the dg_purpose_to_role table
3. Have table(s) with customer-data in Snowflake
To make most use out of the integration there should be at least one table with customer-related data in Snowflake.
NOTE: If you're planning to use the access-management feature the generated row access policy is only applied to one table automatically.
If you want to protect more tables you can manually enhance that by applying the dg_consent_policy to other tables if they also contain the reference-field by using the following SQL (exchanging tablename and referenceField appropriately):
ALTER TABLE tablename ADD ROW ACCESS POLICY dg_consent_policy ON (referenceField:);
4. (Optional) Create Snowflake Roles used by the access management feature
To use the access management feature all Snowflake roles that should be mapped need to be created and have the SELECT permission on the protected table.
For example if there should be a role called MARKETING and the protected table is named contacts this should be executed before setting up the integration:
CREATE ROLE MARKETING;
GRANT SELECT ON contacts TO ROLE MARKETING;
Configuration
In the DataGuard Consent & Preference Management Platform go to the Integration Marketplace and find the Snowflake integration
Click on Configure to start the configuration
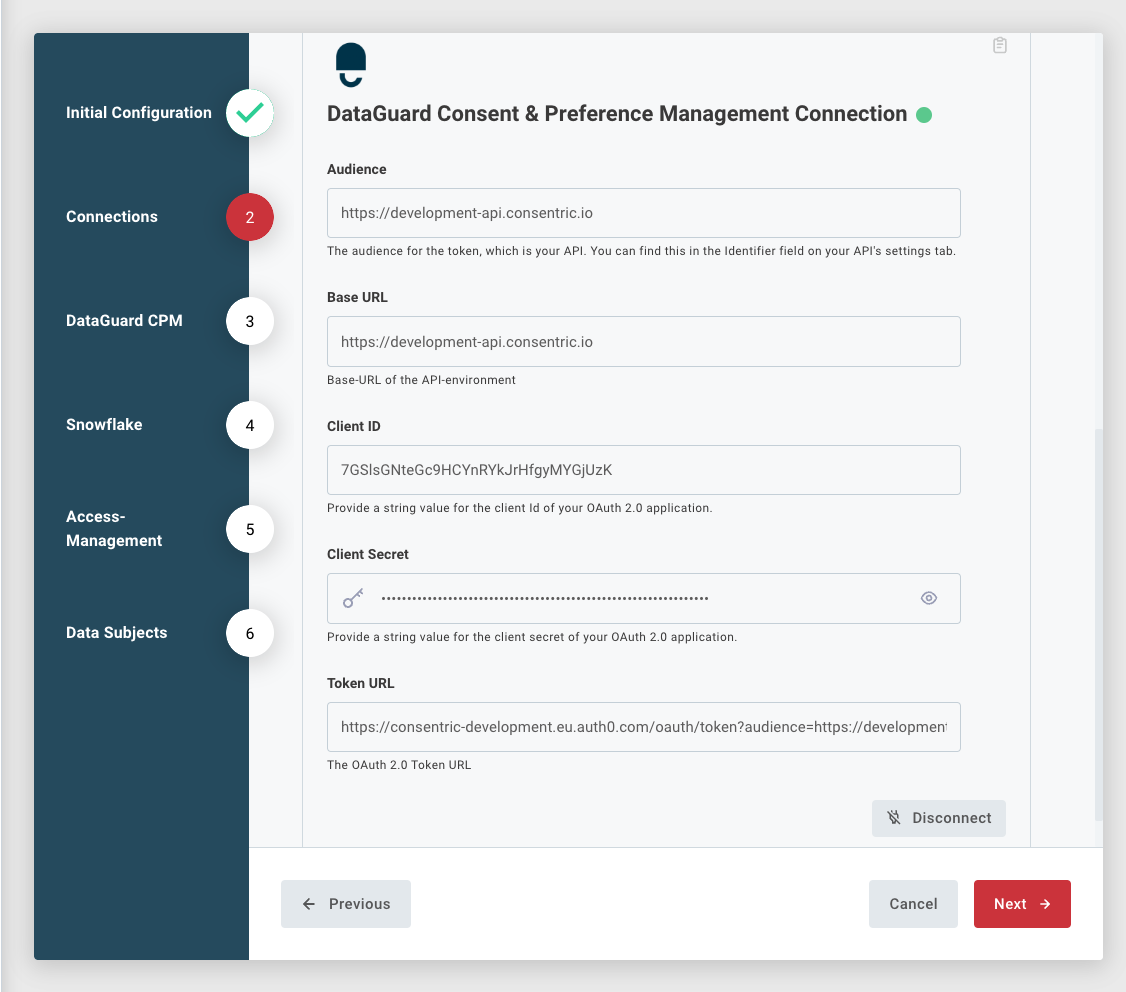
1. Connections
Enter all details needed for the Snowflake connection.
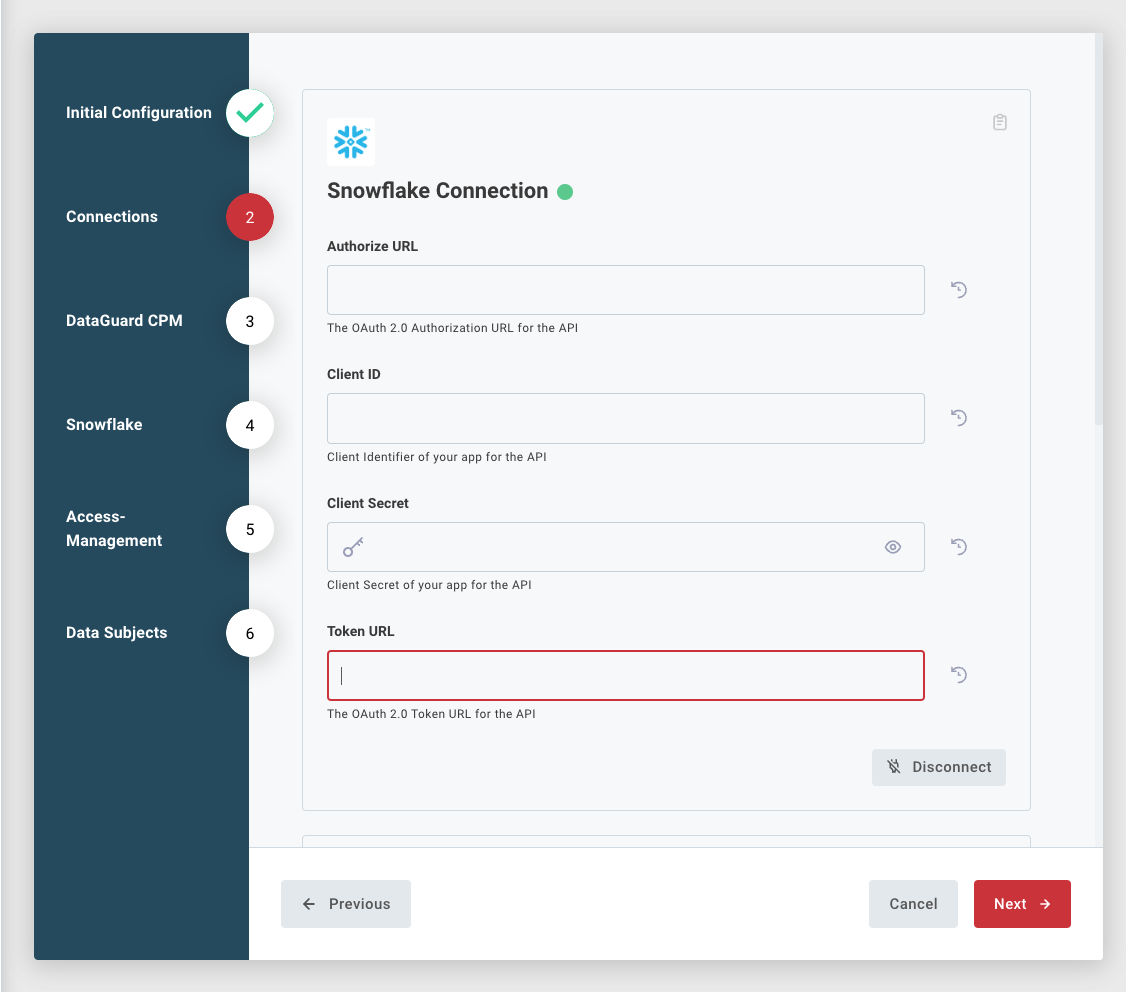
Refer to the section about pre-requisites on how to obtain the needed values
After entering all the details click on the Connect-button and login with the user created to interact with the Snowflake APIs.

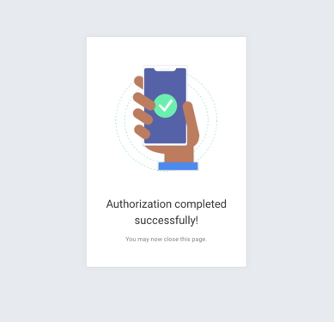
All details needed for the DataGuard CPM connection are provided to you in our welcome email. After entering all the needed details click on the Connect-button. If the authorization was successful a new window is opened to confirm that. Close that window and click on Next.
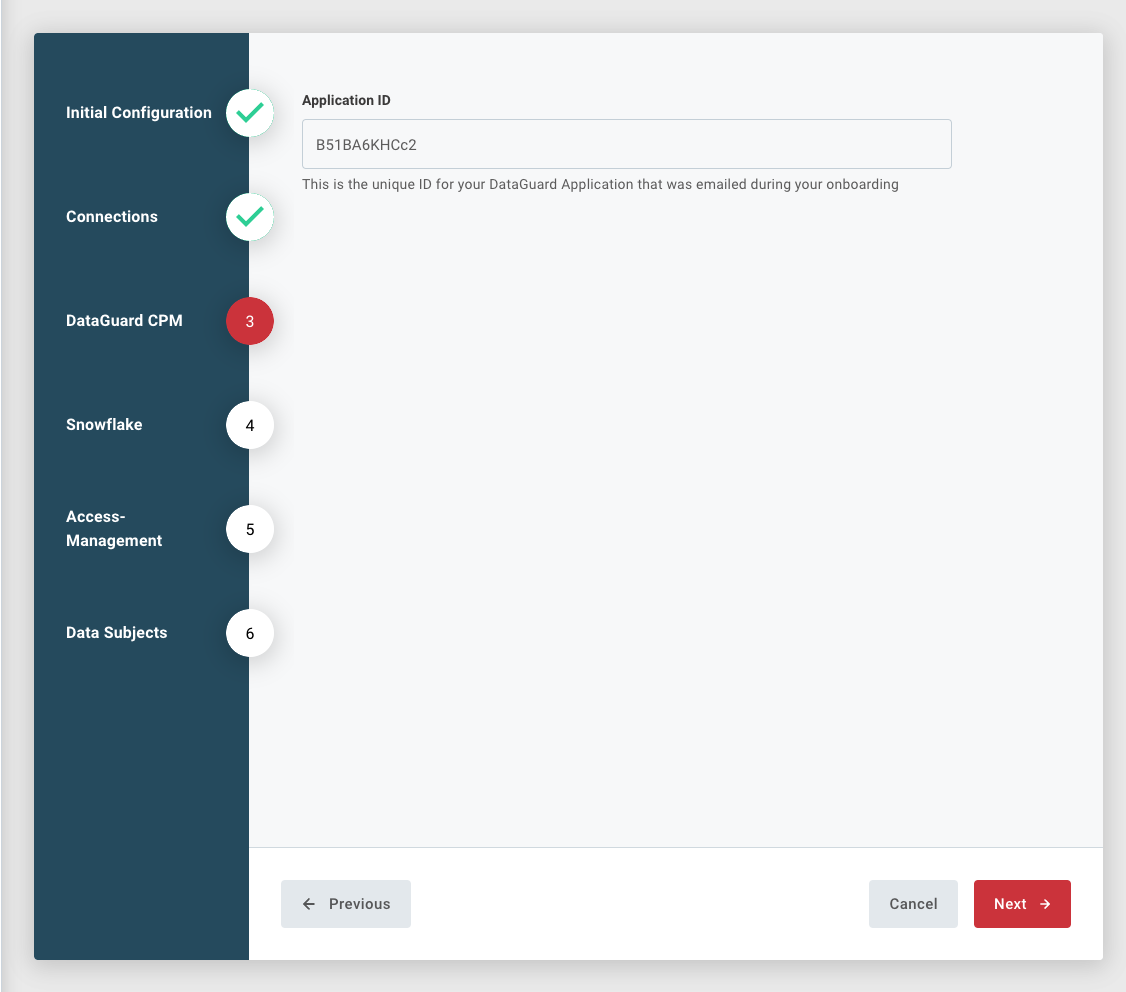
2. DataGuard CPM
The only information needed on that page is the unique ID for your DataGuard application. This has been handed to you in our welcome email during onboarding.
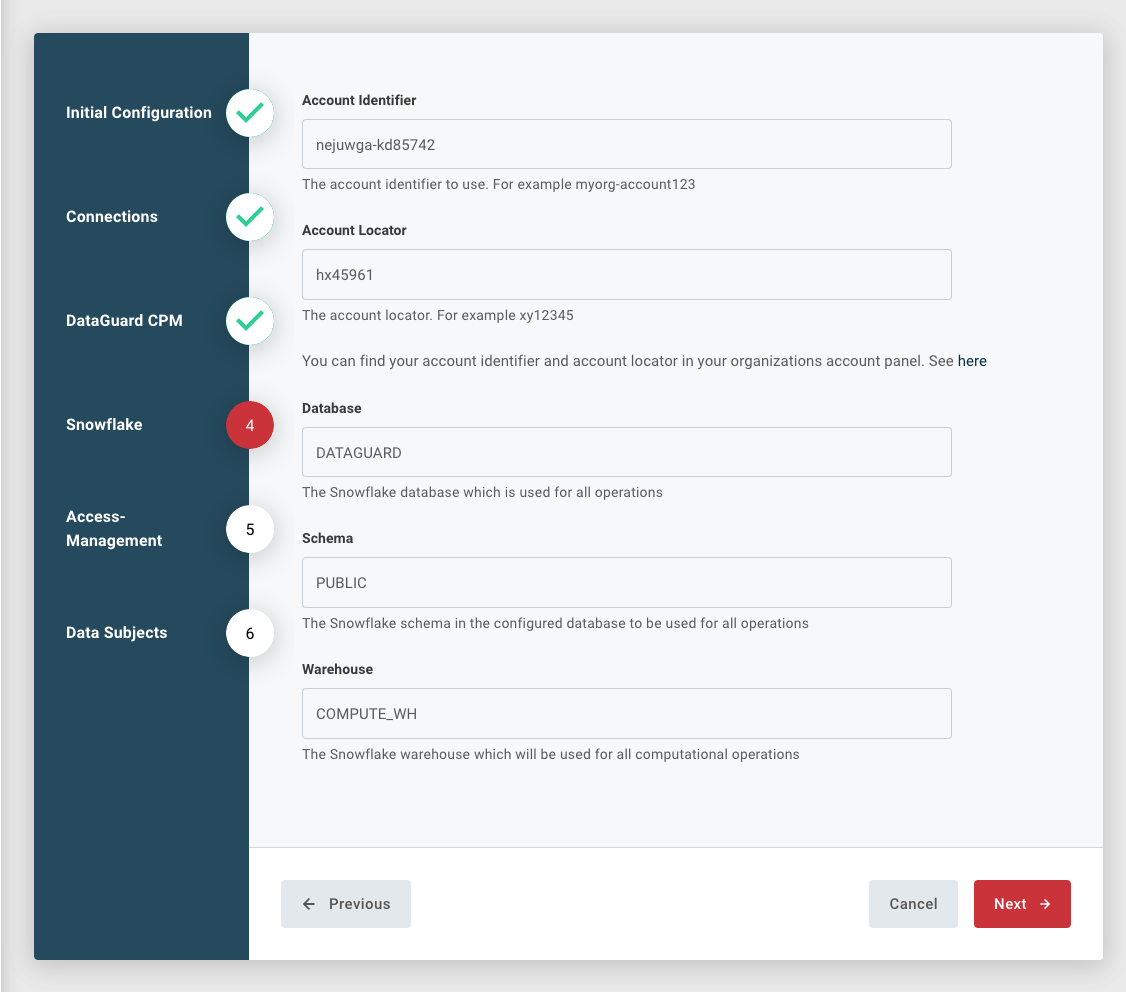
3. Snowflake
On this page you need to enter your Account Identifier, Account Locator and the elements of Snowflake used during the integration (Database, Schema and Warehouse)
The Account Identifier and Locator can be found on your Snowflake Account Admin Panel under Admin - Accounts

The Account Identifier is a combination of the Organisation ID and the Account ID. In the example above that would be nejuwga-kd85742 the Account Locator can be entered as shown in this case HX45961
4. Access Management (optional)
The integration can run with an optional access management feature which provides access to rows in the customer data table to predefined rules based on the given consents of that customer.
In this page you can enable or disable this feature and provide consent purpose to Snowflake role mappings as needed. It's possible to map the same consent purpose to multiple roles or not map every consent purpose. The integration will always synchronise all active consent purpose changes independent of that mapping.
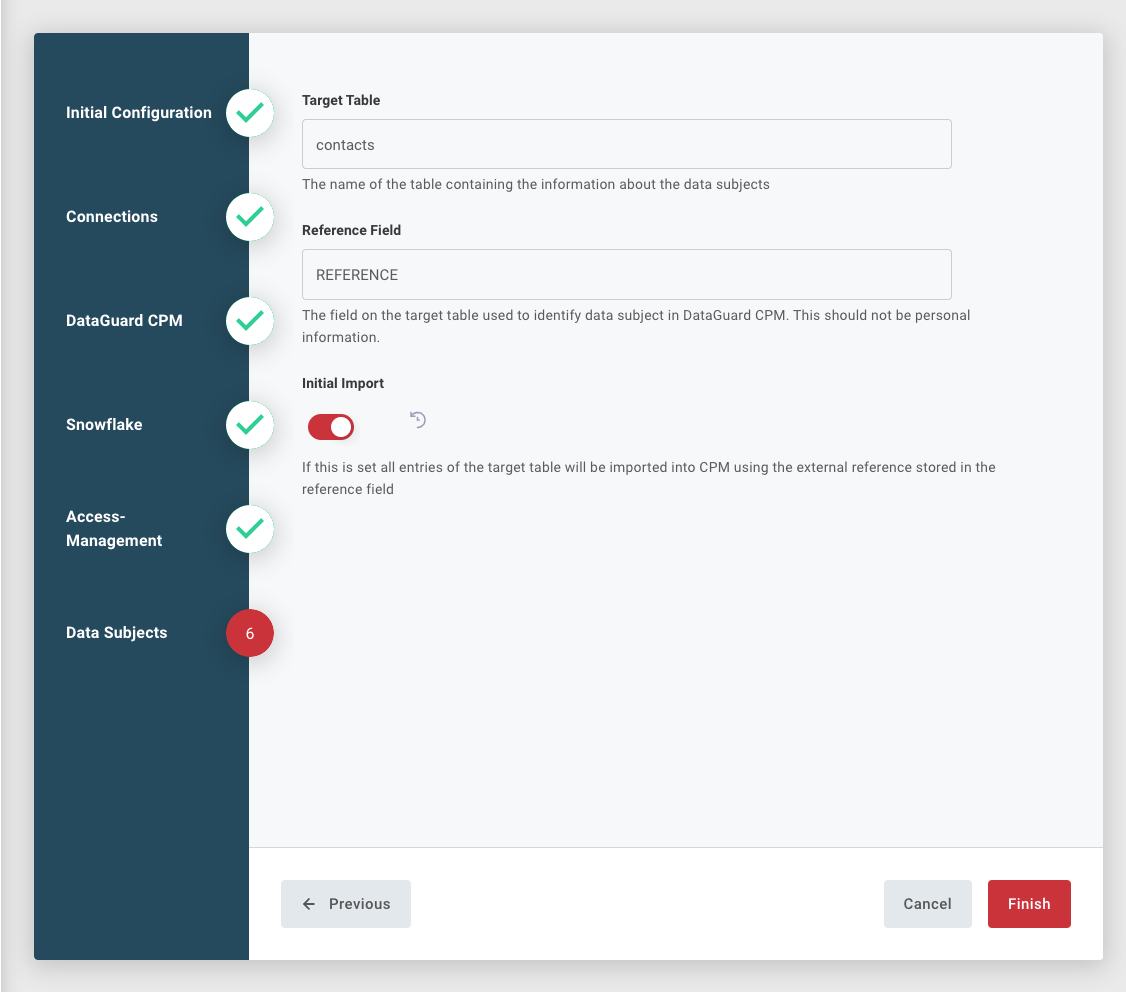
5. Data Subjects
The last configuration page tells us something about the data subjects. The target table and the reference field is used to map entries in the consent-table to your main customer data table.
Optionally you can activate an initial import of all entries that are in the target table as data subjects in DataGuard CPM using the contents of the reference fields as an external reference inside DataGuard CPM. If enabled, this import will be executed after completing the configuration and setup in Snowflake. Depending on the amount of data this might take some time until all references show up in CPM and can then be used during synchronisation.
Updated 8 months ago