Record Permissions
How to use our UI to capture permission transactions
API for permission transactions is here
Locating Citizens
Citizens can be located on DataGuard using a range of common search criteria.
After login, the Citizen UI will present you with a search box.

This search box defaults to external reference (ordinarily this will be your own system ID or a means by which you can identify your supporting customer record data in client-side systems), but other options may be available from the drop down menu if personal data is being stored on the platform.

Enter the value to be searched and either click on the spyglass or hit enter.
Note: The search uses exact match and does not allow wildcard searching.
If DataGuard Permissions finds multiple records, you will be presented with a list to select from. If this list contains more than 50 citizens, you will be asked to narrow the search criteria.
Viewing Citizen Permissions
The main Citizen Permissions screen provides you with a quick overview of the citizen’s permissions, including:
Personal Data - only displayed if stored in, or accessible by DataGuard.
Permissions - the fundamental Who, What and Why of data processing.
Processing Justification - To understand the processing justification(s) being applied you can either expand specific areas, or select the ‘EXPAND’ option to see everything. This expanded view enables you to view the current state of a Citizen’s permissions. Permissions can be collapsed in the same way.

In some instances, you may want to prioritise the purpose view of permissions. You can switch between ‘data’ or ‘purpose’ views using the data/purpose toggle.

Filtering Permissions
DataGuard allows you to filter Permissions to identify any which are soon to expire using the ‘Filter By’ area on the left-hand side of the screen. To filter the view by a specific duration, simply select the appropriate filter option. Click on the filter again to remove the selection.

Updating Citizen Permissions (Wrap Up)
To update a Citizen's permissions, use the following steps:
- Click on an option to see the list of available states that can be claimed within a transaction.

- Select the new state from the available options.
Note: to speed up Permissions changes, updates can be made to Permissions groups. Select 'Groups' above the Citizen's permission to view and make changes to preset groups. You can wrap up these transactions in the same way you would a standard permission update.

- Review the changes made in the 'Wrap up' area to the right of the selected transactions.
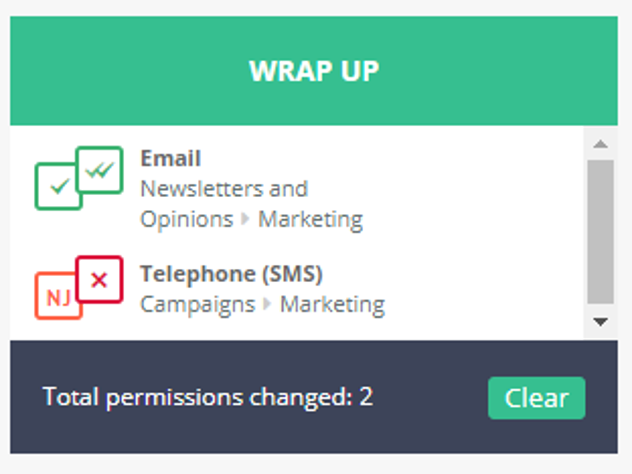
Note: you can clear all transactions using the 'Clear' button or reverse individual transactions using the subtract button next to each. You will need to hover over individual options to display the subtract button.
-
Click on the 'Wrap up' button to proceed to the transaction wrap up screen.
-
The wrap up screen is comprised of three sections:

Summary - A list of the Options to be updated and their new processing justifications
Privacy Notice - Here you will need to select the Privacy Policy and Permission Statement you wish to tie to the transaction. If you have created Campiagns, you can choose a Campaign to auto-populate the fields.
Additional Information - Select the channel the request came through, along with the effective date (today by default if not edited in the form) and record any optional notes.
Once all of the required fields have been populated, click on the 'Complete wrap up' button to complete the transaction and update the Citizen's Permissions. A confirmation message will be displayed on-screen with the option to return to the Citizen's permission page.
Raising Objections
Citizen's have the right to object to their data being processed under Legitimate Interest.
Objections to processing under legitimate interest can be raised in the same way as any other permission state change. The state will change from 'LI Claimed' to 'LI Objected'.
Depending on the objection outcome, the permission state will either revert to 'LI Claimed' if the objection is rejected, or 'LI Objection Upheld' if the objection is upheld.
Note: The DataGuard API can be used to set the default response to objections auto-uphold all, auto-reject all or require manual intervention. It is also possible to select the required objection response for a sub-set of permissions configuration options. For more details on managing objections, please see the dedicated section here.
Reverting Transactions
From time to time, permission changes can be logged incorrectly. The ability to revert a permissions change that was made in error ensures permissions are accurate, whilst maintaining a full audit history.
Note: Transactions that have been automatically created as part of a business rule (e.g. auto-upheld objections) and transactions which have been previously reverted will not display the revert icon. Reverting a transaction is final and cannot be undone.
To revert a transaction, navigate to the Citizen’s permissions history screen. Click on the rubbish bin icon in the expandable supporting data area. If the rubbish bin icon isn't present, the transaction isn't revertible.

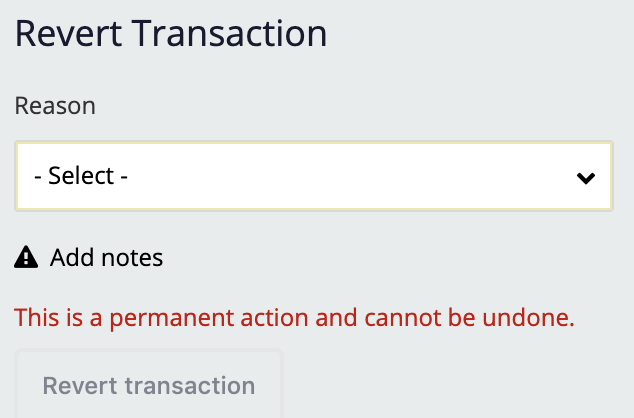
When reverting a transaction, the reason for the reversion must be captured along with optional supporting notes. The reason field gives the options: Incorrect citizen; Incorrect permissions; Incorrect wrap up information; and an Other option. If other option is selected, this allows the input of a custom reason.
Once a transaction has been successfully reverted, the Citizen’s history will be updated. A new transaction entry will be logged in the Citizen’s history to detail the reversion, including a link to the reverted transaction and any supporting details.

The reverted transaction will now appear greyed out with a (REVERTED) label next to the transaction time, and a reverted date included in the supporting data.
Once a transaction has been reverted the current permission state will be determined as if the reverted transaction did not exist.

Note: To revert an automated business rule transaction (e.g. auto-upheld objections) the originating transaction must be reverted. Once the originating transaction is reverted, the platform will then revert the linked automated transaction.
Updated over 1 year ago